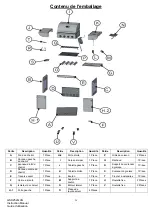
GSS2520JAN
Instruction Manual
Guide d’utilisation
10
.
AA
AA
J
K
Pre installed Bolt 6
( )
BBX3
X
Step 9 (Install the valve with side knob and knob seat)
a) Align the holes on the side knob seat (M) with the hole on the front
of the right side shelf and side burner valve. Insert one M4 x 10
bolt (BB) and one M4 flat washer (EE) into the pre-drilled holes.
b) Tighten all the bolts using the screwdriver provided.
c) Press the knob (L) onto the valve shaft.
Step 10 (Install the side burner)
a) Open the right side burner lid and place the side burner (N)
on the right side shelf. Make sure the side ignition line
connects well with the valve.
b) Align the holes on the side burner (N) with the holes on the
right shelf.
c) Insert one M4 x 10 bolt (BB) into each of the pre-drilled hole
of the side burner (N).
d) Insert one M4 flat washer (EE), M4 lock washer (FF) and M4
nut (GG) into bolt (BB).
e) Go back to tighten all the bolts using the screwdriver
provided.
f)
Connecting ignition line with the electrode.
Step 8 (Side shelf assembly)
a)
Loosen the five pre-installed bolts on right
side of body assembly and a leave 1/4 of the
bolt's length extending from body assembly.
b)
Align the large hole on right side shelf (K)
with the extended bolt from the body
assembly. Push the right side shelf down
until locked into place and insert one M6 bolt
(AA) into the pre-drilled hole.
c)
Tighten the bolts by hand.
d)
Repeat the same procedure with the left side
shelf (J) and body assembly.
e)
Align the holes on tool hanger (T) with the
holes on bottom of left side shelf.
f)
Insert one M4 x 10 bolt into each pre-drilled
hole and tighten by hand.
g)
Go back and tighten all the bolts using the
screwdriver provided.
E E X 4
B B X 4
F F X 4
G G X 4
Insert
Ignition cable
N
T


