6
USING YOUR HOTCUP
™
Before using your HotCup
™
for the first time
•
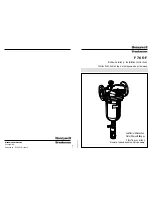
Remove your HotCup
™
carefully from the box. Remove any packaging and promotional
material and position your HotCup
™
on a dry, level, secure work surface away from the
edge.
•
Follow the instructions below and discard the first full tank of water. Repeat once more.
This will remove any residues that may remain from the manufacturing process.
Using your HotCup
™
Always position your HotCup
™
in such a way that the start button cannot be
accidentally operated, especially by children. As you use your HotCup
™
, a certain
portion of the water boiled will be transferred back to the water reservoir. This will
mean the water reservoir may become hot. Always use care when handling your
HotCup
™
.
1.
Press the lid flap release button to open the lid.
2.
Fill the water chamber from your cold tap up to the MAX mark.
3.
Close the lid and press the stop button. This will make sure that your HotCup
™
will not
immediately start a boil cycle when you place it onto the power base.
4.
Connect your HotCup
™
to a mains supply socket.
5.
Place a suitable cup or container with a tea bag, coffee, sugar, etc. below the
dispensing nozzle. Never operate your HotCup
™
without a cup or suitable container
placed below the dispensing nozzle. Adjust the dispensing control to the required
setting. The control adjusts the quantity of boiling water dispensed by your HotCup
™
.
For smaller cups like teacups, set the control towards the setting; for larger cups like
coffee mugs, set the control towards the setting. If you are not sure which setting to
use, it’s best to use a lower setting until you gain experience using your HotCup
™
.
6.
Press the start button. The body will light up blue and your HotCup
™
will start to boil.
7.
The selected quantity of boiling water will be dispensed into the cup. Your HotCup
™
is
now ready to use again. If, after just having boiled, the start button doesn’t operate,
simply wait a few seconds before trying it again.
Stopping your HotCup
™
If you have started the boil procedure and then decide you want to stop your HotCup
™
for
any reason, simply press the stop button. You can also stop water that is being dispensed
by pressing the stop button. The boiled water will be safely transferred back into the water
reservoir.
Summary of Contents for hotcup vkj476
Page 1: ...boils water in seconds HotCup water dispenser...
Page 5: ...5...
Page 7: ...7 SMALL CUP LARGE CUP...
Page 9: ...9...
Page 11: ...11...