background image

11 


5.


TROUBLE SHOOTING GUIDE  


Here are the steps to follow if you experience problems with the product.   


The appliance does not work   


• 

Make sure that the unit is plugged in correctly. 

Check the electrical socket by plugging in another 
appliance.   
•    Check if the cable or plug is damaged. If so, do 
not try to work it again.   


The unit does not create a complete vacuum 
inside the bags   


• 

The open end of the bag should remain 

completely inside the vacuum channel area. 
• 

Check for impurities in the sealing seals and the 

seals. Clean them and put them back in the correct 
position.   
• 

The bag could have a hole in it. To check this, 

seal the bag with some air inside, submerge the bag 
in water and squeeze it. Bubbles will indicate that 
there is a leak. Seal it again or use another bag   


The bags have not sealed correctly


•    The cause could be the sealing bar overheating 
or the bag has melted. Open the cover and let the 
sealing bar cool for several minutes.   


The bag did not maintain the vacuum after 
being sealed   


•    This can be caused by a leak due to wrinkles, 
crumbs, fat or liquid. Open the bag, clean the upper 
part and remove any foreign matter from the sealing 
bar before trying to seal it again. 


FagorBrandt SAS – Management Company - SAS with a capital of 20,000,000 Euros- Head Office: 7 rue Henri 

Becquerel - 92500 Rueil-Malmaison - RCS Nanterre 440 303 196 

Summary of Contents for SOU-110

Page 1: ...FR MANUEL D INSTRUCTION EN INSTRUCTION MANUAL Emballeuse sous vide Vacuum Sealer SOU 110...

Page 2: ...otre nouvelle emballeuse sous vide BRANDT Bien entendu dans un souci permanent de satisfaire le mieux possible vos exigences vis vis de nos produits notre service consommateurs est votre disposition e...

Page 3: ...emballeuse sous vide 5 B Avant la premi re utilisation 5 3 UTILISATION DE VOTRE APPAREIL 6 A Instructions d utilisation 6 B Conseils d utilisation 6 C Les rouleaux de sacs 7 4 ENTRETIEN ET NETTOYAGE D...

Page 4: ...it entre la prise de courant et la prise d appareil faire remplacer la prise de courant par une prise ad quate par un technicien qualifi 4 La s curit lectrique de l appareil n est garantie que si celu...

Page 5: ...rdon ou la prise endommag 22 Si vous n allez jamais plus utiliser l appareil couper le cordon d alimentation apr s l avoir d branch B Donn es Techniques C Protection de l environnement Arriv en fin de...

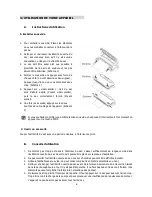
Page 6: ...interrompre tout moment en appuyant sur la touche STOP 2 Ouvrir un sac scell Couper l extr mit du sac avec une paire de ciseaux l int rieur du joint B Conseils d utilisation 1 Ne mettez pas trop de ch...

Page 7: ...euse sous vide et le voyant rouge s allumera 3 Lorsque le voyant LED dispara t le sac sera scell 4 Appuyez sur les deux boutons de verrouillage voir sch ma 3 pour lib rer le rouleau 5 Sortez le roulea...

Page 8: ...en assurer sceller la poche avec un peu d air l int rieur plonger la poche dans l eau et la serrer Les bulles indiqueront une fuite La ressouder ou utiliser une autre poche Les poches n ont pas t scel...

Page 9: ...oing effort to satisfy your demands with regard to our products as best as possible our after sales service department is at your disposal and ready to listen in order to respond to all of your questi...

Page 10: ...2 PREPARING YOUR APPLIANCE 12 A Description of the vacuum sealer 12 B Before using your vacuum sealer 12 3 USING YOUR APPLIANCE 13 A Operating instructions 13 B Tips for use 13 4 CARING FOR AND CLEANI...

Page 11: ...nt of their use being absolutely necessary always ensure that they conform to current safety standards and take care not to exceed the indicated maximum voltage 6 Never use adaptors if the voltage is...

Page 12: ...ects on the environment and health and enables the constituent materials to be recycled which saves energy and resources To remind you that you must dispose of this appliance correctly the symbol show...

Page 13: ...end of the bag so that the bag can be placed on the vacuuming plate easier 2 Do not wet the open end of the bag A wet bag may be difficult to melt and seal tightly 3 Clean and straighten the open end...

Page 14: ...l is done 4 Press the two cover lock buttons to file the roll See drawing 3 5 Pull out the bag roll and cut to your desired bag length The bag is ready The machine should only be used with the bags su...

Page 15: ...The bag could have a hole in it To check this seal the bag with some air inside submerge the bag in water and squeeze it Bubbles will indicate that there is a leak Seal it again or use another bag Th...

Reviews: