PCI Photon 8 Port RS232 Software Installation
Chapter 3 Page 17
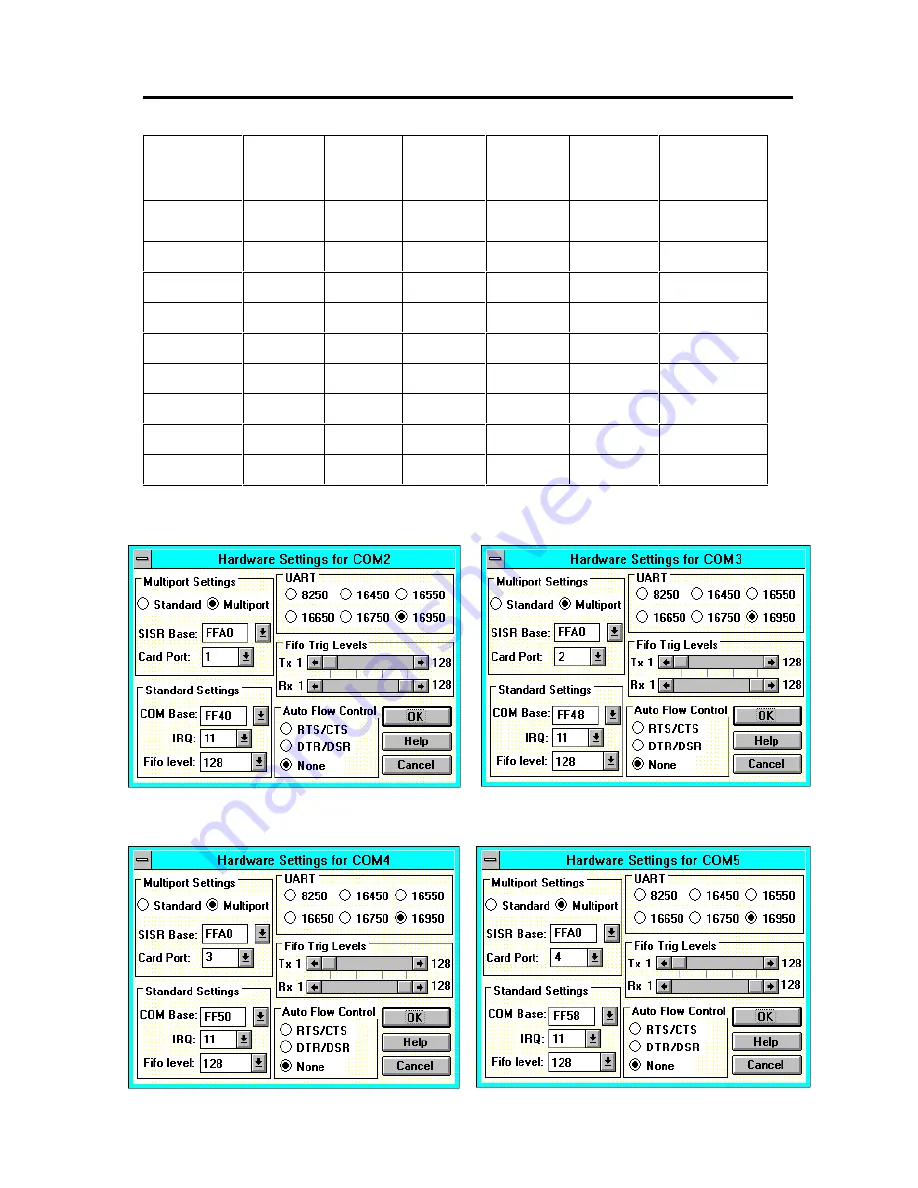
Settings for Photon 8 Port RS232 Card COM1 Present
COM
Port
SISR
Card
Port
COM
Base
IRQ
UART
FIFO
Trip
BBCARDS
Values *
FFA0
FF40
11
COM2
FFA0
1
FF40
11
16950
Default
COM3
FFA0
2
FF48
11
16950
Default
COM4
FFA0
3
FF50
11
16950
Default
COM5
FFA0
4
FF58
11
16950
Default
COM6
FFA0
5
FF60
11
16950
Default
COM7
FFA0
6
FF68
11
16950
Default
COM8
FFA0
7
FF70
11
16950
Default
COM9
FFA0
8
FF78
11
16950
Default
*The BBCARDS Values may be different from your machine.
Card Port 1
Card Port 2
Card Port 3
Card Port 4