19
7. Performing Calibration
1. Keep pressing the feed button while turning on the power, until the
printing motor becomes activated.
2. The calibration has been performed while the printer automatically
feed label for certain length.
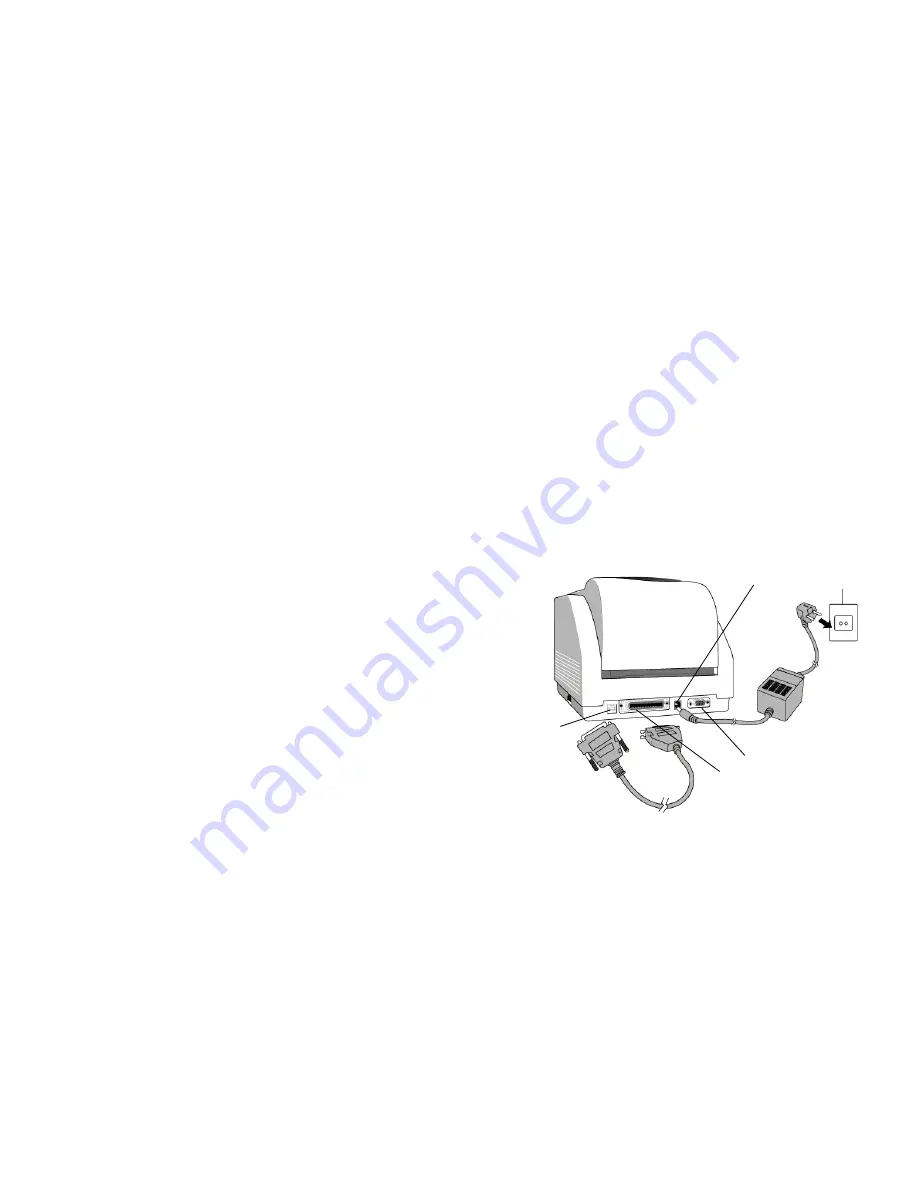
8. Hooking up the Printer and Computer
Note :
The power supply barrel connector must be inserted into the
power jack on the back of the printer before connecting the
communication cables.
This printer comes with both a nine-pin Electronics Industries
Association (EIA) RS-232 serial data interface, a standard Centronics
parallel interface and USB interface. In either case, you must supply the
required interface cable for your application.
Note :
This printer complies with FCC "Rules and Regulations" , Part 15,
for Class A Equipment, using fully shielded six-foot data cables.
Use of longer cables or unshielded cables may increase radiated
emissions above the Class A limits.
20
Power Jack
RS-232 Serial Port
Parallel Port
USB port
Serial (RS-232) Interface Requirements
The required cable must have a nine-pin "D" type male connector on
one end, which is plugged into the mating serial port located on the back
of the printer. The other end of this signal interface cable connects to a
serial port at the host computer.
The settings for the Serial port are :
Baud rate : 9600 – Stop Bit : 1 – Data Bit : 8 – Parity : None – Flow
Control : Xon / Xoff


