


7
ENGLISH
Audio-visual processors incorporating an “automatic”
set up procedure may be “confused” by subwoofers
with an auto switch-on/sleep function. A potentially
damaging fault condition can arise. Subwoofers are
best left switched on and fully active during set up if
such a processor is used.
Note: In some situations, other equipment
switching on or off may create a spike in the mains
power supply sufficient to cause the auto-off timer
to reset. Should that occur, the subwoofer will stay
on for a further 30 minutes.
Standby:
With the switch set to Standby the
subwoofer will become active when 12V is applied to
the Trigger Input (Number 10 above). Zero volts at the
input will return the subwoofer to sleep. The indicator
will glow green when the subwoofer is active and red
when the subwoofer is in sleep.
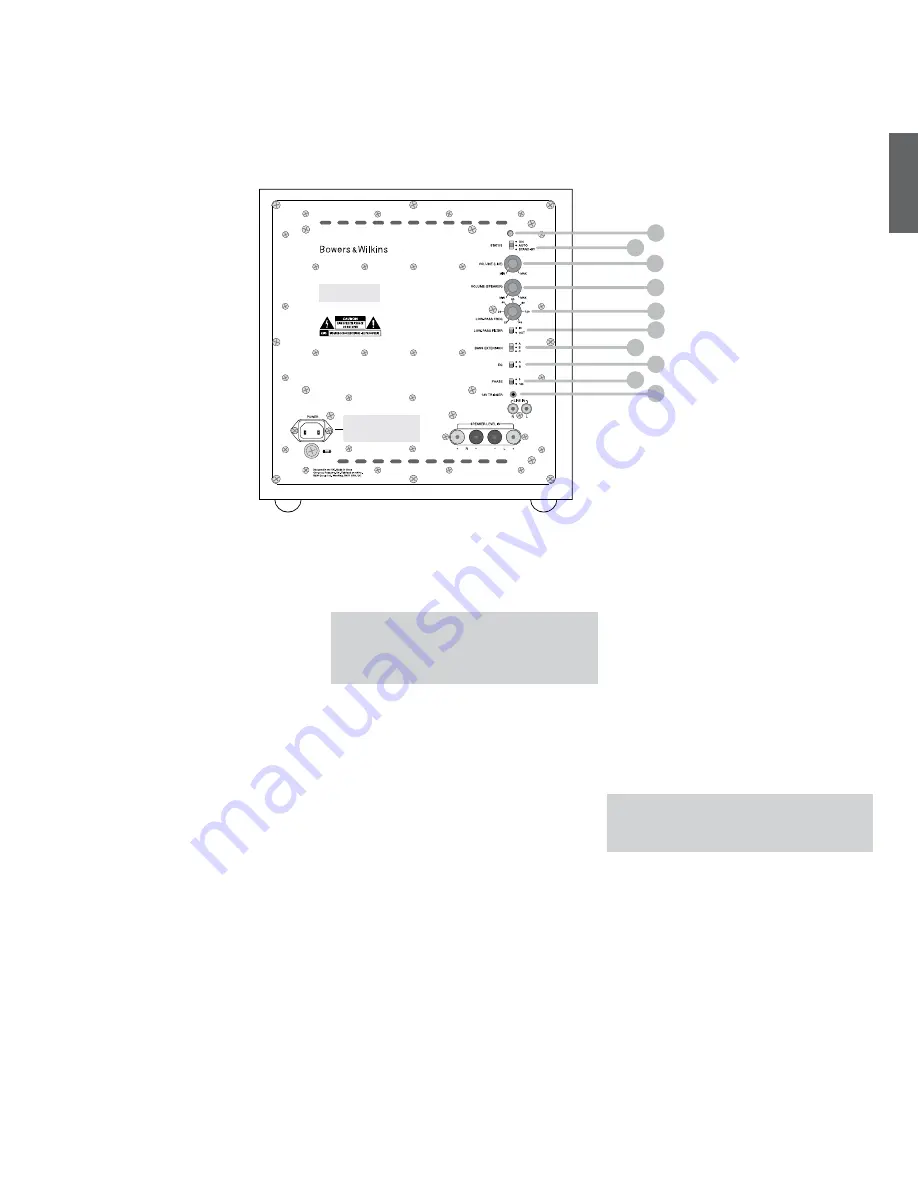
Setting The Subwoofer Controls
There are 7 controls to consider:
•
The VOLUME (LINE) control (Number 3 above)
•
The VOLUME (SPEAKER) control (Number 4
above)
•
The LOW-PASS FREQ (frequency) control
(Number 5 above)
•
The LOW-PASS FILTER switch (Number 6 above)
Note:
This applies only to the LINE input. The
filter is always in circuit with the SPEAKER LEVEL
input.
•
The BASS Extension switch (Number 7 above)
•
The EQ (equalisation) switch (Number 8 above)
•
The PHASE switch (Number 9 above)
The appropriate settings depend on the equipment
used with the subwoofer and the modes of connection.
If using more than one subwoofer, ensure the controls
on each one are set the same.
Note: The VOLUME (LINE) and VOLUME
(SPEAKER) controls only operate on their
respective line and volume inputs. An unused
volume control is best set to Min.
Switching On and Off
Subwoofers are best switched on after any other item
and switched off first. The On/Auto/Standby switch
(Number 2 above) and Status Indicator (Number 1
above) operate as follows:
On:
With the switch to On, the subwoofer will remain
fully active and the indicator will glow green.
Auto:
With the switch set to Auto, the subwoofer will
initially become fully active and the indicator will glow
green. After about 30 minutes without an input signal,
the subwoofer will automatically enter “sleep” mode.
The indicator will glow red. When an input signal is
detected, the subwoofer will automatically become
active and the indicator will glow green. The subwoofer
will return to sleep after about 30 minutes with no
input signal.
4. Switch on and setup
1
2
3
4
5
6
7
8
10
9
Summary of Contents for ASW10CM S2
Page 1: ...Manual ASW10CM S2...
Page 9: ......


