background image

8

Editing the Effects

Sub-Parameter Settings

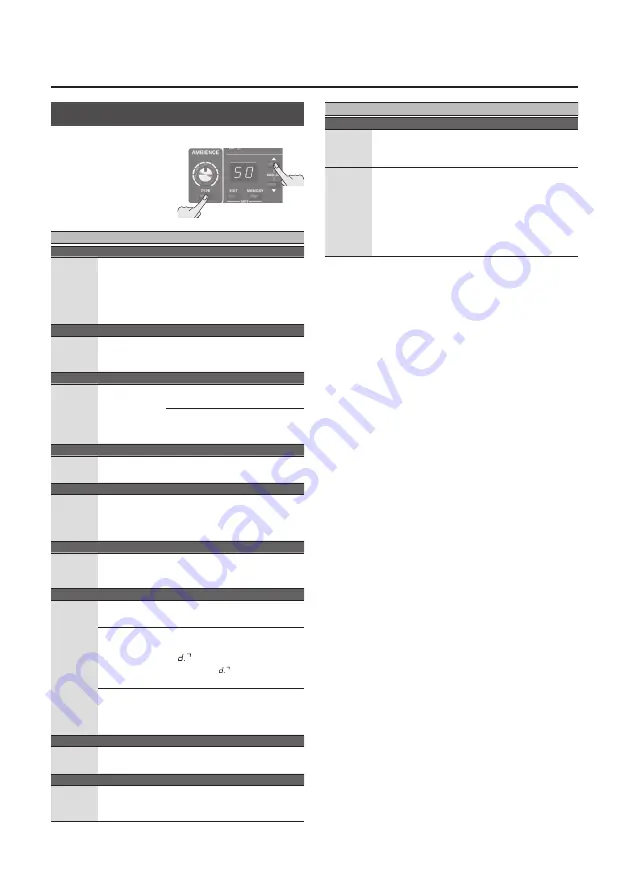
By long-pressing one of the effect buttons, you can access 

additional settings.

1  

Long-press a button.

The display indicates the 

parameter/value.

2  

Use the [

?

] [

=

] buttons 

to select a value.

Button

Parameter

Value

Explanation

INPUT

SELECT

LU

LEVEL

0

50

gg

Output level of the 

input selector. If CH1 

and 2 are blended, 

this changes the 

volume of both 

channels.

BOOST

BOOST

tn

TONE

-10

0

10

Specifies the tonal 

character when the 

booster is on.

FX LOOP

FX LOOP

ds

DIRECT

oF

on

Mixes the direct 

sound.

*  You can set this if an external 

device is connected to the 

RETURN jack.

ANTI-FEEDBACK

NOTCH 

1, 2

dp

DEPTH

1

20

Adjusts the depth of 

the notch filter.

ACOUSTIC RESONANCE

TYPE

tn

TONE

-10

0

10

Adjusts the tonal 

character when 

acoustic resonance 

is on.

COMP

TYPE

At

ATTACK

0

50

gg

Adjusts the strength 

of the attack when 

picking.

DELAY

TYPE

fb

FEEDBACK

0

gg

Adjusts the number 

of delay repeats.

nt

NOTE

d

Sets the note for the 

delay sound.

=

¸ 

(Quarter Note)

=

=

˚ 

(dotted 8th 

note)

*  To switch between FEEDBACK and NOTE, use the 

[TYPE] button to enter the sub-parameter setting 

mode, and then use the [TYPE] button again to 

switch.

CHORUS

CHORUS

LU

LEVEL

0

gg

Adjusts the level of 

the effect sound.

AMBIENCE

TYPE

tn

TONE

-10

0

10

Adjusts the tonal 

character of the effect 

sound.

Button

Parameter

Value

Explanation

EQ

ON/OFF

ns

NOISE 

SUPPRESSOR

0

gg

Adjusts the noise 

suppressor.

FREQ

NQ

MID Q

0.5

16

Adjusts the width 

of the area affected 

by the EQ centered 

at the frequency 

specified by this 

button (p. 6). Higher 

values will narrow 

the area.

Summary of Contents for AD-10

Page 1: ...diting the Effects 6 EQ Equalizer 6 BOOST 6 FX LOOP 6 ANTI FEEDBACK 7 ACOUSTIC RESONANCE 7 COMP Compressor 7 DELAY CHORUS 7 AMBIENCE 7 Sub Parameter Settings 8 Looper 9 Advanced Settings 10 Output Setting 10 Ambience Output Settings 10 Stomp Pedal Setting 11 System Settings 11 Making Independent EQ Settings for GUITAR IN 1 and 2 11 Assigning the Functions of the Pedals 12 Other Functions 12 Restor...

Page 2: ... of your external effect device to the RETURN jack LINE OUT L PHONES R MONO jacks Connect these jacks to your guitar amp or headphones Connect your headphones to the L PHONES jack If using a mono connection use only the R MONO jack XLR OUT L R jacks Connect to the PA etc Pin assignment of XLR OUT L R jack 1 GND 2 HOT 3 COLD DC IN jack Connect the included AC adaptor here We recommend that you keep...

Page 3: ...ion When the batteries run low the display indicates Bt When this occurs install fresh batteries Connecting a Footswitch or an Expression Pedal If you connect a footswitch FS 5U FS 6 FS 7 sold separately or expression pedal FV 500H FV 500L EV 30 Roland EV 5 sold separately to the CTL1 2 EXP jack you ll be able to assign a variety of functions to it Assigning the Functions of the Pedals p 12 Use on...

Page 4: ...u can adjust the balance 1 Press the SELECT button several times to select 1 2 MIX The CH1 and CH2 indicators are both lit The display shows the value of the balance setting between inputs 1 and 2 2 Use the buttons to adjust the value Display CH1 CH2 mix balance 0 50 gg 100 0 50 50 0 100 Default 50 Tuning the Guitar Tuner 1 Press the TUNER MUTE pedal Guitar is muted the tuner is switched on 2 Chan...

Page 5: ... the EXIT button and press the MEMORY button The display blinks Write 2 Press the MEMORY button The display indicates the memory number 3 Use the buttons to choose the memory number where you d like to save the memory 4 Press the MEMORY button The MEMORY button and display indications blink rapidly MEMO For each effect you can specify whether to save it in memory or use it manually knob positions ...

Page 6: ...ctive when you want to improve the definition of the sound LEVEL Knob Adjusts the overall volume level of the equalizer ON OFF button Switches the equalizer on off MEMO You can specify EQ independently for GUITAR IN 1 and 2 For details refer to Making Independent EQ Settings for GUITAR IN 1 and 2 p 11 BOOST Turning this on raises the level This is convenient when you want to increase the level abo...

Page 7: ...al character appropriately for the guitar or settings you re using Display Button Explanation oF OFF Unlit OFF nA NATURAL Green A natural and uncolored sound WIDE Orange Mellow sound that emphasizes the body resonance br BRIGHT Red Brilliant sound with an extended high frequency range COMP Compressor This makes the volume of the input signal more consistent By suppressing the peak of the attacks i...

Page 8: ...h filter ACOUSTIC RESONANCE TYPE tn TONE 10 0 10 Adjusts the tonal character when acoustic resonance is on COMP TYPE At ATTACK 0 50 gg Adjusts the strength of the attack when picking DELAY TYPE fb FEEDBACK 0 gg Adjusts the number of delay repeats nt NOTE d Sets the note for the delay sound d Quarter Note dotted 8th note To switch between FEEDBACK and NOTE use the TYPE button to enter the sub param...

Page 9: ...if you record a multiple number of times For details on the settings refer to Output Setting p 10 LOOP Pedal Color LOOP Pedal Color Display indication Status Red RC Recording Green PL Playback Orange DB Overdub Green blink ST Stopped phrase exists Red blink CL Stopped no phrase Recording Recording will start immediately when you press the TUNER MUTE pedal At the point where you want to loop press ...

Page 10: ...s the sound that is output from the XLR and LINE jacks NX MIX The sound processed by the effects is output The USB AUDIO playback sound is also mixed and output PP PRE POST L The sound before effects are applied the output of the input selector is output R The sound with effects applied is output CH L The sound of GUITAR IN 2 is output R The sound of GUITAR IN 1 is output 2B GUITAR INPUT 2 FX BYPA...

Page 11: ...switch the effect on off 3 Press the EXIT button to exit setting mode Memory Stomp mode 4 Save the setting by following Saving a Memory p 5 System Settings Settings that are shared by the entire AD 10 are called system settings Making Independent EQ Settings for GUITAR IN 1 and 2 EQ settings can be made independently for GUITAR IN 1 and 2 This lets you set the EQ appropriately for the response of ...

Page 12: ...Parameter Value Explanation USB monitor setting vd USB direct out Switches the output of the AD 10 sound to the XLR and LINE jacks You must install the USB driver when connecting the AD 10 to your computer Download the USB driver from the BOSS website For details refer to Readme htm which is included in the download https www boss info support of The sound of the AD 10 is not output from the XLR a...

Page 13: ...ory Reset Here s how to return the AD 10 to its factory set state 1 While holding down the NOTCH 1 and 2 buttons turn the power on Fr appears in the display and the MEMORY button blinks If you decide to cancel the factory reset turn off the power 2 Press the MEMORY button The display flashes and the factory reset is executed Never turn off the power while Factory Reset is in progress 3 Once appear...

Page 14: ...lease use alkaline batteries When turning the unit over be careful so as to protect the buttons and knobs from damage Also handle the unit carefully do not drop it Repairs and Data Before sending the unit away for repairs be sure to write down the needed information Although we will do our utmost to preserve the data stored in your unit when we carry out repairs in some cases such as when the memo...

Reviews: