background image

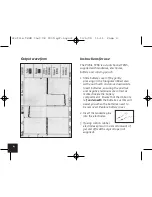
Output waveform

Instructions for use

The Profile TENS is a dual channel TENS,

supplied with leadwires, electrodes,

battery and carrying pouch.

1. Slide battery cover off by gently

pressing on the triangular ribbed area

with your thumb and move downwards.

Insert batteries, ensuring the positive

and negative terminals are correct as

marked inside the battery

compartment. Ensure that the ribbon is

left

underneath

the batteries as this will

assist you when the batteries need to

be removed. Replace battery cover.

2. Insert the leadwire pins

into the electrodes.

3. If using carbon rubber

electrodes spread on a small amount of

gel and affix with surgical tape (not

supplied).

4

Profile TENS Inst UK 2009.qx7:Layout 1

10/6/09

11:11  Page 4

Summary of Contents for Profile TENS

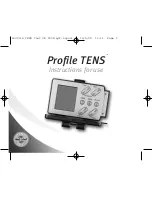
Page 1: ...TM Profile TENS Instructions for use Profile TENS Inst UK 2009 qx7 Layout 1 10 6 09 11 11 Page 1 ...

Page 2: ...8 Precautions Contraindications 9 Contents Before you use your Body Clock Profile TENS it is important that you read this manual carefully It contains all the information you need to ensure you are using the unit safely and correctly Profile TENS Inst UK 2009 qx7 Layout 1 10 6 09 11 11 Page 2 ...

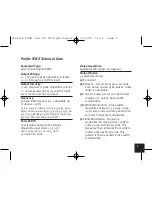
Page 3: ...125 150 175 200 225 and 250 microseconds Output waveform Symmetrical bi phasic rectangular Output Modes 5 selectable modes a Constant b Burst 1 Fixed 1 burst per 2 seconds Each burst consists of 80 pulses Pulse width is adjustable c Fixed 2 bursts per second Each burst consists of 7 pulses Pulse width is adjustable d Width Modulation Pulse width modulates between 25 250µs ramp up for 8 seconds and...

Page 4: ...nsity level will drop back to zero It will then gradually increase to the level set by the user Display In both modulation modes output changes are visible on the display Timer Timer counts down in minutes when timer is on Automatic shutdown If intensity levels are O on both channels and if the unit has not been in use for five minutes it will shut down automatically Low battery indicator A flashi...

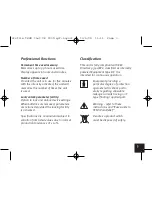
Page 5: ...ctivated Specifications are nominal and subject to variation from listed values due to normal production tolerances of 10 Classification This unit is fully compliant with EEC Directive 93 42 EEC classified as internally powered Equipment Type BF It is intended for continuous operation Equipment providing a particular degree of protection against electric shock partic ularly regarding allowable lea...

Page 6: ...eries ensuring the positive and negative terminals are correct as marked inside the battery compartment Ensure that the ribbon is left underneath the batteries as this will assist you when the batteries need to be removed Replace battery cover 2 Insert the leadwire pins into the electrodes 3 If using carbon rubber electrodes spread on a small amount of gel and affix with surgical tape not supplied...

Page 7: ... the 2Hz 9 Pulse Width adjustment provides extra versatility Increasing or decreasing the setting heightens or lessens the sensation at the site of the electrodes Set initially to 100 then adjust as desired 10 Slowly turn up the intensity using the intensity controls see diagram on page 7 11 By setting the pulse rate control to the upper end of the pulse rate range 80Hz or above you feel a tinglin...

Page 8: ...than 30 minutes unless you experience discomfort 15 Some people achieve pain relief after a short period while others may require to use their TENS for longer 16 If you stimulate for a number of hours check there is sufficient gel on carbon rubber electrodes If using self adhesive electrodes check they have not dried out If this happens dampen slightly If electrodes dry out this can cause minor sk...

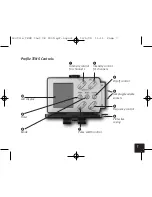
Page 9: ...control for channel 2 On off control Jackplug Leadwire sockets Frequency control Protective casing Pulse width control Mode Timer 쐅 LCD display Intensity control for channel 1 Profile TENS Inst UK 2009 qx7 Layout 1 10 6 09 11 11 Page 7 ...

Page 10: ...rotective cover closes over screen with belt clip on reverse for ease of use Pulse width control This two way button enables you to adjust the pulse width upwards or downwards as desired between 25 250 microseconds Mode selector button Timer This unit has 7 selectable settings i continuous When the unit is first used or after removal of batteries unless you have activated the locking facility it w...

Page 11: ...batteries and electrodes 12 If damaged do not use Return to supplier 13 Remove the batteries when not in use 14 Do NOT use while driving or operating potentially dangerous machinery or while using a microwave 15 Keep out of the reach of children 16 Do NOT place electrodes on or near the eyes in the mouth over the front or sides of the neck across the head heart or an area of broken inflamed infect...

Page 12: ...td 108 George Lane South Woodford London E18 1AD Tel 44 0 20 8532 9595 Fax 44 0 20 8532 9551 www bodyclock co uk e mail customercare bodyclock co uk 0120 June 2009 3 Profile TENS Inst UK 2009 qx7 Layout 1 10 6 09 11 11 Page 10 ...

Reviews: