background image


20 

V1.0 

SmartBus P900-S32 Series USER MANUAL 


7.  Zones cannot be bypassed once the system is armed. 
8.  All bypassed zones will be automatically un-bypassed each time the system is disarmed 

and must be reapplied before the next arming. 


                                         [6] 

                 + [ZONE NUMBERS] + [#] 

(Press and hold down for 2 seconds) 


      (01 to 32) 


1.  Press and hold down key 

[6] 

for 2 seconds. 

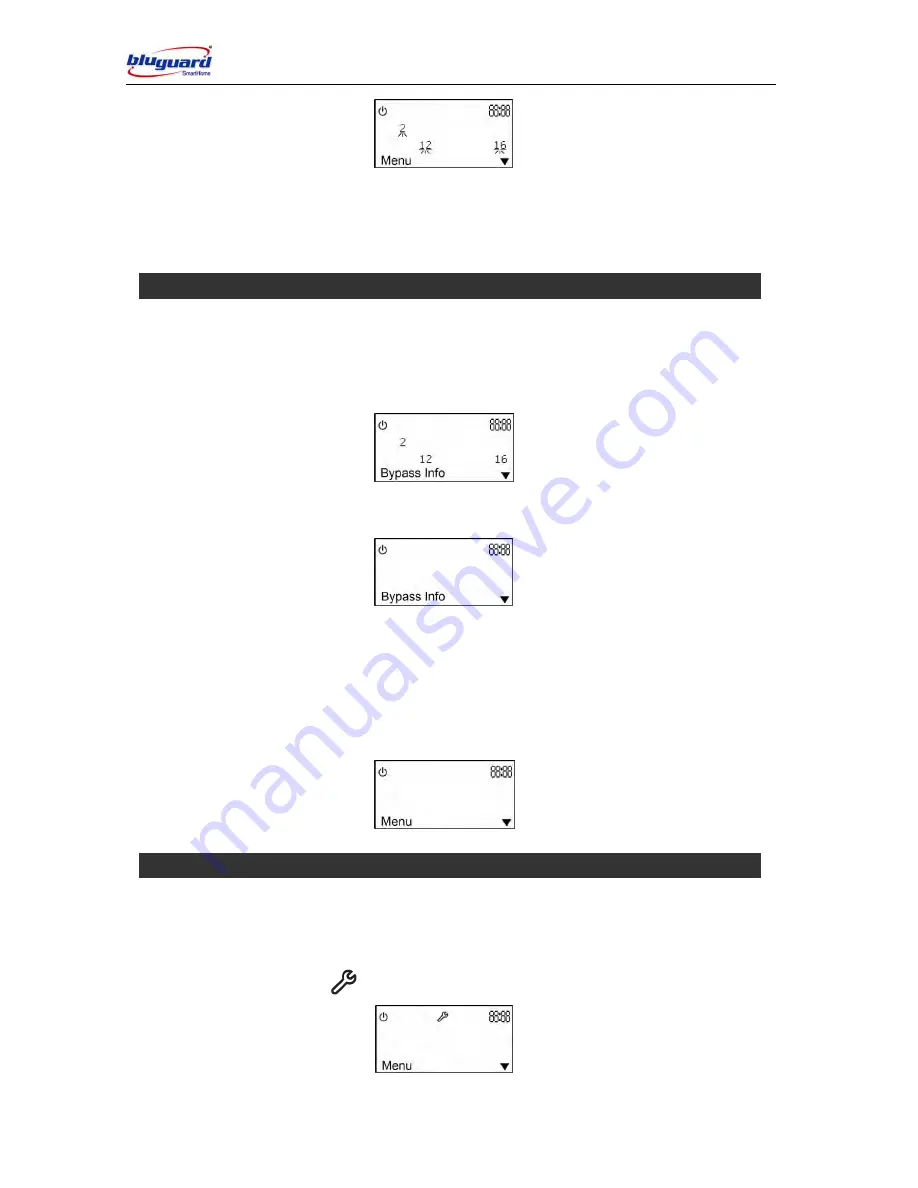
2.  The screen will show the Bypass Zones and keypad audible indicator will sound 2 beeps. 


3.  Press  the  zone  number  corresponding  to  the  current  bypassed  zone  e.g.  press 

[02]

  + 

[12]

 + 

[16]

 if you wish to un-bypass zone 2, 6 and 16. 


4.  Press 

[#]

 key to exit the bypass mode and keypad audible indicator will sound 2 beeps to 

confirm the command. 

5.  To un-bypass all zones at once, press key 

[00] 

followed by 

[#].


6.  Keypad audible indicator will sound 2 beeps to confirm the command and the system will 

be back to normal mode. 

7.  The relevant 

ZONE

 indicator will extinguish to indicate that the zone is now active.


[7] 

(Press and hold down for 2 seconds) 


1.  The  system  will  monitor  a  number  of  possible  trouble  conditions.  If  one  of  these 

conditions occurs, the 

 icon will display until the trouble is restored. 


2.  Press and hold down key 

[7] 

for 2 seconds. 

14.0  UN-BYPASS ZONE  

15.0  VIEW SYSTEM TROUBLE  

Summary of Contents for SmartBus P900-S32 Series

Page 1: ...ELEPHONE REMOTE ARMING 17 11 0 DISARMING THE SYSTEM 17 11 1 KEYPAD DISARMING 17 11 2 REMOTE CONTROL DISARMING OPTIONAL 18 11 3 AUTO TIMER DISARMING 18 11 4 TELEPHONE REMOTE DISARMING 18 12 0 TURN ON OFF HOME AUTOMATION POINT 19 13 0 BYPASS ZONE 19 14 0 UN BYPASS ZONE 20 15 0 VIEW SYSTEM TROUBLE 20 16 0 EVENT VIEWER 21 17 0 CHIME MODE 22 18 0 VIEW ZONE VOCABULARY SETTING 22 19 0 VIEW HA POINT VOCAB...

Page 2: ...6 25 10 TO ERASE AUTO DISARM PARTITION 1 2 3 4 TIMER 37 25 11 PROGRAM AUTO ON TIMER 1 2 3 4 FOR HOME AUTOMATION 38 25 12 TO ERASE AUTO ON TIMER 1 2 3 4 FOR HOME AUTOMATION 39 25 13 PROGRAM AUTO OFF TIMER 1 2 3 4 FOR HOME AUTOMATION 39 25 14 TO ERASE AUTO OFF TIMER 1 2 3 4 FOR HOME AUTOMATION 40 25 15 PROGRAM PERSONAL TELEPHONE NUMBER 1 2 3 4 41 25 16 TO ERASE PERSONAL TELEPHONE NUMBER 1 2 3 4 41 2...

Page 3: ...ey are located on the other side of closed or partly closed doors Telephone line needed to transmit alarm events from the premise to a central monitoring station may be out or temporary out of service Telephone line is subject to compromise by sophisticated method of attack Smoke detector used in conjunction with the alarm system may not sense fire that start from where smoke cannot reach the dete...

Page 4: ...OLLOWER zone will behave as an instant zone if it is violated prior to the violation of an ENTRY EXIT zone Force Arm Arming with exit delay that allows for certain violated zones to be bypassed temporary When the violated zones resume these zones will be protected There is an ENTRY delay time in this arming mode Home Automation HA Optional system expander module that allows you to control differen...

Page 5: ... seconds Program Chime Zone Hold down 9 for 2 seconds Zone number 01 to 32 Holiday Mode Arming Hold down 0 for 2 seconds Activate Fire Alarm Hold down F for 2 seconds Mute Unmute Keypad Hold down for 2 seconds Intercom Hold down for 2 seconds Recording Hold down for 2 seconds User number 1 to 8 Record your voice after the beep and press when finish Lock Unlock Keypad Hold down for 2 seconds On Off...

Page 6: ... 4 Night Arm Hold down 3 for 2 seconds Partition 1 or Partition 2 or Partition 3 or Partition 4 Force Arm Hold down 4 for 2 seconds Partition 1 or Partition 2 or Partition 3 or Partition 4 Holiday Mode Arming Hold down 0 for 2 seconds Partition 1 or Partition 2 or Partition 3 or Partition 4 TESTING THE SYSTEM Sensor Walk Test Press MODE 1 or Menu System Tests Walk Test CMS Reporting Test Press MOD...

Page 7: ...for Answer System Call Out System welcome note and voice menu Answer Call Slow beeps Master Code Master Code User Code 2 3 4 are telephony control codes Terminate Telephone Reporting Immediately 2 Force Arm Disarm system 3 On Off Siren 4 On Off Home Automation Point 01 to 32 HA Points 00 On Off All HA Points System voice report and voice menu 01 to 32 Zone number 5 Bypass Unbypass Zone 00 Bypass U...

Page 8: ...OCK UNLOCK This key will LOCK UNLOCK keypad when hold down for 2 seconds RECORDING This key will activate the VOICE MESSAGE RECORDING mode when hold down for 2 seconds INTERCOM This key will activate the INTERCOM mode when hold down for 2 seconds 0 HOLIDAY MODE This key will activate the HOLIDAY mode when hold down for 2 seconds MUTE This key will MUTE UNMUTE keypad when hold down for 2 seconds 8 ...

Page 9: ...r Code 02 31 Duress Code Clock PROGRAM CLOCK Clock Timers PROGRAM TIMER Arm P1 Timer Disarm P1 Timer Arm P2 Timer Disarm P2 Timer Arm P3 Timer Disarm P3 Timer Arm P4 Timer Disarm P4 Timer ON HA Timer 1 OFF HA Timer 1 ON HA Timer 2 OFF HA Timer 2 ON HA Timer 3 OFF HA Timer 3 ON HA Timer 4 OFF HA Timer 4 Tel Nos PROGRAM TEL NO User Tel No 1 User Tel No 2 User Tel No 3 User Tel No 4 GSM Tel No 1 GSM ...

Page 10: ...in New User Code Re confirm New User Code User Code 11 Key in New User Code Re confirm New User Code User Code 12 Key in New User Code Re confirm New User Code User Code 13 Key in New User Code Re confirm New User Code User Code 14 Key in New User Code Re confirm New User Code User Code 15 Key in New User Code Re confirm New User Code User Code 16 Key in New User Code Re confirm New User Code User...

Page 11: ...0 to 2359 F to erase the previous setting Arm P2 Timer Key in time 0000 to 2359 F to erase the previous setting Disarm P2 Timer Key in time 0000 to 2359 F to erase the previous setting Arm P3 Timer Key in time 0000 to 2359 F to erase the previous setting Disarm P3 Timer Key in time 0000 to 2359 F to erase the previous setting Arm P4 Timer Key in time 0000 to 2359 F to erase the previous setting Di...

Page 12: ... setting User Tel No 4 Key in 16 digit Tel No F to erase the previous setting GSM Tel No 1 Key in 16 digit Tel No F to erase the previous setting GSM Tel No 2 Key in 16 digit Tel No F to erase the previous setting GSM Tel No 3 Key in 16 digit Tel No F to erase the previous setting GSM Tel No 4 Key in 16 digit Tel No F to erase the previous setting Remark Button on the keypad is representing a PAUS...

Page 13: ...ended entries 3 Enter a valid 4 digit USER CODE If you enter any mistakes press key and re enter the code followed by key to confirm you command 4 will be displayed 5 An EXIT delay countdown timer will be shown at the top right temporarily replace the clock and the keypad audible indicator will sound on and off for the duration of the EXIT delay 6 Any bypassed zones will be shown by the flashing z...

Page 14: ... 8 Any DAY STAY zones will be automatically bypassed which shown by flashing zone underline 9 User will be given an ENTRY delay time to DISARM the system when enter the protected premises via ENTRY EXIT zone 3 Press and hold down for 2 seconds 1 This arming mode is ideal for NIGHT time arming with user still remains in the protected premises 2 In this mode the system will be armed instantly with c...

Page 15: ...will be shown at the top right temporarily replace the clock and the keypad audible indicator will sound on and off for the duration of the EXIT delay 5 Any bypassed zones will be shown by the flashing zone underline 6 User will be given an ENTRY delay time to DISARM the system when enter the protected premises via ENTRY EXIT zone 0 Press and hold down for 2 seconds 1 This arming mode is ideal for...

Page 16: ...mporary When the violated zones resume the zone will be protected again 4 Press the remote control button or twist and release the key switch 5 The system will be armed instantly Leave the premises via ENTRY EXIT zone 6 icon will be displayed 7 An EXIT delay countdown timer will be shown at the top right temporarily replace the clock and the keypad audible indicator will sound 2 beeps to confirm t...

Page 17: ...0 Section 23 0 USER CODE 1 To disarm the system enter a valid 4 digit USER CODE followed by key before expiry of the entry delay time 2 Enter the premises through a designated ENTRY EXIT zone entering via other zones will trigger an alarm instantly 3 The ENTRY delay begins once the ENTRY zone is violated 4 The keypad audible indicator will sound for the duration of the ENTRY delay to indicate that...

Page 18: ... release the key switch 2 The icon will extinguish and the keypad audible indicator will sound 2 beeps to confirm the disarming 3 If programmed to do so the siren will sound briefly for this remote control disarming Please refer to Installer Programming Section System Option Setting 1 Your system can be programmed to automatically DISARM itself according to a programmed schedule 2 Please refer to ...

Page 19: ...beeps to confirm the command and the system will be back to normal mode 6 ZONE NUMBERS Press and hold down for 2 seconds 01 to 32 1 Press and hold down key 6 for 2 seconds 2 The screen will show Bypass Info and keypad audible indicator will sound 2 beeps 3 Press the zone number that needs to be bypassed e g press 02 12 16 if you wish to bypass zone 2 6 and 16 4 Press key to exit the bypass mode an...

Page 20: ...ress 02 12 16 if you wish to un bypass zone 2 6 and 16 4 Press key to exit the bypass mode and keypad audible indicator will sound 2 beeps to confirm the command 5 To un bypass all zones at once press key 00 followed by 6 Keypad audible indicator will sound 2 beeps to confirm the command and the system will be back to normal mode 7 The relevant ZONE indicator will extinguish to indicate that the z...

Page 21: ...Reporting Fail Telephone Line GSM Personal Reporting Fail Telephone Line Connection Fail Remark CMS Reporting Fail and Personal Reporting Fail troubles will be extinguished when they are viewed once 8 Press and hold down for 2 seconds 1 The event viewer will store up to 20 latest events in the system An alarm condition will cause the icon flash 2 The icon will extinguish once the user enters EVENT...

Page 22: ...ing to the zone that you wish to be the chime zone 4 Press key to exit the chime mode and keypad audible indicator will sound 2 beeps to confirm the command TO CANCEL CHIME ZONE Repeat the above steps and ensure that the zone number display is extinguished 1 Press key to the Zone Info menu when system in normal mode 2 Press to access into zone info setting Vocabulary settings are shown in the LCD ...

Page 23: ...e PANIC ALARM condition will be activated when press MODE 8 2 The PANIC ALARM condition can also be activated by any FIXED or REMOTE PANIC button that has been installed 3 If the panic button is set as silent zone then the PANIC REPORTING CODE will be transmitted to the central monitoring station without the siren sounding Ensure that your installer has enabled this function if it is required 4 To...

Page 24: ...itted to the central monitoring station 4 To silence the siren enter a 4 digit user code followed by key DURESS CODE 1 This is a special 4 digit user code that is only used in the unique situation where an intruder forces one to disarm the system under duress 2 When the duress code is entered the control panel will be disarmed However a DURESS REPORTING CODE is transmitted to the central monitorin...

Page 25: ...ver this sharing zone will be disarmed if any partition is disarmed The installer must program the required user code settings These settings determine which user codes can arm disarm Partition 1 as well as which user code can arm disarm Partition 2 Partition 3 or Partition 4 User code can also be given access to more than one partition or all partitions If your user code has access to 4 partition...

Page 26: ... arm all partitions If your user code has access to 4 partitions and you would like to arm Partition 1 only USER CODE 1 Leave via ENTRY EXIT Zone If your user code has access to 4 partitions and you would like to arm Partition 2 only USER CODE 2 Leave via ENTRY EXIT Zone If your user code has access to 4 partitions and you would like to arm Partition 3 only USER CODE 3 Leave via ENTRY EXIT Zone If...

Page 27: ...e clock and the keypad audible indicator will sound on and off for the duration of the EXIT delay 11 Any bypassed zones will be shown by the flashing zone underline 12 Leave the premises only via the EXIT ENTRY zone 13 User will be given an ENTRY delay time to disarm the system when enter the protected premises via ENTRY EXIT zone 1 1 or 2 or 3 or 4 Press and hold down for 2 seconds 1 Ensure that ...

Page 28: ...ss and hold down for 2 seconds 1 This arming mode is ideal for DAY time arming with user still remains in the protected premises 2 In this mode system will be armed instantly with certain preprogrammed DAY STAY zones bypassed automatically 3 Ensure that all zone indicators are extinguished if not check that all protected premises are closed 4 DO NOT open the ENTRY EXIT zone 5 Press and hold down k...

Page 29: ...assed shown by flashing zone underline 10 There is no ENTRY delay in this arming mode Any violation on the active zones will trigger the system instantly 4 1 or 2 or 3 or 4 Press and hold down for 2 seconds 1 In this mode the system will be armed with EXIT delay time which allows certain violated zones to be bypassed temporary When the violated zones resume the zone will be protected again 2 Press...

Page 30: ...the clock and the keypad audible indicator will sound on and off for the duration of the EXIT delay 9 Any bypassed zones will be shown by the flashing zone underline 10 Leave the premises only via the EXIT ENTRY zone 11 User will be given an ENTRY delay time to disarm the system when enter the protected premises via ENTRY EXIT zone 12 After disarming Home Automation random ON OFF function will be ...

Page 31: ...secutively more than the keypad lock counter Please refer to Installer Programming Section Keypad Lock Counter Setting 13 If the ENTRY delay is too short have your installer to change the ENTRY delay period 14 If the MEMORY indicator is flashing upon entry there has been an intrusion Call for assistance The intruder may still be inside Master code is a 4 digit personal identification number that a...

Page 32: ...DE is entered Below the User Mode the Passwords command is ready to be entered 7 Use the key and key to scroll up and down Enter the command that you wish to change Please refer to User Programming Summary Table at page 10 Section 9 0 8 To exit user programming mode press or exit from MENU 1 Press 2 Screen will show Menu at the bottom exactly like before entering the user programming mode and keyp...

Page 33: ...3 7 Press to exit user programming mode 8 If any of the user codes are not used please ensure that they are all erased 1 Ensure that the system is in USER PROGRAMMING mode 2 Press to access Passwords menu 3 Press to scroll down to Duress Code 4 Press to select Duress Code 5 Enter the new 4 digit DURESS CODE followed by key Example 1313 and press 6 Re enter the new 4 digit DURESS CODE followed by k...

Page 34: ... 3 Press to scroll down to select which user code that you wish to erase Example User Code 02 4 Press to select User Code 02 5 Enter 4 digit 0000 followed by key 6 Re enter the 4 digit 0000 followed by key 7 Repeat step 3 to 6 to erase other user codes 8 Press to exit user programming mode 9 If any of the user duress codes are not used please ensure that they are all erased Master code cannot be e...

Page 35: ...mat Example 8 00pm is 20 00 5 Press key to confirm the time 6 Press to exit user programming mode 1 Ensure that the system is in USER PROGRAMMING mode 2 Press to scroll down to Timers 3 Press to access Timers menu 4 Press to access Arm P1 Timer for auto arm partition 1 timer 5 Enter the AUTO ARM P1 TIMER in 24 hour format Example 8 00pm is 20 00 25 6 PROGRAM SYSTEM TIMER 25 7 PROGRAM AUTO ARM PART...

Page 36: ...Press to access Timers menu 4 Press to access Arm P1 Timer for auto arm partition 1 timer 5 Press the F key to set to 99 99 setting 6 Press key to erase previous AUTO ARM P1 TIMER setting 7 Press to scroll down to erase Arm P2 Timer Arm P3 Timer and Arm P4 Timer 8 Press to exit user programming mode 1 Ensure that the system is in USER PROGRAMMING mode 2 Press to scroll down to Timers 25 8 TO ERASE...

Page 37: ...TIMER in 24 hour format Example 8 00pm is 20 00 7 Press key to confirm the time 8 Press to scroll down to program Disarm P2 Timer Disarm P3 Timer and Disarm P4 Timer 9 Press to exit user programming mode 1 Ensure that the system is in USER PROGRAMMING mode 2 Press to scroll down to Timers 3 Press to select Timers menu 4 Press to scroll down to Disarm P1 Tmr 25 10 TO ERASE AUTO DISARM PARTITION 1 2...

Page 38: ...r and Disarm P4 Timer 9 Press to exit user programming mode 1 Ensure that the system is in USER PROGRAMMING mode 2 Press to scroll down to Timers 3 Press to access Timers menu 4 Press to scroll down to ON HA Tmr 1 and press for auto on timer 1 5 Enter the AUTO ON TIMER 1 in 24 hour format Example 8 00pm is 20 00 6 Press key to confirm the time 7 Press to scroll down to program ON HA Tmr 2 ON HA Tm...

Page 39: ... auto on timer 1 5 Press the F key to set to 99 99 setting 6 Press key to erase previous AUTO ON TIMER 1 setting 7 Press to scroll down to erase ON HA Tmr 2 ON HA Tmr 3 and ON HA Tmr 4 8 Press to exit user programming mode 1 Ensure that the system is in USER PROGRAMMING mode 2 Press to scroll down to Timers 3 Press to access Timers Menu 25 12 TO ERASE AUTO ON TIMER 1 2 3 4 FOR HOME AUTOMATION 25 1...

Page 40: ... Tmr 4 8 Press to exit user programming mode 1 Ensure that the system is in USER PROGRAMMING mode 2 Press to scroll down to Timers 3 Press to access Timers menu 4 Press to scroll down to OFF HA Tmr 1 and press for auto off timer 1 5 Press the F key to set to 99 99 setting 6 Press key to erase previous AUTO OFF TIMER 1 7 Press to scroll down to erase OFF HA Tmr 2 OFF HA Tmr 3 and OFF HA Tmr 4 8 Pre...

Page 41: ... a PAUSE key of 5 seconds duration 8 Button on the keypad is representing a key 9 Press key to confirm the setting 10 Press to scroll down to program User Tel No2 User Tel No3 and User Tel No4 11 Press to exit user programming mode 12 If programmed so system will call out to user telephone to report for any intrusion 13 If the system fails to contact the preprogrammed personal telephone number 1 s...

Page 42: ...wn to erase User Tel No2 User Tel No3 and User Tel No4 8 Press to exit user programming mode 1 Ensure that the system is in USER PROGRAMMING mode 2 Press to scroll down to GSM Tel Nos 3 Press to access GSM Tel Nos menu 4 Press to select GSM Tel No1 5 Enter the GSM TELEPHONE NUMBER 1 the maximum telephone number length is 16 digits The entered number will be displayed on the screen 25 17 PROGRAM GS...

Page 43: ... Tel No4 11 Press to exit user programming mode 12 If programmed so system will call out to user telephone to report for any intrusion 1 Ensure that the system is in USER PROGRAMMING mode 2 Press to scroll down to GSM Tel Nos 3 Press to access GSM Tel Nos menu 4 Press to select GSM Tel No 1 5 Press the F key to erase the setting 6 Press key to erase previous GSM TELEPHONE NUMBER 1 7 Press to scrol...

Page 44: ... tested at least once every 3 months If the system is not functioning accordingly please contact your system installer for technical assistance 1 Walk Test allows on site testing of each zone of the system 2 Press MODE 1 or from MENU i e Menu System Test WalkTest 3 Siren will trigger for 2 seconds and keypad buzzer will sound briefly if any zone is violated during walk test mode 4 If siren and key...

Page 45: ...i e Menu System Test Siren Test 3 Siren will sound for 3 seconds 4 If siren does not sound consult your system installer 1 Strobe Light Test allows on site testing of strobe light functionality 2 Press MODE 4 or from MENU i e Menu System Test Strobe Test 3 Strobe light will flash for 15 seconds 4 If strobe light does not flash consult your system installer 1 Battery Test allows on site testing of ...

Page 46: ...6 Just call back to the alarm system Press 4 digit password followed by key 7 After that press 9 to speak to the keypads or 0 to listen from the keypads User 1 to 8 can have their own mailbox for voice message recording The mailboxes have a combined capacity of 4 minutes of voice message recording with a maximum of 128 messages Record Listen Delete User Name This system allows users to record thei...

Page 47: ...lable 4 Press key to check who has a new message To retrieve voice message 1 Press to scroll down from Menu to Messages and press Enter your 4 digit password followed by key 2 Press to select Play Message Listen to your messages Erase This Msg Erase message when it is being played Erase All Msg Erase all messages for this user 3 You can also use your mobile phone to record and play voice messages ...

Page 48: ...s at a time Page switching is divided into 2 pages where users are required to select which page to be displayed The pages are categorized as of below Pg1 Page 1 consists of Zone 1 to 16 Pg2 Page 2 consists of Zone 17 to 32 To switch between pages press and the page will display from Pg1 to Pg2 or vice versa 29 0 PAGE SWITCHING ...

Page 49: ... 23 24 25 26 27 28 29 30 31 32 CMS Central Monitoring Station Number _____________________ Central Monitoring Station Account Number _____________________ Servicing Installer company _____________________________ Contact person _____________________________ Contact number _____________________________ Installation Date ______ ______ ______ 30 0 SYSTEM INFORMATION ...

Page 50: ...tition 4 _____________________________ minutes Telephone Reporting Telephone Number 1 _____________________________ Telephone Number 2 _____________________________ Telephone Number 3 _____________________________ Telephone Number 4 _____________________________ Dialing Attempt _____________________________ times OPTIONAL GSM Telephone Reporting GSM Telephone Number 1 _____________________________...

Reviews: