4 Clearview
+
Quick Guide
IMPORTANT
A reboot is required after applying a configuration file.
The user is also able to reboot the unit and upload/download configuration files. Once downloaded, the settings can be
applied to the unit or the user can choose to set the unit back to the default factory settings with a click of a button.
System Settings
To change the System and Ethernet Settings, including unit identification and location, go to the “
System
” tab (shown next
page).
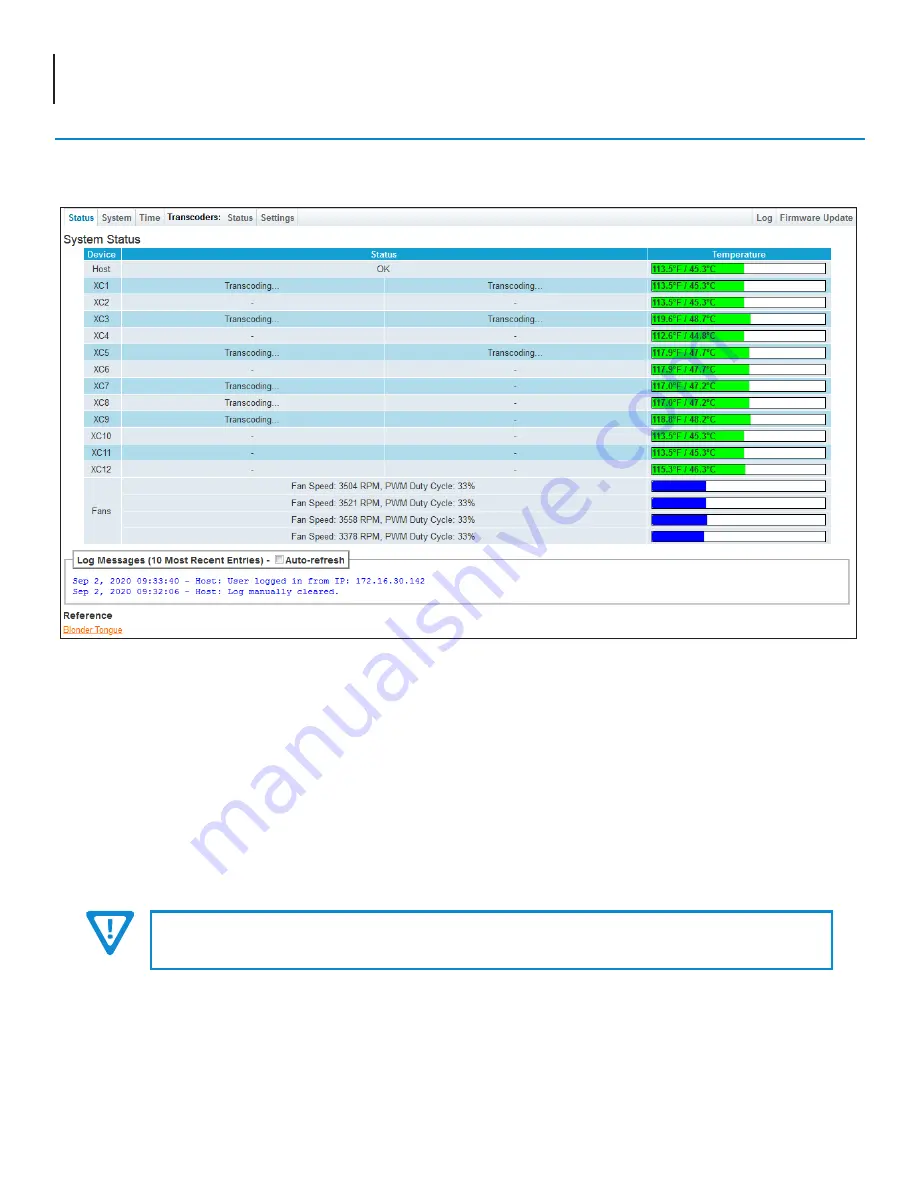
This section provides status messages, temperatures, and fan RPM for the Host system as well as each transcoder used.
The page also features a recent logged message box beneath the main status area which shows the 10 most recent entries
within the Event Log. To see a more in-depth log of event messages, click the “
Log
” tab located on the right side of the
navigation menu at the top.
Step 4: Basic Configuration
System Status
Once you are logged into the unit, you will be presented with the “
System Status
” page (“Status” tab):
Status Page - Full View
The Ethernet Settings that can be changed are “
IP Address
”, “
Subnet Mask
”, “
Default Gateway
”, “
Primary DNS
”, and
“
Secondary DNS
”. In addition, the network settings for each transcoder slave are individually configurable.
This section also allows the user to individually configure the network settings for each numbered transcode pair (XC1 to XC12).
Click “
Apply Settings
” in order to save new or changed settings.


