background image


HOW TO DISPLAY THE REGULATION SET POINTS 

By pushing the SET key the following information are   

displayed in sequence: 

rSI 

= Room set point 

iSI 

= Stop phase set point, referred to the insert probe 

- Back to the room temperature. 


HOW TO MODIFY THE ROOM SET POINT 

While rSI or iSI are displayed hold pushed the SET key till   

the rSi or iSi label start flashing and LED near the SET key   

is turned on. 

Use the arrow key to modify the value and the SET key to confirm it. 


4. KEYBOARD WHEN THE HOLDING CYCLE IS RUNNING (H)


HOW TO DISPLAY THE HOLDING (REGULATION) SET POINT 

While the holding cycle is running, (H icon lighted), push the SET   

key and the holding set point is displayed on the UPPER display   

while the 

SETH 

label on the bottom display. 

HOW TO MODIFY THE ROOM SET POINT 


While SETH is displayed hold pushed the SET key till the SETH label   

starts flashing and LED near the SET key is turned on. Use the arrow   

key to modify the value and the SET key to confirm it. 

TO CONFIRM AND EXIT

: push again the SET key 


5.  OTHER KEYS 
 

LIGHT 

(4): push the LIGHT (4) key to switch the light on and off.   

The status of the light is monitored by the yellow LED upper the   

key. 

AUX 

(8): ): push the AUX (8) key to switch the auxiliary on and off.   

The status of the auxiliary relay is monitored by the yellow LED   

Upper the key. 

PRINTER 

/ H (7): push the PRINTER key when the keyboard is   

connected to the controller, to enabled/ disable the printer. 

PRINTER CONFIGURATION MENU 

Push the PRINTER (7) key for few seconds to enter the   

printer configuration menu. The 

itP

, label is displayed, use   

the ARROW keys to browse the parameters 

To modify: 

push the 

SET 

key and then the ARROW keys. 

To confirm

: push the 

SET 

key 

To exit the Printer menu

: Push together SET + UP keys   

or wait 5 sec 


Summary of Contents for BCF20

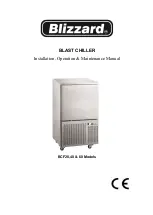
Page 1: ...BLAST CHILLER Installation Operation Maintenance Manual BCF20 40 60 Models...

Page 2: ...General use of the cabinet 3 Operation instruction for temperature controller 4 REGULAR MAINTENANCE 10 Cleaning the condenser coil 10 Cleaning the fan blade and motor 11 Cleaning the interior of unit...

Page 3: ...n a pallet and shrink wrapped Documentation is inserted into a clear pocket located inside the unit Carefully remove the protective plastic film and cardboard from the unit exterior and from the door...

Page 4: ...ting equipment high ambient temperature will cause the compressor to overwork leading to higher energy bills and gradual breakdown of the unit The appliance shall not be exposed to rain sun The cabine...

Page 5: ...g period of time please unplug the unit from the outlet After unplugging the unit wait at least 10 minutes before re plugging it Failure to do so could cause damage to the compressor Do not attempt to...

Page 6: ...ate that product should be placed in the Blast Chiller Blast Freezer within 30 minutes from completion of cooking The packaging of food and the way in which it is loaded or placed within the equipment...

Page 7: ...all the main features of cycle can be printed start and end of the cycle length of the cycle logging of the temperature of the cabinet and goods Frontal panel Quick start 1 DISPLAY The upper display...

Page 8: ...DING PHASE TO DISPLAY Push and release the SET key 6 the holding set point of the selected cycle is displayed for 5 sed TO MODIFY while the set point is displayed hold pushed the SET key till the HdS...

Page 9: ...NT While SETH is displayed hold pushed the SET key till the SETH label starts flashing and LED near the SET key is turned on Use the arrow key to modify the value and the SET key to confirm it TO CONF...

Page 10: ...following table 9 HOW TO SELECT A CYCLE 1 Push the to move among the cycles C1 C2 C3 C4 and the holding cycle The related symbol on the display will be lighted and the cycle will be selected NOTE to...

Page 11: ...sually called hard chill soft chill freezing cycle 2 For each phase there are 3 parameters iS1 iS 2 iS 3 Set point related to the insert probes that stops the current phase rS1 rS2 rS3 set point of th...

Page 12: ...the three insert probes reach the iS3 value the values End followed by the i1P or i2P or i3P are shown on the display Cycle ends when all the probes have reached the iS3 value A signal is generated bu...

Page 13: ...gular basis preferably weekly Simply remove door gasket from the frame of the door soak in warm water and soap for thirty 30 minutes dry with soft cloth and replace Check door gaskets for proper seal...

Page 14: ...ure gaskets are snapped in completely Remove gasket and wash with soap and water Check condition of gasket and Replace if necessary Clean the condenser coil Unplug unit and allow coil to defrost Make...

Page 15: ...W D H mm wats W Load A Climate Class Container capacity in GN1 1 Chilling capacity in 90mins kg Freezing capacity in 240mins kg BCF20 HC R290 150 800 800 930 750 4 5 4 5 20 15 BCF40 HC R290 150 800 80...

Page 16: ...Adjusting parameters on a Blizzard Blast Chiller To start the cycle press and release the key...

Page 17: ...Pre set cycle settings...

Reviews: