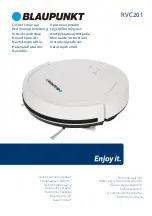
4
1. Power button
2. Top cover
3. Internal dust container
4. Bumper
5. Front wheel
BEFORE THE IRST USE
1.
Remove all papers, cartons and foils protecting the vacuum and its parts.
2.
Remove the insulation foil from between the battery and the contacts. Make sure the battery is
inserted correctly according to its polarity.
3.
Install the collector brushes. Press the brush marked with L or R into the appropriate spot
marked with L or R.
4.
Set the device in the middle of a larger area, and run the cleaning programme until the battery is
discharged. Charge the device battery according to the instructions.
CHARGING THE DEVICE
1. Make sure that the device battery is correctly installed in the device before charging it.
2. Plug the power-supply plug into the vacuum cleaner, then plug the power supply into an electrical
socket. The blue LED on the power button will blink.
3. When the battery is fully charged, the LED will be lit continuously. Charging the battery takes
approximately 4-5 hours.
4. It is recommended to fully charge the battery without interruptions. This will extend the battery life.
DEVICE START-UP
Prepare the surface of the room to be cleaned. Remove sensitive objects, cables, sheets of paper. Raise
backdrops, curtains, and drapes hanging to the ground. Cover delicate furniture.
Press the on/off button to start the robot vacuum cleaner. The robot will start to move and clean,
periodically changing modes.
The robot will run until the battery is discharged or until it is blocked by objects lying on the floor,
doorsteps, or turned off by means of the on/off switch.
The robot will inform you that the battery is low by lighting up the red control LED on the on/off
switch.
CLEANING AND MAINTENANCE
1. Emptying and cleaning the dust container.
Open the top cover by lifting it up. Pull out the container. Remove the cover and the internal filter.
Empty the container.
The container may be cleaned under running water (do not wash in a dishwasher or washing machine).
Clean the filter with a soft brush.
RVC201
6. Drive wheels
7. Collector brushes
8. Suction opening
9. Surface-edge sensors (Anti-fall)
10. Battery compartment
Random
Spiral
Spiral
Along the wall
Summary of Contents for RVC201
Page 2: ...RVC201 2 4 9 ...
Page 8: ...6 RVC201 ...
Page 14: ...RVC201 12 ...
Page 26: ...24 RVC201 ...
Page 32: ...30 RVC201 ...
Page 38: ...36 RVC201 ...
Page 44: ...42 RVC201 ...
Page 50: ...48 RVC201 ...
Page 62: ...RVC201 60 ...
Page 68: ...66 RVC201 ...
Page 74: ...72 RVC201 ...
Page 80: ......


