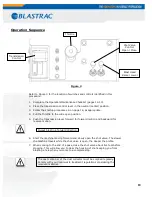

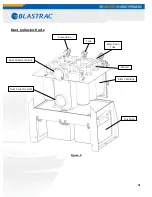
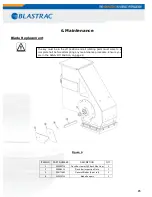
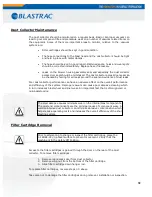


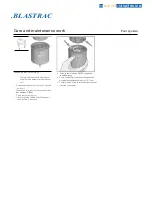


Dust Collector Maintenance
The dust collector should be monitored on a regular basis. Bad or improper vacuum can
lead to poor component life and premature wear on a number of vacuum related items on
the equipment. Some of the more important areas to monitor, relative to the vacuum
system, are:
•
Filter cartridges should be kept in good condition.
•
The hose connections to the blast head and the dust collector should be tight
and held in place with metal clamps.
•
The hose should be kept in good repair. Flattened spots, holes and wear spots
should be corrected immediately. Replace hose if necessary.
•
Leaks on the blower housing assembly seal and especially the dust collector
access door seal should be minimized. The dust collector access door seal can
be checked by feeling for air leaks around the seal and evidence of dust leaks.
Poor dust collector performance can have an adverse effect on the overall performance
and efficiency of the system. Improper vacuum can cause poor abrasive cleaning which
in turn increases blast wheel and liner wear. An important fact that is often ignored or
misunderstood is:
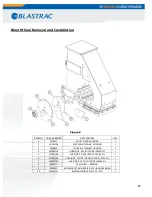
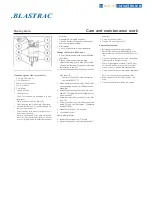
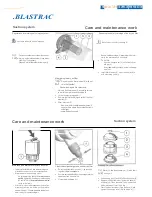
Filter Cartridge Removal
Access to the filter cartridges is gained through the door on the rear of the dust
collector. To remove filter cartridges:
1.
Remove rear access door from dust collector
2.
Remove wing nut from the bottom of the filter cartridge
3.
Slide filter cartridge down hanger rod
To replace filter cartridges, reverse steps 1-3 above.
Take care not to damage the filter cartridges during removal, installation or inspection.
32
The steel abrasive causes minimum wear on the internal blast components.
The dust and contaminants are the principal cause of component wear. A
well-maintained dust collector can minimize abrasive contamination which
helps reduce operating costs and increases the overall efficiency of the shot
blasting system.
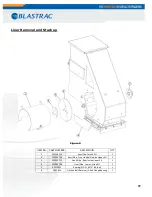
Prior to attempting to change or inspect the filter cartridges, place the
1-16DB4-V2 on a level surface to prevent movement. Verify that the
machine is in the Safety Off Position.
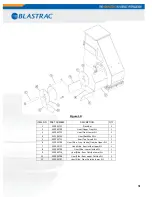
Summary of Contents for 1-16DB4-V2
Page 1: ...SERVICE MANUAL 1 16 DB4 V2 VERSION 1 1 www blastrac com 1 800 256 3440...
Page 36: ...Check for leaks after starting theengine...
Page 38: ...35...
Page 40: ...36...
Page 42: ...37...
Page 44: ...38...
Page 46: ...39...
Page 50: ...BLASTRAC RS IN SURFACE PREPARATION Figure 12 43...
Page 57: ...BLASTRAC VATORS IN SURFACE PREPARATION Blast Head Assembly Figure 14 48...