9
CHAPTER 3: Installation
3. Installation
3.1 Installing a Single Hub
To install a Video CCTV-A/V Hub that isn’t daisychained or cascaded with any
other devices, follow the steps below.
CAUTION!
Do not attempt to open the housing. There are no user-serviceable parts
inside the Video CCTV-A/V Hub.
To avoid electrical interference, keep your equipment, baluns, and
cables away from neon or fluorescent lights, generators, electric
motors, high-voltage lines, and other sources of high-voltage or high-
frequency electromagnetic signals.
Keep in mind that video and audio 1 form one set of signals, while
video and audio 2 form another set.
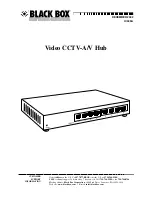
1. The Video CCTV-A/V Hub is polarity sensitive and works in conjunction with
many of our IC440 series video baluns. If you want to use the hub with baluns
that have an opposite signal polarity, you’ll need to reverse the signal polarity
of the cabling between the hub and the baluns (that is, cross-pin it). Make
sure, however, that the pinout of any balun you use with the hub has the same
pinout as the hub. (A table that shows the hub’s pinout is printed on the
hub’s rear panel.)
2. Connect the appropriate video baluns to the audio/video source and
destination devices, following the directions in the baluns’ manual. Run the
appropriate patch cables from the baluns to your site’s twisted-pair cabling
system.
The hub supports up to two video and two audio channels. So the hub will
work with the:
• Video Balun (IC440A);
• Video Stereo Audio Balun (IC441A-R2);
• CCTV Video Balun (IC444A);
• Dual Audio/Video Balun (IC446A); and
• S-Video Balun (IC447A).

