


CHAPTER 3: Installation
11
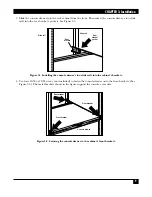
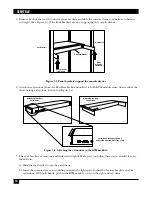
8. Push the rear brackets all the way in and fasten them.
9. Slide out the console drawer. Push the KVM module evenly toward the drawer and secure both units using
the thumbscrews. See Figure 3-7.
Figure 3-7. Securing the KVM module to the console drawer.
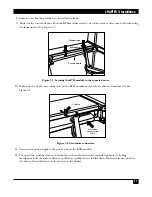
10. Make sure the Centronics connectors on the KVM module and attached cable are firmly mated. See
Figure 3-8.
Figure 3-8. Centronics connectors.
11. Connect the power supply to the power jack on the KVM module.
12. For operation, pull the drawer out from the rack and latch it in the extended position. A locking
mechanism locks the drawer when it’s pulled out, pushed in, or folded down. When not in use, push in
the drawer, then fold down, lock, and secure the display.
Console drawer
KVM module
Thumbscrews
5
⁄
16
" (8 mm)
Centronics
connector on
cable


