background image

BLACK BOX

®

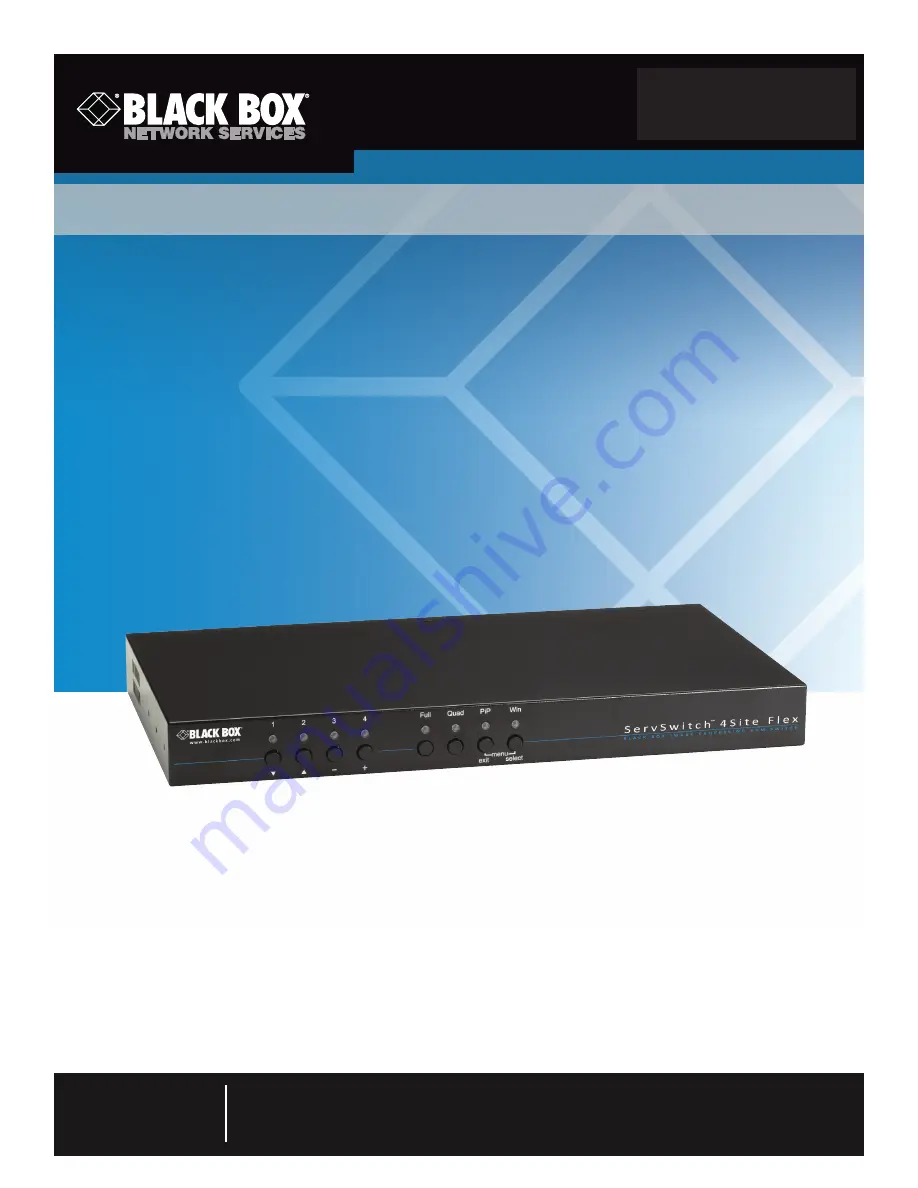
Simultaneously display four different analog/ 

digital video sources on one screen, while  

supporting either USB or PS/2 keyboards and mice.

Supports full-screen mode, quad-screen mode, PiP, and windows mode.

ServSwitch

 4site Flex

KVP4004A

Order toll-free in the U.S.: Call 877-877-BBOX (outside U.S. call 724-746-5500)

FREE technical support 24 hours a day, 7 days a week: Call 724-746-5500 or fax 724-746-0746

Mailing address: Black Box Corporation, 1000 Park Drive, Lawrence, PA 15055-1018

Web site: www.blackbox.com   •   E-mail: [email protected]

Customer 

Support 

Information

Summary of Contents for KVP4004A

Page 1: ...en mode PiP and windows mode ServSwitch 4site Flex KVP4004A Order toll free in the U S Call 877 877 BBOX outside U S call 724 746 5500 FREE technical support 24 hours a day 7 days a week Call 724 746...

Page 2: ...conds Trademarks Used in this Manual Black Box and the Double Diamond logo are registered trademarks and ServSwitch is a trademark of BB Technologies Inc 3M and MicroTouch are registered trademarks of...

Page 3: ...n the equipment is operated in a commercial environment Operation of this equipment in a residential area is likely to cause interference in which case the user at his own expense will be required to...

Page 4: ...n el flujo de aire por los orificios de ventilaci n 10 El equipo el ctrico deber ser situado fuera del alcance de fuentes de calor como radiadores registros de calor estufas u otros aparatos incluyend...

Page 5: ...supply Only connect the device to a grounded power supply Installation Make sure that the device is disconnected from the power source before installing anything Unplug the device or disconnect the p...

Page 6: ...ng Video Sources Computers 17 3 4 Connecting USB Devices 17 3 5 Powering Up the System 17 3 6 Connecting Audio 17 4 On Screen Display 19 4 1 On Screen Display OSD Overview 19 4 2 OSD Main Menu Window...

Page 7: ...mputer 63 9 1 Channel Mapping 63 9 2 Audio 64 9 3 Name 1 4 65 9 4 Keyboard 66 9 5 Mouse 66 9 6 Reset PS 2 67 9 7 EDID DDC 67 10 OSD USB Device 1 4 71 10 1 USB Port Status 71 10 2 Switching Mode 72 10...

Page 8: ...kbox com Page 8 Table of Contents Appendix E DCP XML Remote Control 96 Appendix F Supported Touchscreen Controller 97 Appendix G Supported Video Input 98 Appendix H Supported Video Output 100 Appendix...

Page 9: ...annel selection 1 Full Screen mode 1 Quad mode 1 PiP mode 1 Win mode Back panel 1 Power On Off switch Connectors CPU 4 DVI I F 4 6 pin mini DIN F 4 USB Type B F Console 1 DVI I F 6 USB Type A F 1 3 5...

Page 10: ...Modes There are four display modes Quad mode Full Screen mode PiP mode and Win mode Quad mode In this mode the screen is split into four fields of equal size each displaying the entire screen content...

Page 11: ...e displayed on the right hand side of the screen This enables simultaneous monitoring Figure 2 3 PiP mode screen Win mode In Win mode each video source is displayed in its own separate detached window...

Page 12: ...matrix USB 2 0 devices for example printer external memory memory stick Webcam 3D mouse finger printer can be switched to the connected computers 2 2 4 Operation There are six ways to operate ServSwit...

Page 13: ...al at the video input of the selected channel An LED lights yellow when there is a signal at the video input but another channel has been selected When the LED is dark there is no signal at the video...

Page 14: ...ible because the output resolution setting is not supported by the monitor After setting the correct output resolution 640 x 480 60 you can choose a resolution the connected monitor supports in the OS...

Page 15: ...l devices to this port to operate the ServSwitch 4site Flex remotely Execute firmware updates or manage the device using ConfDev via the control ports 6 RS 232 RJ 45 control port Connect external seri...

Page 16: ...Connecting the Unit to Power Plug the power cable into the power plug located on the rear panel of ServSwitch 4site Flex but do not turn the power on 3 2 Connecting the Console Monitor Keyboard Mouse...

Page 17: ...switch it to computers connected to ServSwitch 4site Flex ServSwitch 4site Flex supports transparent USB devices such as printer external memory 3D mouse and finger printer Keyboard Mouse Keyboard an...

Page 18: ...R AUDIO Enable audio output Select the audio source and adjust the volume Audio out Powered speakers Amplifier Headphones 1 3 2 Figure 3 4 A variety of device options are available to connect to the S...

Page 19: ...tocol RS 232 MODE CURRENT Set the current channel and mode START Set the channel and mode in which the device should boot CONFIGURATION BACKUP Save configuration settings RECALL Restore last saved con...

Page 20: ...gn computer names KEYBOARD Display type of keyboard PC1 PC2 PC3 or USB MOUSE Display type of mouse PS 2 PS 2 Wheel or USB Set USB mouse positioning absolute relative RESET PS 2 Reset PS 2 mouse and ke...

Page 21: ...Screen Display Use a serial or USB connection from a PC to ServSwitch 4site Flex to remotely open the OSD using ConfDev 3 The OSD pops up in the center of the screen on top of the video image Figure 4...

Page 22: ...window higher menu level or exit the OSD Changes in parameters are saved automatically 4 3 2 Navigation Using the Buttons on the Front Panel Corresponding keys on console keyboard Figure 4 3 Front pa...

Page 23: ...w displays the status of HDCP input and output encoding HDCP High bandwidth Digital Content Protection is an encoding system used to secure and transmit audio and video In the upper part of the window...

Page 24: ...EY and press the ENTER SELECT key to open the HOTKEY window Two different hotkey modes are available For multiple hotkey commands you can define one to four keys that are pressed simultaneously to ent...

Page 25: ...ouse or trackball To activate Hotmouse operation 1 Navigate to Enable Hotmouse 2 Change the setting to Yes There are two modes of Hotmouse operation Hotmouse Cursor and Hotmouse Menu Although Hotmouse...

Page 26: ...ut defines the period 1 to 30 seconds after which the selector will close automatically Default setting is 5 seconds Figure 4 8 Quad mode To open the active channel in Quad mode 1 Press hotkey Q 2 The...

Page 27: ...et the color for the inactive channels Selector Figure 4 10 Selector In Win mode use hotkey 1 4 to select a channel or window Or you can use the hotmouse function or front panel buttons 1 4 to select...

Page 28: ...D POSITION window Figure 4 11 System OSD Position screen Use this function to move the OSD window to any position on the screen 4 4 7 OSD Language Navigate with the arrow keys in the SYSTEM menu to th...

Page 29: ...ty levels are available By default all functions are enabled security level 0 To change the security level you must first enter a predefined password This six digit password is enclosed separately wit...

Page 30: ...O OUTPUT EDID VIDEO INPUT STATUS COMPUTER NAME 1 4 KEYBOARD MOUSE EDID DDC HELP HOTKEY ABOUT CONTACT SECURITY LEVEL 6 With Security Level 6 you have the following additional operations SYSTEM CONTROL...

Page 31: ...PUT VIDEO DVI VGA ROTATION CROPPING COMPUTER CHANNEL MAPPING MOUSE RESET PS 2 Switch video output to VGA using hotkey V or front panel buttons 1 2 SECURITY LEVEL 0 This is the default setting of ServS...

Page 32: ...ample 4 4 10 Control Navigate with the arrow keys in the SYSTEM menu to the entry CONTROL Press ENTER SELECT to open the CONTROL window Figure 4 17 System Control screen Off selected The device can be...

Page 33: ...tch 4site Flex ServSwitch 4site Flex responds to each DCP message sent by the control device with a DCP reply This reply includes the values of all settings queried or set by means of the last message...

Page 34: ...e synchronization Figure 4 20 System Control DCP mode Synchronize selected IMPORTANT Each time you restart a ServSwitch 4site Flex set to synchronize it will send all its settings to the next connecte...

Page 35: ...a the serial Y to the RX input of ServSwitch 4site Flex 2 ServSwitch 4site Flex 2 adopts the settings and sends a DCP message via TX output over the Y cable to the RX input of ServSwitch 4site Flex 3...

Page 36: ...apter 4 On Screen Display Table 4 1 Maximum security levels Item Maximum Security Level CONSOLE CHANNEL 6 VIDEO CHANNEL 6 VIDEO LAYOUT 5 PiP LAYOUT 4 PiP HEIGHT 4 PiP OFFSET 4 PiP ZOOM 4 PiP CHANNEL 4...

Page 37: ...Full Screen Quad PiP or Win Mode or Test Pattern active channel and PiP settings that ServSwitch 4site Flex uses after a reset or when the system is powered up When the START menu is called up the cur...

Page 38: ...the option PiP CHANNEL to define which channel should appear in the single window See the section Display Modes for details PiP size Adjust the size of PiP images to your requirements 12 single mode...

Page 39: ...724 746 5500 blackbox com Page 39 Chapter 5 OSD Mode Figure 5 4 Triple gap Figure 5 5 Triple no gap Figure 5 6 Triple tile...

Page 40: ...en different display modes Figure 5 7 PiP display mode single Single fixed One channel is selected to be displayed as permanent PiP image Only the active channel full image can be switched Press front...

Page 41: ...Only the PiP can be switched Press front panel buttons 1 2 3 or 4 to switch the full image Single scan Figure 5 10 Single scan mode Within a PiP image when the three other video sources are displayed...

Page 42: ...arrows can be used to select the horizontal or vertical position or size of the windows Activate the checkbox ASPECT RATIO to retain the aspect of the video source 5 5 Test Pattern Navigate with the a...

Page 43: ...hapter 5 OSD Mode We recommend that you use all available test patterns for the test procedure To exit TEST PATTERN mode use the OSD the front panel buttons Full Quad PiP or Win or hotkey commands acc...

Page 44: ...es the current device settings including the start mode set in MODE START Additionally EDID data from the 4 inputs is also saved For details on creating an external backup to a file see the section De...

Page 45: ...mmand Execution of this command results in a complete reset and reboot of ServSwitch 4site Flex with factory defaults FACTORY DEFAULTS SYSTEM HOTKEY Multiple Hotkey Hotkey Ctrl Alt HOTMOUSE ON Hotmous...

Page 46: ...annels CONTRAST 56 all channels HORIZ POSITION auto all channels VERT POSITION auto all channels SCREEN WIDTH 0 screen width correction of all channels PHASE 0 all channels FORMAT Fit to screen No all...

Page 47: ...the selection menu Use arrow keys to select the desired line in the list shown on the right and press ENTER SELECT for the new video format The new output mode is visible for 10 seconds Within this t...

Page 48: ...to the entry KEYBOARD Press ENTER SELECT to open the KEYBOARD window Set the keyboard layout to the desired language English Deutsch German Espa ol Spanish Fran ais French Italiano Italian or Japanes...

Page 49: ...e touchscreen window Calibration After connecting a touchscreen to the ServSwitch 4site Flex for the first time calibrate the touchscreen Open CONSOLE TOUCHSCREEN menu choose CALIBRATE and press ENTER...

Page 50: ...uching the quadrant This activates the keyboard and mouse of that quadrant and allows the computer that was operating in quad mode to operate in full screen mode temporarily The other sources are not...

Page 51: ...onnected to ensure that mouse acceleration is switched off and mouse scaling is set to 1 1 Resetting the mouse position When using relative positioning mode the actual position of the mouse cursor and...

Page 52: ...d mouse are operating the computer If you use graphics cards with multiple video outputs you must assign the computer s mouse and keyboard to the corresponding video output Channels 1 4 Example If a c...

Page 53: ...ack Figure 7 11 Select Color Console Background Image selected Use BACKGROUND COLOR to set the color of the background Enter the desired color in 24 bit color red green and blue values A preview of th...

Page 54: ...ID memory If VIDEO OUTPUT is set to auto the ServSwitch 4site Flex uses the optimum output resolution offered by the EDID EDID Extended Display Identification Data is a VESA standard data format that...

Page 55: ...open the INPUT STATUS window Figure 8 1 Video Input Status screen Resolutions at the four video inputs are shown under INPUT STATUS Resolution recognition at the four video inputs is automatic Some a...

Page 56: ...or DVI is to be displayed If the setting DVI VGA is selected ServSwitch 4site Flex will first check the digital input If there is no signal at this input the analog signal input will be checked This...

Page 57: ...hannels overlap the monitor display should have a total of lines no higher than 2028 If the aspect ratio is not locked in Win mode you can t use both size reduction and enlargement simultaneously for...

Page 58: ...Analog Input Only Use the arrow keys to navigate in the VIDEO menu to the entry BRIGHTNESS or CONTRAST and press ENTER SELECT to open the BRIGHTNESS or CONTRAST windows Figure 8 6 Video Brightness Con...

Page 59: ...en manual ly Use the arrow keys to navigate to the AUTO MAN field and set to MAN for manual Use the or keys in the value field to adjust the horizontal position between 63 and 63 and the vertical posi...

Page 60: ...deo Phase screen Incorrect phase sampling time of pixel color value may result in blurring bad contrast or poor legibility Use this setting to adjust phase 8 9 Format Use the arrow keys to navigate in...

Page 61: ...r for example with an aspect ratio of 16 10 and the active channel does not have a wide screen aspect ratio e g 4 3 PiPs are placed aside the full image of the active channel in the black bar on the r...

Page 62: ...724 746 5500 blackbox com Page 62 Chapter 8 OSD Video Figure 8 12 PiP mode for wide screen monitors Full screen is positioned on the left hand side in PiP mode Full screen mode...

Page 63: ...nnel Mapping screen In the CHANNEL MAPPING menu you can change the assignment between physical input ports and logical channels This can be useful for instance if computer needs to be shown on another...

Page 64: ...t the audio source from the list To ensure that the audio source is the computer being currently operated select active channel from the list For a fixed audio source select one of the computers from...

Page 65: ...PUTER menu to the entry NAME 1 4 and press ENTER SELECT to open the NAME 1 4 window Figure 9 3 Computer Name 1 4 Change Name screens Use the section NAME to assign a name to each of the four windows d...

Page 66: ...yboard screen Use this display feature to identify which keyboard type USB PC1 PC2 or PC3 has been recognized at which computer port 9 5 Mouse Use the arrow keys to navigate in COMPUTER menu to the MO...

Page 67: ...reen pads or KVM extenders 9 6 Reset PS 2 Use the arrow keys to navigate in the COMPUTER menu to the entry RESET PS 2 and press ENTER SELECT to open the RESET PS 2 window Figure 9 6 Computer Reset PS...

Page 68: ...SELECT to open the window with detailed settings for this EDID Select a video mode for the channel using the arrow keys Press ENTER SELECT to confirm the selection Two freely selectable video modes ca...

Page 69: ...gramming the expected video signal into the input EDID Use the arrow keys to navigate to the first video mode entry and press ENTER SELECT to open the window with a list of selectable video modes In t...

Page 70: ...ng will overwrite the automatic analog input mode detection If you connect a different video source or change the video mode from the PC you may need to change this setting again to get correct result...

Page 71: ...one computer to the stick and from the stick to another computer connected to ServSwitch 4site Flex Data can be copied between computers without being networked Use the arrow keys to navigate in the...

Page 72: ...o chose one of the following modes to change the switching mode 1 Manual switching with warning This mode allows switching the USB port manually by selecting one of the computers connected But before...

Page 73: ...device or use the front panel buttons as described in the OSD Exit the menu The new name will automatically be saved and displayed in the other menus Figure 10 4 USB Device Change Name screen NOTE Us...

Page 74: ...ys to navigate in the HELP menu to the desired line and press ENTER SELECT to open the corresponding window Figure 11 1 Help About Details HELP ABOUT displays the current revision levels hardware and...

Page 75: ...e activated via touchscreen Tap the screen twice and leave your finger pressed on the touchscreen after the second tap tap hold like a double click without lifting the finger on the second click until...

Page 76: ...and click the left mouse button Channel 1 is active Channel 3 is selected Channel 3 is active Figure 12 3 Example Switch from Channel 2 to Channel 3 Hotmouse cursor in Quad mode Switching active chan...

Page 77: ...r Move the Hotmouse Cursor to the PiP image area hold down the left mouse button and drag the PiPs to the desired vertical position NOTE As soon as the hotmouse cursor moves over a PiP image its appea...

Page 78: ...you want to activate and press the left mouse button NOTE When the hotmouse cursor moves over a window its appearance changes arrows channel number To close the hot mouse cursor left double click or u...

Page 79: ...window and the following buttons will appear O Open OSD hotmouse context menu S Swap signal windows After this is selected the other window is clicked R Toggle aspect ratio locking for current window...

Page 80: ...vidual symbols Figure 12 12 Hotmouse menu in PiP mode Hotmouse Menu in PiP mode Click with the left mouse button on the arrow symbols to either increase or decrease the values in question Clicking on...

Page 81: ...the left mouse button to activate it You can also switch to a different mode with the left mouse button Figure 12 14 Hotmouse menu in Quad mode Figure 12 15 Quad mode Hotmouse Menu FULLSCREEN MODE Us...

Page 82: ...click the left mouse button to activate it Change the posi tion and size of PiP images and PiP zoom Change PiP mode triple triple gap single fixed single direct single scan and scan time Triple gap P...

Page 83: ...hat the main image and the PiP images are shown as large as possible without overlapping Figure 12 20 Triple tile Single fixed One selected PiP image is permanently displayed Single direct Press the f...

Page 84: ...the hotmouse menu in WIN mode to save the position of your channel windows Four different configuration sets can be saved under win1 win2 win3 or win4 1 Enter Win mode 2 Position and or resize your ch...

Page 85: ...more efficient and accurate assistance if you have a complete description including the nature and duration of the problem when the problem occurs the components involved in the problem any particular...

Page 86: ...in sequence As a double click hotkey you can choose one of the following keys Ctrl Shift Alt Scroll Examples Hotkey Scroll Scroll Hotkey Ctrl Ctrl NOTE In command mode hotkey is activated LED flashes...

Page 87: ...tly open USB Device 1 4 Hotkey V Safe output mode Hotkey I Directly open OSD PiP menu in the background display mode switches to PiP as long as the menu is open Hotkey M Open Close the Hotmouse Hotkey...

Page 88: ...COM port Your ServSwitch 4site Flex The installation CD containing the confdevEn exe program The enclosed serial cable RJ 45 DB9 adapter RJ 45 CAT5 cable USB or COM ports Rear panel Figure B 1 Hardwar...

Page 89: ...te Flex is connected to Figure B 3 Settings screen Remote OSD operation Click the green arrow to open the On Screen Display OSD of ServSwitch 4site Flex remotely on your external Windows computer The...

Page 90: ...upported for background images The file used should have a maximum size of 2 MB The maximum resolution will be that of the connected monitor If an image of another format needs to be used it must firs...

Page 91: ...x A 256 color bitmap is uploaded from the user PC to ServSwitch 4Site Flex using the ConfDev utility Storing a configuration ConfDev can also be used to store device configurations to a file on your P...

Page 92: ...ing a configuration Loading a configuration ConfDev can be used to load device configurations from a file on your PC Open the ConfDev menu DEVICE LOAD CONFIGURATION The Open dialog will appear from wh...

Page 93: ...B cable USB A USB B the current executable firmware file Follow these steps 1a Use the serial cable to connect the COM port of your computer to the RS 232 port on ServSwitch 4site Flex OR 1b Use the U...

Page 94: ...rmware file 3 Set the desired COM port 4 Press Update LEDs 1 4 on the front panel of the ServSwitch 4site Flex flash blue during the update Additionally the upgrade process is indicated by an OSD wind...

Page 95: ...RJ 45 port at the rear panel of ServSwitch 4site Flex This adapter connects to your external serial control device for example computer You can connect any CAT5 cable to the adapter The other end of t...

Page 96: ...ex For a general description of XML go to at http www w3 org XML The XML scheme for DCP can be found on the enclosed CD under the name dcp xsd For a detailed description on how to use DCP XML with Ser...

Page 97: ...Q USB R5W HT580 R by XanQ Technology Corporation 3M MicroTouch MicroTouch EX II new release delivered since 2009 with support of HID MicroTouch DST only restriction first calibrate it at computer then...

Page 98: ...MT SVGA 800 x 600 75 75 X DMT SVGA 800 x 600 85 85 180 X DMT XGA 1024 x 768 50 22 50 CVT XGA 1024 x 768 60 60 X DMT XGA 1024 x 768 70 70 X DMT XGA 1024 x 768 75 75 X DMT XGA 1024 x 768 85 85 X DMT XGA...

Page 99: ...T SXGA 1400 x 1050 60 60 DMT SGI 1600 x 1024 60 60 CVT UXGA 1600 x 1200 50 50 CVT UXGA 1600 x 1200 60 60 X DMT UXGAr 1600 x 1200 50 50 CVT UXGAr 1600 x 1200 60 60 CVT WSXGA 1680 x 1050 60 60 DMT HDTVp...

Page 100: ...VGA 800 600 75 SVGA 800 600 85 XGA 1024 768 50 XGA 1024 768 60 XGA 1024 768 70 XGA 1024 768 75 XGA 1024 768 85 SXGA 1280 1024 50 SXGA 1280 1024 60 SXGA 1280 1024 75 SXGA 1400 1050 50 SXGA 1400 1050 60...

Page 101: ...eo output display video formats Mode Horizontal Vertical Hz WUXGAr 1920 1200 60 HDTVp 1280 720 50 HDTVp 1920 1080 24 HDTVp 1920 1080 50 HDTVp 1920 1080 60 NOTE When set to auto by default ServSwitch 4...

Page 102: ...nels or to switch the display mode of any of the ServSwitch 4site Flex units in the master slave system Different levels master or slave require different types of hotkeys For example keep the hotkey...

Page 103: ...724 746 5500 blackbox com Page 103 NOTES...

Page 104: ...wer and surge protection products to media converters and Ethernet switches all supported by free live 24 7 Tech Support available in 30 seconds or less Copyright 2012 Black Box Corporation All rights...

Reviews: