background image

724-746-5500   |   blackbox.com 


Page 29

Chapter 3: Installation and Configuration

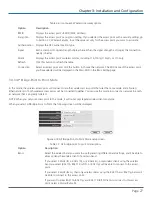
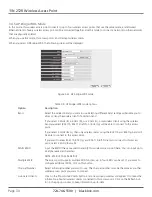
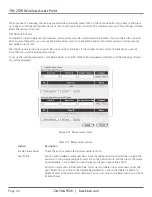
Table 3-8. AP bridge-point to multi-point mode options.


Option  


Description


Band 


 Select the wireless band you want to use. Selecting a different band setting will enable the AP 
to allow or deny the wireless client of a certain band. 


 If you select 2.4GHz (B), 2.4GHz (N), or 2.4GHz (G), only wireless clients using the wireless 
band you select (802.11b, 802.11 Draft-N, or 802.11g) will be able to connect to this access 
point.


 If you select 2.4GHz (B+G), then only wireless clients using the 802.11b and 802.11g band will 
be able to connect to this access point. 


 If you want to allow 802.11b, 802.11g, and 802.11 Draft-N clients to connect to this access 
point, select 2.4GHz (B+G+N).


Channel Number  

 Select a channel number you want to use. The channel number must be the same as another 
wireless access point you want to connect.


MAC Address 1-4 

Input the MAC address of the wireless access point you want to connect.


Set Security 


 Click on this button to select an encryption mode for the wireless link, and a new popup win-
dow will appear. Refer to Section 3.7 for detailed descriptions.

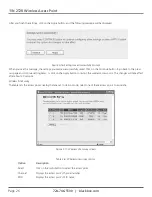
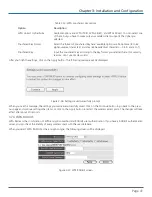
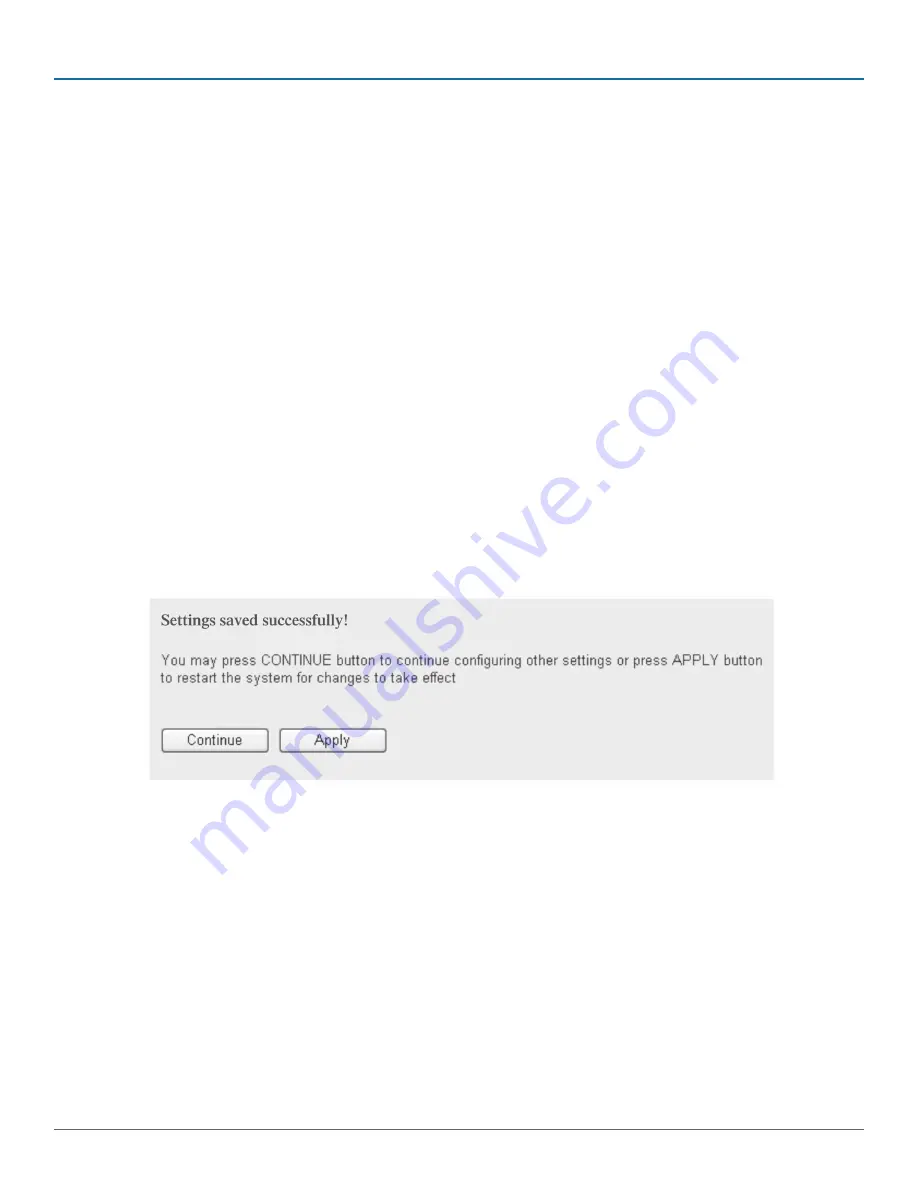
After you finish the settings, click on Apply, and the following message will be displayed:

Figure 3-21. Settings saved successfully prompt.

When you see this message, the settings you made are successfully saved. Click on the Continue button to go back to previous 
page and continue setting other items, or click on the Apply button to restart the wireless access point. The changes will take 
effect after about 30 seconds.

Summary of Contents for 11N 2T2R

Page 1: ...ng from cabinets and racks and power and surge protection products to media converters and Ethernet switches all supported by free live 24 7 Tech support available in 20 seconds or less Copyright 2009 All rights reserved Black Box Tech Support FREE Live 24 7 Tech support the way it should be Great tech support is just 20 seconds away at 724 746 5500 or blackbox com ...

Page 2: ...eless Access Point Order toll free in the U S Call 877 877 BBOX outside U S call 724 746 5500 FREE technical support 24 hours a day 7 days a week Call 724 746 5500 or fax 724 746 0746 Mailing address Black Box Corporation 1000 Park Drive Lawrence PA 15055 1018 Web site www blackbox com E mail info blackbox com Customer Support Information September 2009 WAP 300BGN ...

Page 3: ...logies Inc Any other trademarks mentioned in this manual are acknowledged to be the property of the trademark owners We re here to help If you have any questions about your application or our products contact Black Box Tech Support at 724 746 5500 or go to blackbox com and click on Talk to Black Box You ll be live with one of our technical experts in less than 20 seconds ...

Page 4: ...ss Setup 16 3 2 4 Windows Vista IP Address Setup 18 3 2 5 Connnecting to the Web Management Interface 19 3 3 View System Status and Information 20 3 4 Select an Operating Mode for the Wireless Access Point 22 3 4 1 AP Mode 22 3 4 2 Station Infrastructure 25 3 4 3 AP Bridge Point to Point Mode 27 3 4 4 AP Bridge Point to Multipoint Mode 28 3 4 5 AP Bridge WDS Mode 30 3 4 6 Universal Repeater 31 3 5...

Page 5: ...3 10 2 IP Address of the Wireless Access Point 48 3 10 3 DHCP Server 49 4 Advanced Configuration 51 4 1 Configuration Backup and Restore 51 4 2 Firmware Upgrade 52 4 3 System Reset 52 Appendix A Troubleshooting 54 A 1 Problems Solutions 54 A 2 Calling Black Box 55 A 3 Shipping and Packaging 55 Appendix B Glossary 56 ...

Page 6: ...encouraged to try to correct the interfer ence by one of the following measures Reorient or relocate the receiving antenna Increase the separation between the equipment and receiver Connect the equipment into an outlet on a circuit different from that to which the receiver is connected Consult an experienced radio TV technician for help Caution Changes or modifications not expressly approved by th...

Page 7: ...ue impidan el flujo de aire por los orificios de ventilación 10 El equipo eléctrico deber ser situado fuera del alcance de fuentes de calor como radiadores registros de calor estufas u otros aparatos incluyendo amplificadores que producen calor 11 El aparato eléctrico deberá ser connectado a una fuente de poder sólo del tipo descrito en el instructivo de operación o como se indique en el aparato 1...

Page 8: ...re for the safety of those who install and use it However special attention must be paid to the dangers of electric shock and static electricity when working with electrical equipment All guidelines for this equip ment must therefore be followed at all times to ensure the safe use of the equipment EU Countries Intended for Use The ETSI version of this device is intended for home and office use in ...

Page 9: ...______________________________________________________________________________________ Page 8 ...

Page 10: ...es 2 3 Safety Information For safety follow these instructions 1 This access point is designed for indoor use only DO NOT place this access point outdoors 2 DO NOT put this access point in or near hot or humid places such as a kitchen or bathroom Also do not leave this access point in the car in summer 3 DO NOT pull any connected cable with force disconnect it from the access point first 4 If you ...

Page 11: ...nical Support at 724 746 5500 Wireless Access Point 3 dBi dipole antenna 2 pcs AC power adapter This user s manual 2 6 Front Panel The Wireless Access Point s front panel is shown in Figure 2 1 Table 2 1 describes its components 3 1 2 Figure 2 1 Front panel Table 2 1 Front panel components Number Component Light Status Description 1 PWR LED ON The access point is switched on and correctly powered ...

Page 12: ...on 4 Antennas Included detachable 3 dBi antennas connect here 5 Power connector Connects to an A C power adapter 6 RJ 45 connector Local Area Network LAN port 7 Reset WPS Resets the router to its factory default settings clears all settings or starts the WPS function Press and hold this button for 10 seconds to restore all set tings to factory defaults Press and hold this button for less than 5 se...

Page 13: ...onfigure the Wireless Access Point After connecting the access point to the network you will set up the access point s network parameters so that it can work prop erly in your network environment Before you can connect to the access point and start configuration procedures your computer must be able to get an IP address automatically use dynamic IP address If it s set to use a static IP address or...

Page 14: ...tallation and Configuration 2 Select Specify an IP address then input the following settings see Figure 3 2 IP address 192 168 2 2 Subnet Mask 255 255 255 0 Click OK when finished Figure 3 2 Input IP address and subnet mask ...

Page 15: ...panel Double click on the Network and Dial up Connections icons double click Local Area Connection and the Local Area Connection Properties win dow will appear Select Internet Protocol TCP IP then click on Properties see Figure 3 3 Figure 3 3 Local area connection properties screen 2 Select Use the following IP address then input the following settings IP address 192 168 2 2 Subnet Mask 255 255 25...

Page 16: ...Page 15 Chapter 3 Installation and Configuration Click OK when finished See Figure 3 4 Figure 3 4 Internet protocol TCP IP properties screen ...

Page 17: ...ft corner of your computer then click on the control panel Double click the Network and Internet Connections icon click on Network Connections and then double click on Local Area Connection The Local Area Connection Properties window will appear see Figure 3 5 Then click on Properties Figure 3 5 Local area connection properties screen General tab ...

Page 18: ...tion and Configuration 2 Select Use the following IP address see Figure 3 6 then input the following settings IP address 192 168 2 2 Subnet Mask 255 255 255 0 Figure 3 6 Internet protocol TCP IP properties Click OK when finished ...

Page 19: ...your computer then click on control panel Click View Network Status and Tasks then click Manage Network Connections Right click Local Area Network then select Properties The Local Area Connection Properties window will appear Select Internet Protocol Version 4 TCP IPv4 and then click on Properties Figure 3 7 Local Area Connection Properties screen Networking tab ...

Page 20: ...K when finished Figure 3 8 Properties window General tab 3 2 5 Connecting to the Web Management Interface All functions and settings of this access point must be configured via the web management interface Start your Web browser and input 192 168 2 1 in the address bar then press the Enter key The following message appears see Figure 3 9 Figure 3 9 Connect to web management interface screen ...

Page 21: ...me and password again you need to retype the user name and password correctly If you re certain that the user name and password you typed are correct see Appendix A Troubleshooting 3 3 View System Status and Information After you connect to the access point via a Web browser the first thing you see is the Status and Information page All system and network related information for this access point ...

Page 22: ...rform firmware upgrade this number will help you to determine if you need an upgrade Mode Displays the current wireless operating mode see Section 3 4 ESSID Displays the current ESSID the name used to identify this wireless access point Channel Number Displays the current wireless channel number Security Displays the current wireless security setting BSSID Displays the current BSSID a unique ident...

Page 23: ... this mode AP Bridge Point to Multi Point Establishes a wireless connection with other wireless access points using the same mode and links the wired network to these wireless access points Up to 4 access points can be connected in this mode AP Bridge WDS This mode is similar to AP Bridge to Multi Point but the access point does not work in bridge dedicated mode It accepts wireless clients while w...

Page 24: ... NOTE ESSID IS CASE SENSITIVE Multiple ESSID The access point supports multiple SSID function up to four SSIDs can be set If you want to configure additional SSIDs click on this button Channel Number Please select a channel number you wish to use If you know a certain channel number is being used by other wireless access points nearby don t use the same channel number Associated Clients Click on t...

Page 25: ...re You can input up to 32 alphanumerical characters NOTE ESSID IS CASE SENSITIVE Broadcast SSID Decide if the wireless access point will broadcast its own ESSID or not You can hide your wireless access point s ESSID set the option to Disable so only people who know the ESSID can connect WMM WMM Wi Fi Multimedia technology improves the performance of certain network applications such as audio video...

Page 26: ...02 11 Draft N or 802 11g can connect to this access point If you select 2 4GHz B G then only wireless clients using the 802 11b and 802 11g band can connect to this access point If you want to allow 802 11b 802 11g and 802 11 Draft N clients to connect to this access point select 2 4GHz B G N Main ESSID Input the ESSID the name used to identify this wireless access point here You can input up to 3...

Page 27: ... page and continue setting items or click on the Apply button to restart the wireless access point The changes will take effect after about 30 seconds Wireless Site Survey The table lists the access points nearby that are set to station mode select one of these access points to associate Figure 3 17 Wireless site survey screen Table 3 6 Wireless site survey options Option Description Select Click ...

Page 28: ...eless access point will connect to another wireless access point that uses the same mode and all wired Ethernet clients of both wireless access points will be connected together You can use this mode to connect a network to anoth er network that is physically isolated NOTE When you set your access point to this mode it will not accept regular wireless clients anymore When you select AP Bridge Poin...

Page 29: ...successfully prompt When you see this message the settings you made are successfully saved Click on the Continue button to go back to the previ ous page and continue setting other items or click on the Apply button to restart the wireless access point The changes will take effect after about 30 seconds 3 4 4 AP Bridge Point to Multi Point Mode In this mode this wireless access point will connect t...

Page 30: ...nnect to this access point select 2 4GHz B G N Channel Number Select a channel number you want to use The channel number must be the same as another wireless access point you want to connect MAC Address 1 4 Input the MAC address of the wireless access point you want to connect Set Security Click on this button to select an encryption mode for the wireless link and a new popup win dow will appear R...

Page 31: ...ct 802 11b 802 11 Draft N or 802 11g will be able to connect to this access point If you select 2 4GHz B G then only wireless clients using the 802 11b and 802 11g band will be able to connect to this access point If you want to allow 802 11b 802 11g and 802 11 Draft N clients to connect to this access point select 2 4GHz B G N MAIN ESSID Input the ESSID the name used to identify this wireless acc...

Page 32: ... saved You can click on the Continue button to go back to the previous page and continue setting other items or click on the Apply button to restart the wireless access point The changes will take effect after about 30 seconds 3 4 6 Universal Repeater In this mode the access point acts as a wireless repeater it can be configured as station and AP at the same time It uses the sta tion function to c...

Page 33: ...ltiple SSID functions up to four SSIDs can be set If you want to configure additional SSIDs click on this button Channel Number Select a channel number you want to use The channel number must be the same as another wireless access point you want to connect Associated Clients Click on the Show Active Clients button A new popup window will appear that contains the information about all wireless clie...

Page 34: ...d the WPS will do the setup for you This access point supports two types of WPS Push Button Configuration PBC and PIN code If you want to use PBC you have to switch this access point to WPS mode and push a specific button on the wireless client to start WPS mode To do this press the AP s Reset WPS button or click on the Start PBC button in the Web configuration interface If you want to use a PIN c...

Page 35: ... of passphrase keys for WPS connection Passphrase Key Displays the WPA passphrase All characters will be replaced by asterisks for security If encryption is not set on this access point nothing will be displayed here Config Mode There are Registrar and Enrollee modes for the WPS connection When Registrar is enabled the wireless clients will follow the access point s wireless settings for WPS conne...

Page 36: ...alue is 2346 RTS Threshold Sets the wireless radio s RTS threshold Do not modify the default value if you don t know what it is the default value is 2347 Beacon Interval Sets the wireless radio s beacon interval Do not modify the default value if you don t know what it is the default value is 100 DTIM Period Sets the wireless radio s DTIM period Do not modify the default value if you don t know wh...

Page 37: ...he WMM function the access point will define the priority of different kinds of data and give higher priority to applications which require instant responding This improves the performance of such network applications CTS Protect Enabling this setting will reduce the chance of radio signal collisions between 802 11b and 802 11g wireless access points We recommend setting this option to Auto TX Pow...

Page 38: ...is AP Bridge Point to Point AP Bridge Point to Multi Point or AP Bridge WDS Figure 3 30 AP bridge point to point screen Select from four security levels disable no security data encryption disabled WEP WPA pre shared key and WPA radius Refer to the following sections for detailed instructions NOTE If multiple SSIDs are enabled select the SSID network you want to configure in advance It s very impo...

Page 39: ...configure When you select Disable wireless encryption for the network is disabled Figure 3 31 Enable disable security screen After you finish the setting click on the Apply button and the following message will be displayed Figure 3 32 Settings saved successfully prompt When you see this message the settings you made are successfully saved Click on the Continue button to go back to the previ ous p...

Page 40: ...e Key Format There are two types of key format ASCII and Hex When you select a key format the number of key characters will be displayed For example if you select 64 bit as key length and Hex as key format you ll see the message at the right of Key Format is Hex 10 characters which means the length of WEP key is 10 characters Default Tx Key You can set up to four WEP keys and you can decide which ...

Page 41: ...ngs saved successfully prompt When you see this message the settings you made are successfully saved Click on the Continue button to go back to the previ ous page and continue setting other items or click on the Apply button to restart the wireless access point The changes will take effect after about 30 seconds 3 7 3 WPA Pre shared Key WPA Pre shared key is the safest encryption method Use it to ...

Page 42: ... t use simple words After you finish the settings click on the Apply button The following message will be displayed Figure 3 36 Settings saved successfully prompt When you see this message the settings you made are successfully saved Click on the Continue button to go back to the previ ous page and continue setting other items or click on the Apply button to restart the wireless access point The c...

Page 43: ...he RADIUS authentication server s IP address here address RADIUS Server Port Input the RADIUS authentication server s port number here The default value is 1812 RADIUS Server Password Input the RADIUS authentication server s password here After you finish the settings click on the Apply button and the following message will be displayed Figure 3 38 Settings saved successfully prompt When you see t...

Page 44: ...in RADIUS Server refer to the next section instead of an external RADIUS server RADIUS Server If you check this box the value of the internal RADIUS server fields will be ignored Enable 802 1x Enable or disable 802 1x user authentication Authentication RADIUS Server IP Input the RADIUS authentication server s IP address here address RADIUS Server Port Input the RADIUS authentication server s port ...

Page 45: ...dresses you need is more than this use the external radius server To set up the internal radius server click Radius Server on the left of the Web management interface and the following informa tion will be displayed Figure 3 41 Radius server screen Table 3 17 Radius server options Option Description Enable Radius Server Check this box to enable internal radius server function User Profile You can ...

Page 46: ... in the radius server database Click on the Reset button to uncheck all Select boxes After you finish the settings click on the Apply button and the following message will be displayed Figure 3 42 Settings saved successfully prompt When you see this message the settings you made are successfully saved Click on the Continue button to go back to previous page and continue setting other items or clic...

Page 47: ... MAC address entries Enable Wireless Check this box to enable MAC address restriction If unchecked no restriction will be enforced any Access Control wireless client with the proper encryption setting will be able to connect to this wireless access point MAC Address Input the MAC address allowed using this wireless access point here You don t have to add a colon or a hyphen just input 0 to 9 and a...

Page 48: ...he wireless access point The changes will take effect after about 30 seconds 3 10 System Utilities This access point provides some control functions including password IP address management and DHCP server functions Click System Utility on the left of the Web management interface to access these functions Below are detailed descriptions of every control function 3 10 1 Change Password You can chan...

Page 49: ...al network Remember this address or you will not be able to connect to this wireless access point s configuration menu The default IP address is 192 168 2 1 subnet mask 255 255 255 0 Press and hold the Reset WPS button for more than 10 sec onds to change the IP address back to the default value if you forget the IP address you set To change the IP address click System Utility on the left and the f...

Page 50: ...other items or click on the Apply button to restart the wireless access point The changes will take effect after about 30 seconds 3 10 3 DHCP Server This wireless access point can act as a DHCP server for your network and it s disabled by default If you want to activate this function click System Utility on the left and the following screen will be displayed Figure 3 49 DHCP server screen NOTE Rem...

Page 51: ... network This is optional Lease Time Choose a lease time how long every computer can keep a specific IP address for every IP address assigned by this access point from the drop down menu After you finish click on the Apply button and the following message will be displayed Figure 3 50 Settings saved successfully prompt When you see this message the settings you made are successfully saved Click on...

Page 52: ...ore the access point s configuration options Option Description Backup Settings Press the Save button and you ll be prompted to download the configuration as a file The default filename is config bin You can save it as another filename for different versions and keep it in a safe place Restore Settings Press the Browse button to pick a previously saved configuration file from your com puter and th...

Page 53: ...TE Never interrupt the upgrade procedure by closing the Web browser or physically disconnecting your computer from the access point since this could corrupt the firmware If the firmware you uploaded is corrupt the firmware upgrade will fail 4 3 System Reset If the access point is not working properly use this function to restart the access point this may help solve the problem This function is use...

Page 54: ...er 4 Advanced Configuration Figure 4 4 Confirm reset screen Click OK to reset the access point or click Cancel to abort Remember all connections between the wireless client and this access point will be disconnected ...

Page 55: ...upgraded the firmware and this happens contact Black Box Technical Support Possible Solution 7 If all of the above solutions don t work contact Black Box Technical Support at 724 746 5500 Problem I can t get connected to the wireless access point Solution 1 If encryption is enabled please re check the WEP or WPA passphrase settings on your wireless client Solution 2 Move closer to the wireless acc...

Page 56: ...port A 2 Calling Black Box If you determine that your 11N 2T2R Access Point is malfunctioning do not attempt to alter or repair the unit It contains no user serviceable parts Contact Black Box Technical Support at 724 746 5500 Before you do make a record of the history of the problem We will be able to provide more efficient and accurate assistance if you have a complete description including the ...

Page 57: ... series of four numbers separat ed by periods that identifies a single unique Internet computer host in an IP network Example 192 168 2 1 It consists of 2 por tions the IP network address and the host identifier The IP address is a 32 bit binary pattern which can be represented as four cascaded decimal numbers separated by aaa aaa aaa aaa where each aaa can be anything from 000 to 255 or as four c...

Page 58: ...Point to Point Protocol It is a communications protocol for transmitting information over Ethernet between different manufacturers Protocol A protocol is a set of rules for interaction agreed upon between multiple parties so that when they interface with each other based on such a protocol the interpretation of their behavior is well defined and can be made objectively without confu sion or misund...

Page 59: ...eb based management Graphical User Interface GUI Many devices support a graphical user interface that is based on the Web browser This means the user can use the familiar Netscape or Microsoft Internet Explorer to control configure or monitor the device being managed ...

Reviews: