


4
3
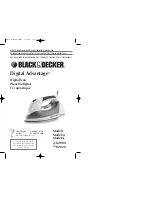
Product may vary slightly from what is illustrated.
How to Use
This appliance is for houseold use only.
Before first use, remove any labels, stickers, or tags that may be attached to the
body or soleplate of the iron.
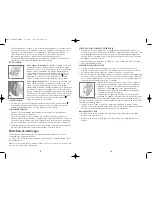
1. Using a clean measuring cup, tilt the iron and pour water
into the water-fill opening until the level reaches the MAX
mark on the water window
(B)
. Do not overfill.
2. Note: Use ordinary tap water for ironing. Do not use water
processed through a home softening system.
3. Plug in the iron. The light on the handle glows and a beep
sounds. The digital display illuminates. Temperature
setting 1 appears on the display.
4. To select a temperature setting from 1 to 7, press the
temperature button located below the digital display until
you reach the desired setting
(C)
. The readout will display
the setting number and an "up" arrow will flash until the
iron has reached the correct temperature for that setting.
Note: There is a convenient fabric/temperature guide on the
saddle of the iron
(D)
.
• For steam ironing, be sure the water reservoir is filled,
then turn the variable steam dial to the appropriate setting
for the fabric you are ironing
(E)
. For optimum
performance at any steam setting, let the iron stand
on its heel rest until operating temperature is reached,
as indicated on digital display (see fig. A), before
beginning to iron. When finished ironing on any steam
setting, turn the variable steam dial to "steam off" before
unplugging the iron.
• For dry ironing, move the variable steam dial to the “steam off” setting.
5. When the correct temperature is reached the iron will beep twice and the
arrow will disappear. The temperature setting number will continue to be
displayed in the lighted area .
6. To change temperature settings while ironing, just push the temperature button.
When a lower setting is selected, a "down" arrow will flash until the iron
temperature has lowered to the correct level for that setting.
7. About the Auto Off: When the iron is idle for 10 minutes, the iron will beep
one tone, the digital display will flash "Auto Off" and the iron will turn off.
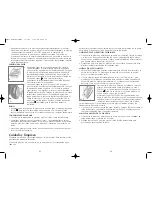
B
C
D
E
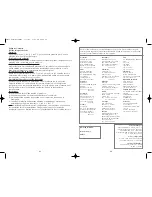
1. Spray nozzle
2. Water-reservoir opening
3. Digital display window
4. Power/temperature setting button
5. Surge-of-steam button
6. Spray button
7. Power indicator light
8. Heel rest
9. Water window with MAX mark
10. Variable steam dial
Note: D2020 electric cord is 2 feet longer.
Models D2000 and D2020
1. Digital display window
2. Surge-of-steam button
3. Spray button
4. Power/temperature
setting button
A
D2000.Pub178674RV06 1/17/06 3:29 PM Page 4