◈
Self-Test
1. Check that the paper is properly loaded.
2. While pressing the Feed button, turn the power off. Self-test begins.
3. Print the current state of the printer such as ROM version and DIP switch setting.
4. Print the current state of the printer and stop printing after the following phrase.
(The paper signal lamp continues to flicker):
SELF-TEST PRINTING.
PLEASE PRESS THE FEED BUTTON.
5. Press the Feed button to continue printing. Print the printable character forms.
6. End the self-test mode automatically and print the phrase below to cut the paper.
*** COMPLETED ***
7. When the self-test mode of the printer ends, the printer turns to the normal state.
※
Note
It is possible to check whether the printer works properly through the self-test, with which
printing quality, ROM version and DIP settings can be confirmed.
◈
Specifications
Item
Details
Printer
Printing Method
Thermal transfer printing
Dot Density
SRP-350III : 180 dpi (7dots/mm)
SRP-352III : 203 dpi (8dots/mm)
Printing Method
3inches 72
mm
2inches 48
mm
No. of Character per Line
(Default Value)
SRP-350III
: 42 (Font A) ,56 (Font B), 56 (Font C)
SRP-352III
: 48 (Font A) ,64 (Font B), 64 (Font C)
Printing Speed *1)
Max. 250 mm/sec
Receiving Buffer Size
4K bytes
SMPS Input Voltage
100~240 VAC
Frequency 50/60
Hz
SMPS Output Voltage
24 VDC
Temperature
Operating: 0~40
℃
Storage: -20~60
℃
Humidity
Operating: 10~80 % RH
Storage: 10~90 % RH
Paper excluded
Mechanism Head Life *2)
150 Km
Auto Cutter
1,800,000 cuts
Mechanism MCBF *2)
70,000,000 lines
Paper
Paper Type
Paper roll
Roll Width
3inches 79.5±0.5
mm
2inches 57.5±0.5
mm
Roll Diameter
Up to 83 mm
Roll Thickness
0.062~0.075 mm
Roll Tube
Inside diameter: Ø12 mm (0. 47
″
)
Outside diameter: Ø18 mm (0. 71
″
)
※
Note
*1) Printing speed may be slightly slow depending on the data transmission speed and the
combination of commands.
*2) The specifications were determined based on operation at normal temperature using
designated paper on default settings. They are subject to change depending on
temperature or printing level.
◈
Serial (RS-232C) Fixed Interface Model
Windows Driver Installation
1. Run Windows Driver installation file.
2. Click
Next
at the initial installation window.
3. Select
one of
Serial Ports
in the
Port Type
window and then click
Next
.
(Figure 1)
4. Click
Yes
and then restart the computer.
(Figure 2)
5. After restarting, move to the following route to see the set printer properties:
※
Windows XP: Select
Control Panel > Printer and Fax >
BIXOLON SRP-350III Icon> Right Mouse Button > Properties
.
※
Windows Vista or higher version: Select
Control Panel > Hardware and Sound >
Device and Printer
> BIXOLON SRP-350III Icon > Right Mouse Button >
Printer Properties
.
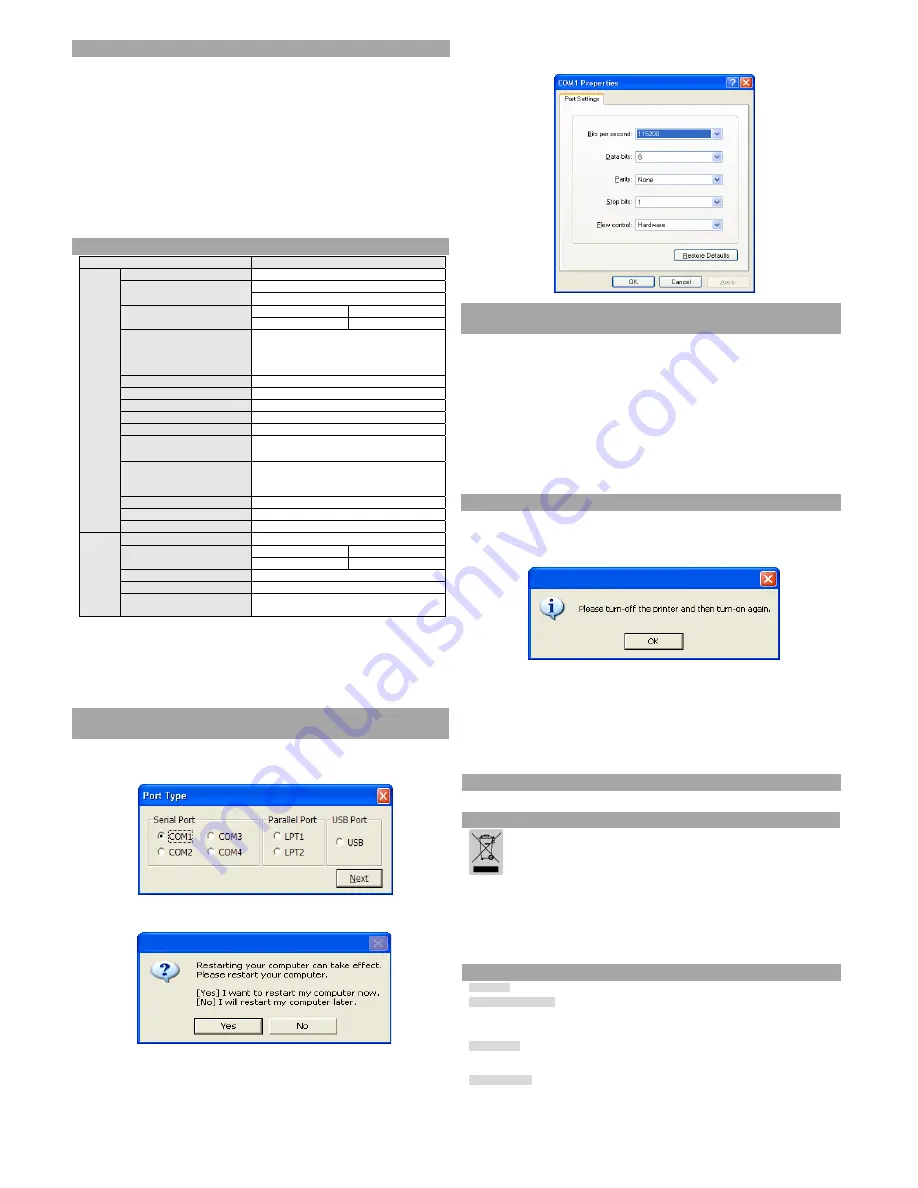
6. After selecting the
Port
tab in the
Properties
window and selecting
Port Configuration
and then setting it as same as the self-test result, click
OK
.
◈
Parallel (IEEE1284) Fixed Interface Model
Windows Driver Installation
1. Run Windows Driver installation file.
2. Click
Next
at the initial installation window.
3. Select
one of Parallel Ports
in the
Port Type
window and then click
Next
(Refer to Fig. 1.).
4. Click
Yes
and then restart the computer (Refer to Fig. 2).
5. After restarting, move to the following route to see the set printer properties:
※
Windows XP: Select
Control Panel > Printer and Fax >
BIXOLON SRP-350III Icon > Right Mouse Button > Properties
.
※
Windows Vista or higher version: Select
Control Panel > Hardware and Sound >
Device and Printer
> BIXOLON SRP-350III Icon > Right Mouse Button > Printer
Properties
.
6. Select the
General
tab in the
Properties
window and then
Printing Test Page
to ensure
printing works properly.
◈
USB Interface Model Windows Driver Installation
1. Run Windows Driver installation file.
2. Click
Next
at the initial installation window.
3. Select
USB
in the
Port Type
window and then click
Next
(Refer to Fig. 1.)
4. Turn off the printer and then back on and then click OK button.
5. After restarting, move to the following route to see the set printer properties:
※
Windows XP: Select
Control Panel > Printer and Fax >
BIXOLON SRP-350III Icon > Right Mouse Button > Properties
.
※
Windows Vista or higher version: Select
Control Panel > Hardware and Sound >
Device and Printer
> BIXOLON SRP-350III Icon > Right Mouse Button > Printer
Properties
.
6. Select the
General
tab in the
Properties
window and then
Printing Test Page
to ensure
printing works properly.
◈
Ethernet Interface Model Windows Driver Installation
Refer to the separate User Manual for Ethernet Interface Card (See CD).
◈
WEEE (Waste Electrical and Electric Equipment)
This marking shown on the product or its literature, indicates that is should not be
disposed of with other household wastes at the end of its working life. To prevent
possible harm to the environment or human health from uncontrolled waste
disposal, please separate this from other types of wastes and recycle it responsibly
to promote the sustainable reuse of material resources. Household users should
contact either the retailer where they purchased this product, or their local
government office, for details of where and how they can take this item for
environmentally safe recycling.
Business users should contact their supplier and check the terms and conditions
of the purchase contract. This product should not be mixed with other commercial
wastes for disposal.
☎
BIXOLON Co., Ltd.
●
Website
http://www.bixolon.com
●
Korea Headquarters
(Add) 7~8F, (Sampyeong-dong), 20, Pangyoyeok-ro241beon-gil,
Bundang-gu, Seongnam-si, Gyeonggi-do, 13494, Korea (ROK)
(Tel.) +82-31-218-5500
●
U.S. Office
(Add) BIXOLON America Inc., 3171 Fujita St, Torrance, CA 90505
(Tel.) +1-858 764 4580
●
Europe Office
(Add) BIXOLON Europe GmbH, Tiefenbroicher Weg 35 40472 Düsseldorf
(Tel.) +49 (0)211 68 78 54 0


