background image

- EN 8 -

Manufactured by  BIGBEN INTERACTIVE SA

396, Rue de la Voyette
CRT2 - FRETIN
CS 90414

59814 LESQUIN Cedex - France

www.bigben.eu

Made in China

• 

If there is an incoming call while “RR140I range” is connected to your cell phone for music playback, 

it will pause at once when you answer the call and resume after the call ended. (Sometimes it will 

pause after end the call, it depends on your cell phone.)

• 

The Bluetooth® word, mark and logo are registered trademarks owned by Bluetooth SIG, Inc. and 

any use of such marks by Bigben Interactive is under license. Other trademarks and trade names 

are those of their respective owners.

•  The undersigned, Bigben Interactive declares that the radio equipment of the RR140I type complies 

with the 2014/53/EU directive.

The complete text is available at 

https://www.bigben-interactive.co.uk/support/

Summary of Contents for RR140I

Page 1: ...IO RÉVEIL FM AVEC CHARGEUR USB ET CHARGEUR SANS FIL OPTIONNEL RR140I BT BLUETOOTH RR140I MODE D EMPLOI LISEZ ATTENTIVEMENT LE MODE D EMPLOI AVANT UTILISATION ET CONSERVEZ LE POUR CONSULTATION ULTÉRIEURE FR ...

Page 2: ... isolées suffisamment élevées pour présenter un risque d électrocution Sécurité Avertissement Ne retirez jamais le boîtier de cet appareil Ne lubrifiez jamais aucun composant de cet appareil Ne placez jamais cet appareil sur un autre équipement électrique Veillez à ce que l appareil ne soit pas exposé à la lumière directe du soleil à une flamme nue ni à une source de chaleur Ne regardez jamais dir...

Page 3: ...éconnexion doit rester directement manipulable 16 Assurez vous qu il y a assez d espace libre autour de l appareil pour la ventilation 17 Les piles ou bloc de piles ou batterie ne doivent pas être exposées à une chaleur excessive comme la lumière du soleil le feu etc 18 La plaque signalétique se trouve sous l appareil Entretien du produit 1 Débranchez toujours l appareil et attendez qu il ait refr...

Page 4: ...ionner avec une alimentation secteur domestique classique 100 240 V CA 50 60 Hz N essayez pas de l utiliser avec d autres alimentations électriques Cela pourrait endommager l appareil et annuler votre garantie Fabricant de l adaptateur Dong Guan Obelieve Electronic Co Ltd Modèle d adaptateur OBL 0502400E Alimentation par piles Assurez vous que les piles sont correctement insérées pour éviter tout ...

Page 5: ... MIN Minute Suivant 10 Éteindre l alarme 11 Affichage LED 12 Port de recharge USB 5 V 1 A 13 Entrée AUX 14 Antenne FM 15 Prise d alimentation 16 Compartiment piles Démarrage Branchez une fiche de l adaptateur secteur au dos de l appareil et son autre fiche dans une prise électrique standard Recharge USB Pour recharger votre téléphone portable ou un autre appareil branchez un câble de recharge USB ...

Page 6: ...onction radio AUX peuvent être utilisées en même temps Régler l horloge Appuyez sur le bouton marche arrêt pour entrer dans le mode veille Appuyez sur le bouton Régler l horloge 7 pendant 2 s L affichage clignote Appuyez sur les boutons des heures et des minutes 8 9 pour les régler L heure est affiché au format 24 heures Régler l alarme Appuyez sur le bouton marche arrêt pour entrer en mode veille...

Page 7: ...rie retentira une fois le délai sélectionné écoulé Le délai par défaut est de 90 minutes Plusieurs options sont disponibles pour l utilisateur 90 80 70 60 50 40 30 20 10 et Désactivé Quand la sonnerie retentit appuyez à nouveau sur le bouton Sieste ou 2 pour l éteindre Pour annuler la fonction sieste appuyez sur le bouton 5 et sélectionner OFF Sommeil Quand la radio est allumée appuyez sur le bout...

Page 8: ...pour allumer l appareil et sélectionnez le mode AUX avec le bouton Mode 2 2 Branchez la fiche 3 5 mm d un câble audio non fourni dans l entrée AUX 13 au dos de l appareil et branchez son autre fiche dans la sortie de ligne ou la prise casque d une source audio externe ou d un ordinateur 3 Appuyez à nouveau sur le bouton marche arrêt Mode pour quitter Bluetooth optionnel Couplage Bluetooth 1 Appuye...

Page 9: ...le logo sont des marques déposées appartenant à Bluetooth SIG Inc et toute utilisation de ces marques par Bigben Interactive est sous licence Les autres marques et noms commerciaux appartiennent à leurs propriétaires respectifs Par la présente Bigben Interactive déclare que l équipement radioélectrique du type RR140I est conforme à la directive 2014 53 UE Le texte complet de la déclaration UE de c...

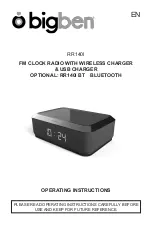
Page 10: ...FM CLOCK RADIO WITH WIRELESS CHARGER USB CHARGER OPTIONAL RR140I BT BLUETOOTH RR140I OPERATING INSTRUCTIONS PLEASE READ OPERATING INSTRUCTIONS CAREFULLY BEFORE USE AND KEEP FOR FUTURE REFERENCE EN ...

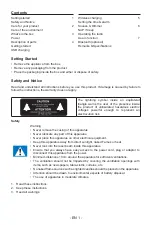
Page 11: ... uninsulated hazardous electric voltages powerful enough to represent an electrocution risk Safety Warning Never remove the casing of this apparatus Never lubricate any part of this apparatus Never place this apparatus on other electrical equipment Keep this apparatus away from direct sunlight naked Fames or heat Never look into the laser beam inside this apparatus Ensure that you always have easy...

Page 12: ...around the product for ventilation 17 Batteries battery pack or batteries installed shall not be exposed to excessive heat such as sunshine fire or the like 18 The rating label is placed on the bottom side of apparatus Care for your product 1 Always unplug the appliance and wait for the unit getting cold before cleaning 2 Do not play music at excessive volume levels as damage to hearing and or the...

Page 13: ... 100 240V 50 60Hz household power supply Do not attempt to operate the system using other power sources This may result in damage to the unit and void your warranty The adaptor manufacturer Dong Guan Obelieve Electronic Co Ltd Adaptor Model OBL 0502400E Battery power Be sure that the batteries are inserted correctly to avoid damage to the appliance Always remove the batteries when appliance will n...

Page 14: ...hour 9 MIN Minute skip 10 Alarm OFF 11 LED Display 12 USB charger 5V 1 A 13 Aux In 14 FM Antenna 15 AC socket 16 Battery compartment Getting started Plug the power adapter into the back of the clock and the other end into a standard electrical outlet USB charging To charge your device or mobile phone connect your USB charging cable not provided to the USB charging port 12 located on the back of th...

Page 15: ... by brand model Note Wireless Charging and Radio Aux in can be used at the same time Setting the time Press Power to enter standby mode Press hold Time Set 7 for 2 seconds The display will flash Press HR Hour Set Min Minute Set 8 9 to set the hour and minute The Clock will show 24H mode Setting the alarm Press Power to enter standby mode In standby mode press Alarm 1 3 for 2 seconds and the main d...

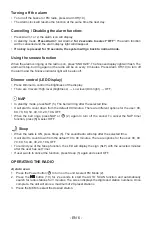
Page 16: ...tandby mode press NAP 5 The bell will ring after the selected time It will start to count down from the default 90 minutes There are different options for the user 90 80 70 60 50 40 30 20 10 OFF When the bell rings press NAP or 2 again to turn off the sound To cancel the NAP timer function press 5 select OFF Sleep When the radio is ON press Sleep 5 The sound radio will stop after the selected time...

Page 17: ...her end into the line out jack or headphone jack of an external audio source or computer 3 Press Power Mode again to exit Bluetooth optional Bluetooth pairing 1 Press the Mode button to reach BT 2 Select RR140I BT in your mobile phone 3 If you want to pair a new device Press BT PAIR to restart the pairing process Remarks Don t discard the electrical and electronic appliances in the regular waste d...

Page 18: ... call ended Sometimes it will pause after end the call it depends on your cell phone The Bluetooth word mark and logo are registered trademarks owned by Bluetooth SIG Inc and any use of such marks by Bigben Interactive is under license Other trademarks and trade names are those of their respective owners The undersigned Bigben Interactive declares that the radio equipment of the RR140I type compli...

Page 19: ... CON CARGADOR INALÁMBRICO Y CARGADOR USB OPCIONAL RR140I BT BLUETOOTH RR140I INSTRUCCIONES DE FUNCIONAMIENTO LEA DETENIDAMENTE ESTAS INSTRUCCIONES ANTES DE UTILIZAR EL PRODUCTO Y CONSÉRVELAS PARA FUTURAS CONSULTAS ES ...

Page 20: ...cia de tensión peligrosa no aislada dentro del producto de magnitud suficiente para suponer un riesgo de electrocución Seguridad Advertencia No abra nunca la carcasa de este aparato No lubrique nunca ninguna de las piezas de este aparato No coloque nunca este aparato sobre otros equipos eléctricos Mantenga este aparato alejado de la luz directa del sol o de fuentes de calor No mire nunca directame...

Page 21: ...ón debe estar siempre fácilmente accesible 16 Compruebe que haya siempre suficiente espacio libre alrededor del aparato para su ventilación 17 Las pilas pack de pilas o pilas instaladas no deben estar expuestas al calor excesivo a la luz del sol al fuego o similares 18 La placa identificativa está situada en la parte de abajo del aparato Cuidado del producto 1 Desenchufe siempre el aparato y esper...

Page 22: ... funcionar en una alimentación eléctrica doméstica normal de CA 100 240V 50 60Hz No intente usar el sistema con otras fuentes de alimentación De lo contrario podrían producirse daños en la unidad y anularse la garantía Fabricante del adaptador Dong Guan Obelieve Electronic Co Ltd Modelo de adaptador OBL 0502400E Alimentación por pilas Asegúrese de instalar las pilas observando la polaridad correct...

Page 23: ... de los minutos Avanzar 10 Desactivar alarma OFF 11 Pantalla LED 12 Cargador USB 5V 1 A 13 Aux In entrada para dispositivos auxiliares 14 Antena de FM 15 Conexión de CA 16 Compartimento de las pilas Primeros pasos Enchufe el adaptador de corriente a la parte trasera del reloj y el otro extremo a una toma de corriente estándar Carga USB Para cargar su dispositivo o teléfono móvil conecte el cable d...

Page 24: ... para entrar en el modo de espera Mantenga pulsado el botón de ajuste de la hora TIME SET 7 durante 2 segundos La pantalla parpadeará Pulse el ajuste de las horas HR minutos Min 8 9 para ajustar las horas y los minutos El reloj indicará el modo de 24H Ajuste de la alarma Pulse el botón de encendido apagado para entrar en el modo de espera Con el modo de espera seleccionado mantenga pulsado el botó...

Page 25: ...l intervalo seleccionado Por defecto el temporizador inicia una cuenta atrás de 90 minutos No obstante el usuario podrá seleccionar entre diferentes intervalos 90 80 70 60 50 40 30 20 10 y OFF desactivado Cuando suene el timbre pulse NAP o 2 de nuevo para apagar el sonido Para cancelar la función del modo de siesta pulse 5 para seleccionar OFF desactivado Dormir Con la radio encendida pulse Sleep ...

Page 26: ...n de encendido para encender el aparato y ponga el botón Mode 2 en la posición AUX In 2 Enchufe un extremo del cable de audio de 3 5 mm no incluido en la conexión Aux in 13 situada en el panel trasero y el otro extremo en la conexión de salida line out o en la conexión para auriculares de una fuente de audio externa o un ordenador 3 Pulse de nuevo el botón de encendido Mode para salir Bluetooth op...

Page 27: ...s comerciales registradas propiedad de Bluetooth SIG Inc y cualquier uso de tales marcas por Bigben Interactive se hace bajo licencia Otras marcas y nombres comerciales pertenecen a sus respectivos propietarios Yo el abajo firmante Bigben Interactive declaro que el equipo radioeléctrico del tipo RR140I cumple con la directiva 2014 53 UE El texto completo de la Declaración UE de conformidad está di...

Page 28: ...ARICABATTERIA WIRELESS E CARICABATTERIA USB OPZIONALE RR140I BT BLUETOOTH RR140I ISTRUZIONI D USO LEGGERE ATTENTAMENTE LE ISTRUZIONI SUL FUNZIONAMENTO PRIMA DI UTILIZZARE L UNITÀ E CONSERVARLE PER CONSULTAZIONI FUTURE IT ...

Page 29: ...atero indica la presenza di tensione pericolosa non isolata all interno del prodotto di potenza tale da costituire un rischio di folgorazione Sicurezza Avvertenze Non rimuovere l alloggiamento dell apparecchiatura Non lubrificare nessun componente dell apparecchiatura Non posizionare l apparecchiatura sopra altri dispositivi elettrici Tenere l apparecchiatura lontana dalla luce solare diretta da f...

Page 30: ...i che vi sia sufficiente spazio libero attorno al prodotto per la ventilazione 17 Le batterie batterie singole o pacco batterie non devono essere esposte a calore eccessivo come luce solare diretta fuoco o simili 18 Le specifiche tecniche sono riportate sulla parte inferiore dell apparecchio Manutenzione del prodotto 1 Scollegare l apparecchio dalla presa di corrente e attendere che si raffreddi p...

Page 31: ... alimentata a corrente domestica standard CA 100 240 V 50 60Hz Non tentare di alimentare l apparecchio tramite altri tipi di alimentazione per evitare danni all unità e l annullamento della garanzia Fabbricante dell adattatore CA Dong Guan Obelieve Electronic Co Ltd Modello dell adattatore CA OBL 0502400E Autonomia batterie Assicurarsi che le batterie siano inserite correttamente per evitare di da...

Page 32: ... ore 9 MIN minuti Avanti 10 Arresta sveglia 11 Display LED 12 Caricabatteria USB 5 V 1 A 13 Presa Aux in 14 Antenna FM 15 Presa di alimentazione CA 16 Vano batteria Operazioni preliminari Collegare un estremità dell alimentatore al retro dell apparecchio e l altra estremità a una presa di corrente standard Ricarica via USB Per ricaricare un dispositivo tramite USB collegare il cavo di ricarica USB...

Page 33: ... in possono essere usati contemporaneamente Impostare l orologio Premere il pulsante di accensione per attivare la modalità di standby Tenere premuto il pulsante Orologio 7 per 2 secondi Le cifre sul display lampeggeranno Premere HR ore e Min minuti 8 9 per impostare le ore e i minuti L orologio è in visualizzato in formato 24 ore Impostare la sveglia Premere il pulsante di accensione per attivare...

Page 34: ...ndby premere NAP 5 La suoneria si attiverà allo scadere dell intervallo selezionato Il conto alla rovescia è preimpostato su 90 minuti ma sono disponibili anche altre opzioni 90 80 70 60 50 40 30 20 10 e OFF Quando la suoneria si attiva premere NAP o 2 per arrestarla Per annullare il timer premere 5 e selezionare OFF Spegnimento automatico Quando la radio è accesa premere Sleep 5 La radio si spegn...

Page 35: ...un estremità del cavo audio da 3 5 mm non incluso alla presa Aux in 13 sul pannello posteriore e l altra estremità alla presa line out o alla presa per cuffie di un lettore audio esterno o un computer 3 Premere nuovamente il pulsante di accensione Modalità per uscire dalla modalità Aux in Modalità Bluetooth opzionale Abbinamento Bluetooth 1 Premere il pulsante Modalità per selezionare BT 2 Selezio...

Page 36: ...rati di proprietà di Bluetooth SIG Inc e l uso di tali marchi da parte di Bigben Interactive è sotto licenza Altri marchi e nomi commerciali sono di proprietà dei rispettivi titolari Il sottoscritto Bigben Interactive dichiara che l apparecchiatura radioelettrica del tipo RR140I è conforme alla direttiva 2014 53 UE Il testo completo della dichiarazione UE di conformità è disponibile all indirizzo ...

Page 37: ...PERTADOR FM COM CARREGADOR SEM FIOS E CARREGADOR USB OPCIONAL RR140I BT BLUETOOTH RR140I INSTRUÇÕES DE FUNCIONAMENTO LEIA ATENTAMENTE ESTAS INSTRUÇÕES ANTES DA UTILIZAÇÃO E GUARDE AS PARA FUTURAS REFERÊNCIAS PT ...

Page 38: ...tilizador da presença no interior do produto de voltagem elétrica perigosa não isolada com potência suficiente para constituir um risco de eletrocussão Segurança Aviso Nunca retire a estrutura deste aparelho Nunca lubrifique nenhuma peça deste aparelho Nunca coloque este aparelho dentro de outro equipamento elétrico Mantenha este aparelho afastado da luz direta do sol chamas sem proteção ou calor ...

Page 39: ...te em redor do produto para a ventilação 17 As pilhas conjunto de pilhas ou pilhas instaladas não devem ser expostas a calor em excesso como luz solar direta fogo ou algo semelhante 18 A placa das especificações encontra se no fundo do aparelho Cuidados com o produto 1 Retire sempre a ficha da tomada e espere que a unidade arrefeça antes de proceder à limpeza 2 Não reproduza música com um nível de...

Page 40: ...imentação doméstica normal AC de 100 240V 50 60Hz Não tente utilizar o sistema usando qualquer outra fonte de alimentação Isso pode danificar a unidade e anular a garantia O fabricante do adaptador Dong Guan Obelieve Electronic Co Ltd Modelo do adaptador OBL 0502400E Alimentação a pilhas Certifique se de que as pilhas são inseridas corretamente para evitar danos no aparelho Retire sempre as pilhas...

Page 41: ...oras 9 MIN Minutos Avançar 10 Desligar despertador 11 Visor LED 12 Carregador USB 5V 1 A 13 Entrada auxiliar 14 Antena FM 15 Entrada AC 16 Compartimento das pilhas Começar Ligue o adaptador da alimentação na parte traseira do relógio e a outra extremidade numa tomada elétrica Carregamento USB Para carregar o seu dispositivo ou telemóvel ligue o seu cabo de carregamento USB não fornecido na porta d...

Page 42: ...certar as horas Prima o botão da energia para entrar no modo inativo Prima e mantenha premido o botão de acerto da hora 7 durante 2 segundos O visor começa a piscar Prima o botão HR acerto das horas MIN minutos 8 9 para acertar as horas e os minutos O relógio apresenta o modo de 24H Acertar o despertador Prima o botão da energia para entrar no modo inativo No modo inativo prima e mantenha premido ...

Page 43: ...P sesta 5 A campainha toca passado o tempo selecionado Ele começa a contagem decrescente de 90 minutos predefinidos Existem diferentes opções para o utilizador 90 80 70 60 50 40 30 20 10 e Desligado Quando a campainha tocar prima de novo NAP ou 2 para desligar o som Para cancelar a função do temporizador da sesta prima 5 e selecione Desligar Adormecer Quando o rádio estiver ligado prima o botão de...

Page 44: ...midade na entrada para auscultadores de uma fonte de áudio externo ou computador 3 Prima de novo o botão da energia modo para sair Bluetooth opcional Emparelhamento Bluetooth 1 Prima o botão do Modo para escolher BT 2 Selecione RR140I BT no seu telemóvel 3 Se desejar emparelhar um novo dispositivo Prima BT PAIR para reiniciar o processo de emparelhamento Observações Não deite fora os aparelhos elé...

Page 45: ...final da chamada dependendo do seu telemóvel A palavra Bluetooth e logótipos são marcas registadas da Bluetooth SIG Inc Qualquer uso de tais marcas é efetuado sob licença da Bigben Interactive Outras marcas registadas e nomes comerciais pertencem aos respetivos proprietários O abaixo assinado Bigben Interactive declara que o equipamentos radioelétrico do tipo RR140I está em conformidade com a dire...

Page 46: ...MIT INDUKTIONS LADEFUNKTION UND USB LADEANSCHLUSS OPTIONAL RR140I BT BLUETOOTH RR140I BEDIENUNGSANLEITUNG BITTE LESEN SIE VOR DEM GEBRAUCH AUFMERKSAM DIE BEDIENUNGSANLEITUNG UND BEWAHREN SIE DIESE ZUM NACHLESEN AUF DE ...

Page 47: ...g im Inneren dieses Gerätes vorhanden ist die stark genug ist einen Stromschlag herbeizuführen Sicherheit Achtung Niemals das Gehäuse des Geräts entfernen Niemals Teile des Geräts mit Schmiermittel behandeln Niemals das Gerät auf anderen elektrischen Vorrichtungen aufstellen Gerät vor direkter Sonneneinstrahlung offenen Flammen und Hitze schützen Niemals in den Laserstrahl im Inneren des Geräts bl...

Page 48: ...n integrierte Akkupacks oder Batterien dürfen keiner übermäßigen Hitze ausgesetzt werden wie Sonneneinstrahlung offenes Feuer o Ä 18 Das Typenschild befindet sich an der Unterseite des Gerätes Produktpflege 1 Ziehen Sie vor dem Reinigen immer den Stecker des Gerätes aus der Steckdose und warten Sie bis sich das Gerät abgekühlt hat 2 Musik nicht mit übermäßiger Lautstärke hören da dies dem Gehör un...

Page 49: ...AC 100 V 240 V 50 60Hz ausgelegt Versuchen Sie nicht das Gerät mit anderen Stromquellen zu betreiben Dies kann zu Schäden am Gerät führen und Ihre Garantie aufheben Hersteller des Adapters Dong Guan Obelieve Electronic Co Ltd Adapter Modell OBL 0502400E Batteriestrom Achten Sie darauf die Batterien korrekt herum einzulegen um Beschädigungen am Gerät zu vermeiden Entfernen Sie die Batterien immer w...

Page 50: ... MEM 8 Zurück HR Stunde 9 MIN Minute Weiter 10 Wecker AUS 11 LED Anzeige 12 USB Ladegerät 5 V 1 A 13 Aux in 14 FM Antenne 15 AC Buchse 16 Batteriefach Erste Schritte Verbinden Sie den Netzadapter mit der Rückseite der Uhr und das andere Ende mit einer Standard Steckdose Aufladen über USB Um Ihr Gerät oder Mobiltelefon aufzuladen verbinden Sie Ihr USB Ladekabel nicht inbegriffen mit dem USB Ladeans...

Page 51: ...en Einstellen der Uhrzeit Drücken Sie Ein Aus um das Gerät in den Stand by Modus zu schalten Halten Sie Time Set 7 2 Sekunden lang gedrückt Das Display blinkt daraufhin Drücken Sie HR Stunde einstellen Min Minute einstellen 8 9 um Stunde und Minute einzustellen Der Wecker zeigt die Uhrzeit im 24h Format Einstellen der Weckzeit Drücken Sie Ein Aus um das Gerät in den Stand by Modus zu schalten Halt...

Page 52: ... beginnt den Countdown der voreingestellten 90 Minuten Dem Benutzer stehen verschiedene Optionen zur Verfügung 90 80 70 60 50 40 30 20 10 und OFF AUS Wenn der Klingelton ertönt drücken Sie erneut NAP oder 2 um den Klingelton auszuschalten Um die SCHLÄFCHEN Timerfunktion zu löschen drücken Sie 5 um AUS zu wählen Automatisches Ausschalten Drücken Sie Sleep 5 wenn das Radio eingeschaltet ist Der Ton ...

Page 53: ...en AUX In Modus einzustellen 2 Verbinden Sie ein Ende des 3 5 mm Audiokabels nicht inbegriffen mit der Aux in Buchse 13 an der Rückseite und das andere Ende mit der Line out Buchse oder dem Kopfhöreranschluss einer externen Audioquelle oder eines Computers 3 Drücken Sie Ein Aus Mode erneut um den Modus zu beenden Bluetooth optional nur bei Modellen mit Bluetooth Funktion Bluetooth Pairing 1 Drücke...

Page 54: ... und Logo sind eingetragene Handelsmarken von Bluetooth SIG Inc und jegliche Verwendung dieser Zeichen durch Bigben Interactive geschieht unter Lizenz Andere Handelsmarken und Handelsnamen sind Eigentum der jeweiligen Besitzer Hiermit erklärt Bigben Interactive dass das Produkt RR140I der Richtlinie 2014 53 EU entspricht Der vollständige Text der EU Konformitätserklärung ist unter der folgenden In...

Page 55: ...FM WEKKERRADIO MET DRAADLOZE LADER EN USB LADER OPTIONEEL RR140I BT BLUETOOTH RR140I HANDLEIDING LEES DEZE GEBRUIKSAANWIJZING ZORGVULDIG DOOR VOOR GEBRUIK EN BEWAAR VOOR LATERE RAADPLEGING NL ...

Page 56: ...igheid van ongeïsoleerde gevaarlijke spanning binnenin het product die sterk genoeg kan zijn om een gevaar voor elektrische schokken bij personen te vormen Veiligheid Waarschuwing Verwijder nooit de behuizing van dit toestel Smeer nooit een onderdeel van dit toestel Plaats dit toestel nooit op andere elektrische apparaten Houd dit toestel uit de buurt van direct zonlicht vlammen en warmte Kijk noo...

Page 57: ...terijen geïnstalleerde accu s of batterijen nooit bloot aan overmatige warmte zoals zonlicht vuur etc 18 Het typeplaatje bevindt zich aan de onderkant van het apparaat Onderhoud van het toestel 1 Haal de stekker uit het apparaat en wacht totdat het apparaat is afgekoeld voordat u het reinigt 2 Speel geen muziek af op een zeer hoog volume dit kan gehoorbeschadiging of schade aan het toestel veroorz...

Page 58: ...z te worden aangesloten Probeer niet om het apparaat op een andere voedingsbron aan te sluiten Dit kan schade aan het apparaat veroorzaken en uw garantie ongeldig maken Fabrikant van de adapter Dong Guan Obelieve Electronic Co Ltd Model van adapter OBL 0502400E Batterijvermogen Zorg dat de batterijen juist worden geïnstalleerd om schade aan het toestel te vermijden Verwijder altijd de batterijen w...

Page 59: ...n HR uur 9 MIN Minuten overslaan 10 Alarm UIT 11 LED scherm 12 USB lader 5V 1 A 13 Aux In 14 FM antenne 15 AC aansluiting 16 Batterijvak Aan de slag Sluit de netadapter aan op de achterkant van de wekker en steek de stekker vervolgens in een standaard stopcontact Via USB opladen Om uw apparaat of mobiele telefoon op te laden sluit uw USB laadkabel niet inbegrepen aan op de USB laadaansluiting 12 a...

Page 60: ...x in tegelijkertijd te gebruiken De tijd instellen Druk op Aan Uit om het toestel in stand by te zetten Druk en houd Tijd instellen 7 gedurende 2 seconden ingedrukt Het scherm knippert Druk op Uur instellen Minuten instellen 8 9 om het uur en de minuten in te stellen De tijd wordt in de 24 uur tijdnotatie weergegeven Het alarm instellen Druk op Aan Uit om het toestel in stand by te zetten In stand...

Page 61: ... ingestelde tijd rinkelt de bel De countdown start standaard bij 90 minuten De gebruiker kan echter uit verschillende varianten kiezen 90 80 70 60 50 40 30 20 10 UIT Eenmaal u de bel hoort druk opnieuw op DUTJE of 2 om het geluid uit te schakelen Om de DUTJE timer te annuleren druk op 5 en selecteer UIT Inslapen Als de radio speelt druk op Inslapen 5 Het geluid radio stopt met afspelen zodra de in...

Page 62: ...an de achterkant en het ander uiteinde op de line out aansluiting of koptelefoonaansluiting van een externe audiobron of computer 3 Druk opnieuw op Aan uit Modus om af te sluiten Bluetooth optioneel Bluetooth koppelen 1 Druk op de Modus knop totdat BT wordt bereikt 2 Selecteer RR140I BT in uw mobiele telefoon 3 Als u een koppeling met een nieuw apparaat wilt maken Druk op BT KOPPELEN om een nieuw ...

Page 63: ...et type van uw mobiele telefoon is het mogelijk dat het afspelen na het beëindigen van de oproep nog onderbroken is Het Bluetooth woord merk en logo zijn geregistreerde handelsmerken die eigendom zijn van Bluetooth SIG Inc en elk gebruik van deze merken door Bigben Interactive is onder licentie Andere handelsmerken en handelsnamen zijn eigendom van hun respectievelijke eigenaars Hierbij verklaar i...

Page 64: ......
Reviews: