- EN 7 -
B) Tuning
1. Set the Mode button (2) to the FM position.
2. Press
Skip - / + (8, 9) to automatically tune in to the next station.
3. Adjust the Volume (3, 4) to the desired level.
4. Press the Power Button
(2) to turn the radio off.
C) Storing stations in memory positions P01 to P20
1. Set the Mode (2) to the FM position.
2. Tune in to the desired station, press the
Skip - / + (8, 9). The current position number will
flash in the display, e.g. ‘P01, P02… P20’.
3. Press the
Skip - / + to select the station number.
4. Press the MEM (7) to save. 20 radio stations can be stored in memory.
5.
Press the (MEM) to select and listen to a saved station.
Antenna
Extend the wire to obtain the best reception. The user may need to turn or change the position of the
unit to improve reception.
AUX-IN function
1. Press the Power button
to turn on the unit & set the Mode (2) to AUX-In mode.
2.
Plug one end of the 3.5 mm audio cable (not included) into the Aux-in jack (13) on the back panel
and the other end into the line-out jack or headphone jack of an external audio source or computer.
3. Press Power
/ Mode again to exit.
Bluetooth (optional)
Bluetooth pairing
1. Press the Mode button
to reach “BT”.
2.
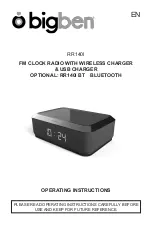
Select “RR140I BT” in your mobile phone.
3.
If you want to pair a new device: Press BT PAIR to restart the pairing process.
Remarks:
• Don’t discard the electrical and electronic appliances in the regular waste disposal.
• Take them to a collection point.
• Some components in these appliances may be hazardous to health and the environment.
Note :
To save energy, in Aux-in function / Bluetooth function (Optional), when the unit has no sound
output or no button is pressed for 30 minutes, the unit will be switched to stand-by mode automatically.
It can be switched ON by pressing the POWER selector again.
Specifications
Power supply: AC 100- 240V, 50/60Hz
Power consumption: 12W
Radio frequency coverage: F87.50 – 108 MHz
Operating Frequency: F87.5 – 108MHz,
Warning!
• Make sure that battery is inserted the right way and with the right polarity
• Remove exhausted battery from the product
• The supply terminals should not be short-circuited
• Dispose of battery safely
Summary of Contents for RR140I
Page 64: ......

