Bestbath is a registered trademark of Best Bath Systems Inc.
© 2018 Best Bath Systems Inc. All rights reserved.
Escape Series Walk-in Bathtub
I N S T A L L A T I O N I N S T R U C T I O N S
( C O N T I N U E D )
6
Reorder #FORM1092
4/18
Figure 7
Figure 8
Apply silicone to
the seam after
fastening flange
to the studs
5
Make final
connections at
drain and at hot and
cold supply lines
3
If the framing pocket is too
small, trim the extension
to fit and support edge
with plastic or metal angle
bracket (1" x 1" minimum).
4
Figure 9
Figure 10
STEP 4:
FINAL INSTALLATION
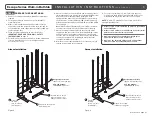
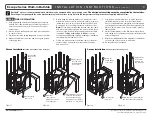
1. With all plumbing and electrical preparations complete
and the floor clean, double-check the tubing or wires to
ensure none have come loose. Then move the tub into
final position.
2. Place a level on the flat part of the deck in both directions
to check for level.
3. Pre-drill holes in the nailing flange and screw to the studs.
4. Make the final drain connection and hook up the hot and
cold supply lines.
5. Before filling the tub with water, use a damp soft cloth to
wipe down the door seal as well as the surface in the door
jamb where it comes in contact with the seal. See
Figure
2
on page 3 for how to adjust pressure at the door seal.
Note:
For the initial startup make sure the seal, door jamb
and door are dry. Although each tub is water tested at the
factory, it is the installer’s responsibility to water test after
installation.
Testing at this stage is critical
to ensure
nothing happened during shipping, handling or installation
that may result in a leak or poor seal.
6. Fill the tub, wait five minutes and then check for leaks at
the door hinge, around the door seal and at all fittings
and connections.
7. Turn the pump and/or blower on using the keypads
inside the tub and let it run for at least five minutes.
Check for leaks while the pump/blower is running and
check again five minutes after it has been turned off. In
places where a visual check is not possible, check for
leaks by hand.
8. Adjust the temperature of the fill water to a level that is
safe, taking into consideration any physical limitations the
end user may have.
9. Attach the cable/lanyard to the magnet’s screw and nut
on the inside of access hole to meet code.
10. Reinstall the front skirt panels.
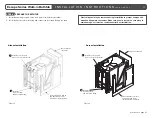
Alcove Installation
(shown with optional deck extension)
Apply silicone
to the seam
between tub
and end panel
4
Make final connections at drain
and at hot and cold supply lines
3
Corner Installation
(shown with optional end panel)
Bestbath
®
water, air and microbubble jet bathtubs may be equipped with a water mixing valve.
The desired valve settings must be completed by the installer.
Resetting or tampering with the valve mechanism may lead to serious injury. Refer to the temperature setting instructions supplied with the valves.
!
Check that the
tub is level
1
2
Screw nailing
flange to the
studs
Screw the
nailing flange
to the studs
2
Check that the
tub is level
1


