


Buttonholes
118
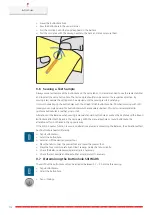
Adjusting the Thread Shank
For buttons on thicker fabrics, increase the thread shank = the distance between the button and the fabric.
Buttons sewn on thin fabrics or buttons for decorative purposes only are stitched without a «thread shank».
NOTICE! The adjustment of the thread shank is only possible when using the Button Sew-On
Foot #18.
> Loosen the screw on the back of the presser foot.
> Push the bar upwards according to the thickness of the fabric.
> Tighten the screw.
Sewing on a Button
Prerequisite:
•
The shank length is adjusted according the fabric thickness.
•
The Button Sew-On Foot #18 or an alternative presser foot is fitted.
•
The fitted presser foot has been selected in the user interface.
•
The feed dog is lowered.
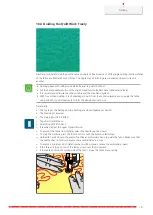
> Tap «Buttonholes».
> Select Button Sew-on Program No. 60.
> Turn the handwheel until the bobbin thread comes up.
>
NOTICE! The Button sew-on program always starts above the left hole of the button.
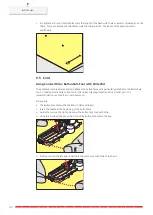
Position the button on the fabric. Place the button and the fabric beneath the needle so that the needle
stitches into the left hole.
For buttons with 4 holes, sew the first front pair of holes first.
> Lower the presser foot.
> Perform the first stitches in the left hole via the handwheel.
> Keep turning the handwheel until the needle changes to the right hole. In doing so, check whether the
needle goes into the right hole. If necessary, adjust the stitch width by turning the upper Multifunction
knob.
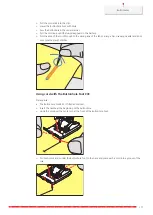
> Hold the threads and push the foot control.
– The machine sews on the button and stops automatically.
> For increased stability, sew the Button sew-on Program again.
> Cut the threads with the machine. Alternatively, pull the sewing projects from under the sewing machine
and trim the threads by hand. Pull the upper thread to the wrong side of the fabric and knot it with the
bobbin thread.
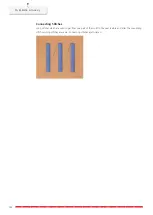
9.17 Sewing Eyelets
For increased stability sew the eyelet twice. Adjust stitch with the balance if necessary.
Prerequisite:
•
The Reverse Pattern Foot #1C or the Open Embroidery Foot #20C is fitted.
> Tap «Buttonholes».
> Select Eyelet with Small Zigzag No. 61 or Eyelet with Straight Stitch No. 62.
> Turn the, «Upper Multi-function Knob» or «Lower Multi-function Knob» to alter the size of the eyelet.
> Sew the Eyelet Program.
– The machine stops automatically at the end of the Eyelet Program.
> Use an awl, punch pliers or a hole punch to open the eyelet.
Summary of Contents for 570 QE
Page 1: ...BERNINA 570 QE User Manual...
Page 2: ......


