background image

Installation Manual


Solar  |  forced circulation system

FKB-SOL

Installation Manual

EN


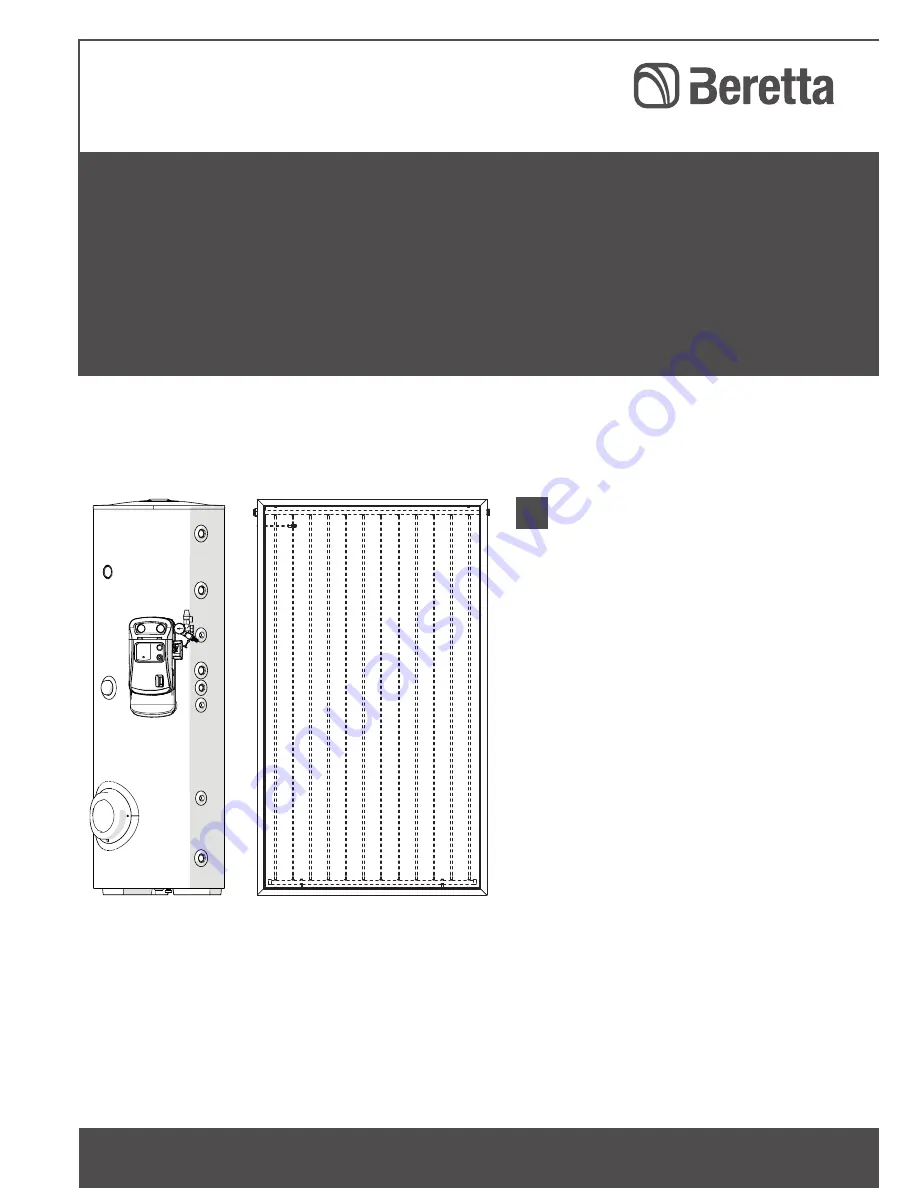
Summary of Contents for FKB-SOL 200/1

Page 1: ...Installation Manual Solar forced circulation system FKB SOL Installation Manual EN...

Page 2: ...e observed to ensure the trouble free installation and efficient functioning of your B forced circulation system Please accept our renewed thanks for your purchase Beretta CONFORMITY B storage cylinde...

Page 3: ...bleed valve available as an accessory 11 7 3 IDRA FI LE solar storage cylinder 11 7 3 1 System layout 12 7 3 2 Technical specifications 13 7 3 3 Storage cylinder water circuit 14 7 3 4 Overall dimens...

Page 4: ...he mains electricity supply if a supplementary heating element is installed shut off the water supply and notify B s Technical Assistance Service or a qualified heating engineer immediately b b Make s...

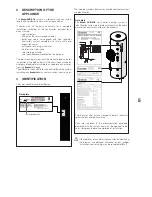
Page 5: ...lves and the complete system are identified by Data plate The B FKB SOL solar water heating system is identified by system data plates marked with the code description and serial number of the product...

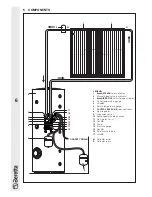
Page 6: ...ssory 3 B IDRA FI LE solar storage cylinder 4 Outlet temperature gauge 5 Valve M 6 Return temperature gauge 7 CONTROL BOX SUN B solar controller 8 Flow regulator 9 Expansion vessel 10 Sensor power cab...

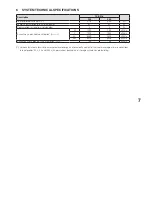
Page 7: ...W Annual non solar heat contribution Qnonsol M 1000 790 kWh a L 1975 1345 kWh a XL 3439 2509 kWh a XXL 4573 3508 kWh a Annual auxiliary electricity consumption Qaux 138 138 kWh a Value calculated in...

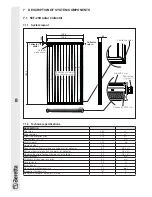
Page 8: ...Total area 2 30 m2 Exposed area 2 16 m2 Effective absorption area 2 15 m2 Connections M F 1 mm Empty weight 40 0 kg Liquid content 1 6 l Recommended flow rate for each line per m2 of collector 30 l h...

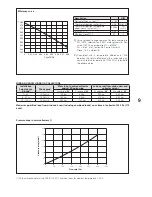
Page 9: ...lector and the surrounding air and with total solar radiation of 1000 W m2 referred to the exposed area WIND AND SNOW LOADS ON COLLECTORS Installation height above ground Wind speed Mass in kg to secu...

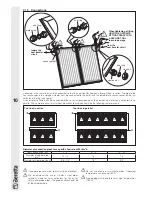
Page 10: ...ther in series provided each line contains no more than 6 collectors or in parallel The complete circuit must always be hydraulically balanced See the following sample layouts Two lines in series Two...

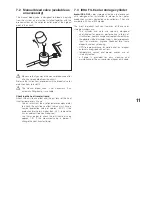
Page 11: ...old is higher than 26 C replace the mix or add anti freeze as required Use litmus paper to check the pH nominal value approx 7 5 If the measured value is below 7 change the heat transfer liquid 7 3 ID...

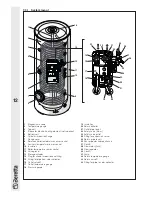
Page 12: ...nsulation 11 Boiler temperature sensor socket 12 Valve group 13 Storage cylinder 14 Plug for anode inspection and lifting 15 Fitting for pipe from solar collector 16 Outlet valve M 17 Outlet temperatu...

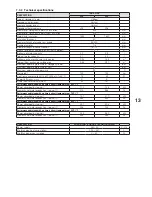
Page 13: ...operating pressure of coils 10 bar Maximum operating temperature 99 C Net weight 105 130 kg Heat loss according to EN 12897 2006 at T 45 C 74 69 W Energy efficiency class C B Useful non solar volume...

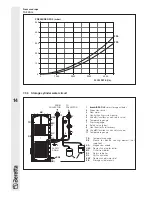
Page 14: ...Expansion vessel 3 Flow meter 4 Central heating system pump 5 Valve R functions as non return valve 6 Temperature gauge 7 Pressure gauge 8 Safety valve 6 bar 9 Heat transfer fluid recovery 10 Valve M...

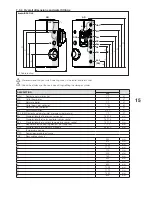
Page 15: ...om solar collector 1 M R Return to solar collector 1 M RL DHW recirculation 3 4 F EAF SB Domestic cold water inlet storage cylinder drain 1 F Psc Diameter length of boiler sensor socket 16 175 mm Psr...

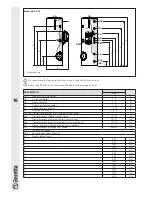
Page 16: ...R Return to solar collector 1 M RL DHW recirculation 3 4 F EAF SB Domestic cold water inlet storage cylinder drain 1 F Psc Diameter length of boiler sensor socket 16 175 mm Psr Diameter length of sola...

Page 17: ...17 GENERAL 7 4 Pump Residual head Water outlet and return group RESIDUAL HEAD mbar 800 700 600 500 400 300 0 200 400 600 800 FLOW RATE l h Tests performed with water at 20 C Flow regulator fully open...

Page 18: ...ar controller Heat is only transferred from the solar collector circuit to the storage cylinder when the temperature of the solar collectors exceeds that of the water in the storage cylinder It is the...

Page 19: ...DHW circulation EAF Domestic cold water inlet SB Storage cylinder drain Note The above schematic is purely indicative b b The domestic hot water system MUST INCLUDE an expansion vessel safety valve au...

Page 20: ...lat seal rings 1 located in the corner profiles of each collector b b This instruction manual is an integral part of the FKB SOL system Once located read it thoroughly and keep it safe b b STORE IN A...

Page 21: ...espect to the heat exchange coil inlet and outlet and mark the points to drill for the expansion plugs b b To avoid damage make holes in the storage cylinder insulation at the points marked before ins...

Page 22: ...tected against damage by the weather and birds and animals Angle of collectors General Solar collectors are designed to be installed at angles of between 15 minimum and 75 maximum Make sure that the b...

Page 23: ...o terminal strip MO1 in the solar controller terminals 1 2 GND Refer to the solar controller s own manual for details On completion of the electrical connections close the cover E of the solar control...

Page 24: ...w slot is horizontal b b If copper piping has been used and joints have been hot brazed flush out the system to remove any brazing residues Seal test the system after you have flushed it out b b Fill...

Page 25: ...sity 50 32 C 1 045 kg dm3 40 21 C 1 037 kg dm3 30 13 C 1 029 kg dm3 b b The propylene glycol supplied is specially formulated for solar collector applications and remains fully efficient throughout th...

Page 26: ...sure in the system to 4 bar Start up the system for about 20 minutes Bleed the circuit again from step 2 until all the air has been removed Set the circuit pressure according to the table on the next...

Page 27: ...N THE SOLAR COLLECTOR CIRCUIT Check that the pressure in the circuit when cold is 1 5 bar at the collector field Low pressure leads to lower evaporation temperatures in the collectors during the stagn...

Page 28: ...lity over time Have your storage cylinder serviced either by the manufacturer s Technical Assistance Centre or by a qualified heating engineer at least once a year Perform the following operations bef...

Page 29: ...node plug to a torque of 25 30 Nm 1 2 3 Cleaning inside the storage cylinder Remove the screws 4 Remove the flange cover 5 Remove the insulation 6 Unscrew the bolts 7 and remove the cover 8 Remove the...

Page 30: ...ure that the hot water outlet is from the left of the collector field The pump gets switched on very late and stops soon afterwards giving no time for proper heat transfer The temperature differential...

Page 31: ...31 TECHNICAL ASSISTANCE CENTRE...

Page 32: ...oilers com Beretta reserves the right to modify the characteristics and specifications given in this publication at any time and without prior notice as part of its policy of continuous product improv...

Reviews: