Section 1: Quick Start Guide
11
Eng
lish
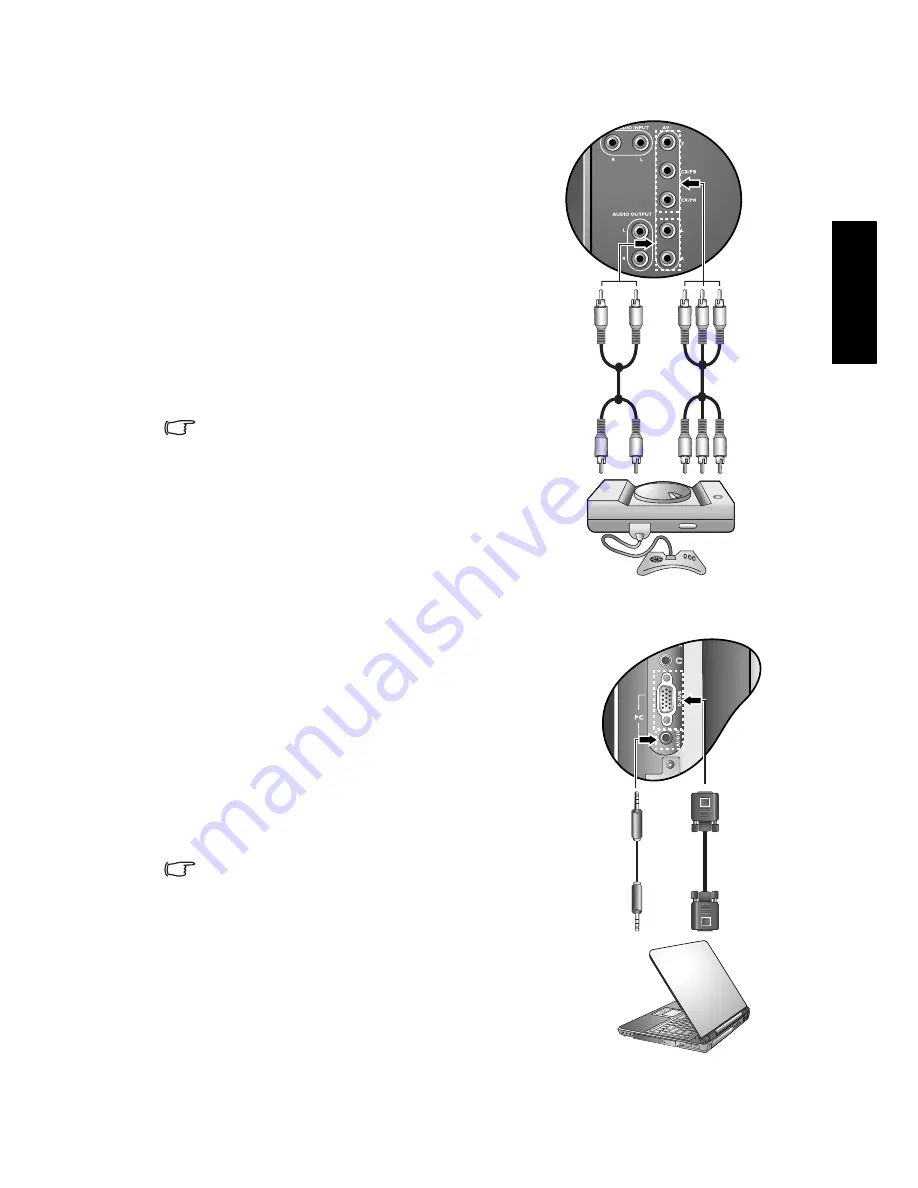
Connecting the Component Video input
Connecting the PC D-Sub input
1. Connect the Component Video output of
your output equipment (like a TV game
console) to the display's AV1 Y, C
B
/P
B
and
C
R
/P
R
terminals using a Component Video
cable (not provided). A Component Video
cable consists of three plugs: Green (Y),
Blue (C
B
/P
B
), and Red (C
R
/P
R
).
2. Connect the Component Video audio
output of your output equipment to the
AV1 L (white)/R (red) input terminals on
the display using a suitable RCA type audio
cable.
To view video image from this input, press
INPUT
and select
AV1
.
Of the analog video signal types,
Component Video offers the best quality.
Ensure that the colors of the plugs and
terminals match when making connection.
For best display results, set the output
resolution of the Component Video source
device to 720p.
See
"Supported Component Video input
signal resolutions" on page 30
for
supported resolutions.
1. Connect the D-Sub video output of your
PC to the PC D-SUB terminal on the
display using a mini D-Sub (15-pin) cable
(not provided).
2. Connect the audio output of your PC to
the display's PC AUDIO terminal using an
appropriate 3.5mm-diameter Mini-jack
stereo audio cable (not provided).
To view video image from this input, press
INPUT
and select
PC
.
When you connect the display to a PC, you
should adjust the resolution in the display
properties of the computer to closely
match the native resolution of the display
(for example, 1360 x 768 pixels).
See
"Supported PC (D-Sub/DVI) input
signal resolutions" on page 30
on other
supported resolutions and
"Setting up
appropriate output resolution on PC" on
page 31
on how to set up PC video output.
TV game
console
Component
Video cable
Audio
cable
PC
Audio
cable
Mini D-Sub
cable


