BenQ RP551+, User Manual
The BenQ RP551+ offers a stunning 55-inch display for interactive presentations and collaborations. Easily access the User Manual for setup and troubleshooting by downloading it for free from manualshive.com. Enhance your meeting experience with this intuitive and innovative solution.
Share
Download


Reviews:
No comments
Related manuals for RP551+
4203 Series
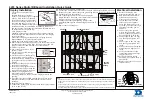
Brand: Daktronics Pages: 2
D-LCH75-MC410-B
Brand: Dahua Technology Pages: 23
Momentum
Brand: Vanerum Pages: 14
eGlass
Brand: pathway Pages: 13

H-7805
Brand: U-Line Pages: 9
MES2436
Brand: EGAN Pages: 2
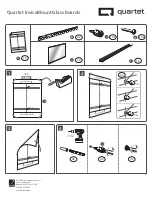
Quartet InvisaMount Glass Board
Brand: ACCO Brands Pages: 7

CDT861M-NEW
Brand: AAVARA Pages: 12
CS7-CLR-DBL
Brand: Copernicus Pages: 10
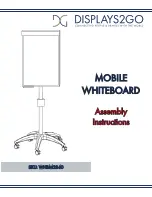
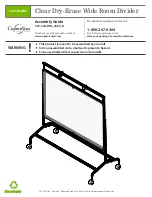
WHBM2840
Brand: Displays2go Pages: 3
VIP Mobile flip chart
Brand: BORKS Pages: 2
A-Frame VersaMobile
Brand: EGAN Pages: 5
i3SIXTY
Brand: i3-TECHNOLOGIES Pages: 9
Post-it Flex Write Surface
Brand: 3M Pages: 4
ZK-IWBP
Brand: ZKTeco Pages: 41

QuicKISS
Brand: BENDHEIM Pages: 2
Prest Mobile
Brand: Ghent Pages: 2
945-238
Brand: Jula Pages: 7


