


1. Overview
BenQ HT 480W User’s Guide
5
Controls and Functions
❚
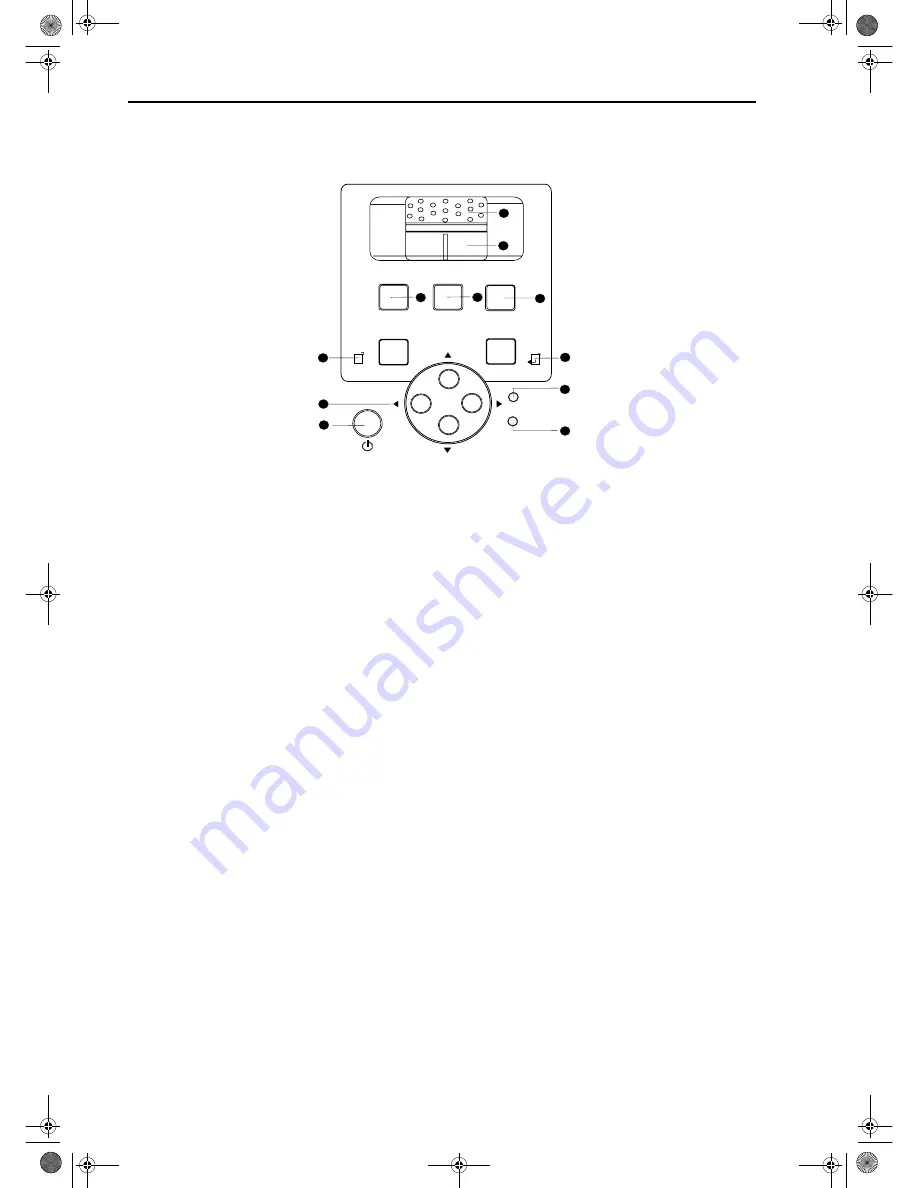
Control Panel
1.
STANDBY/ON
Press this key for ONE second to turn on the unit
when it is in the standby mode. Or press this key to
turn off this unit when it is on.
8
.
POWER LED
Indicates whether the unit is on or off
■
Lit orange when the AC power cord is
plugged into the wall outlet (standby
mode). Once in the standby mode, you can
press the STANDBY/ON key on the
projector or the ON key on the remote
control for ONE second to turn on the
projector.
■
Lit green when the power is turned on
(operational mode).
■
Flashes orange for the first 30 seconds
after powering up, indicating that the lamp
is warming up.
■
Flashes green for one minute after the
projector is turned off to indicate that the
lamp is cooling.
2
.
INPUT
Switches input sources sequentially.
3
.
MEMORY
Sequentially recalls settings 1 ~ 3 saved to memory.
(Please see "Selecting the Video Memory" on
page 17.)
4
.
MENU
Turns the on-screen display control menu on or off.
5
.
ENTER
Enters settings for items shown in the menu.
9
.
LAMP LED
Indicates the status of lamp.
■
Lit red when the lamp has developed a
problem. Please contact your BenQ dealer
for assistance.
6
.
EXIT
Exits and saves the setting(s) of items in the menu.
10
.
Zoom Ring
Adjusts the size of image
■
Rotate right to enlarge the image, and
rotate left to make the image smaller.
7
.
ARROW (
c
/
e
/
d
/
f
)
Use to select the menu or to make various
adjustments.
11
.
Focus Ring
Adjust the focus of the projected images.
■
Rotate clockwise to enlarge the image or
rotate counterwise to make the image
smaller.
Menu
Memory
lnput
Exit
Enter
Power
Lamp
1
2
3
4
5
6
7
8
9
10
11
Content-e.fm Page 5 Monday, July 8, 2002 4:23 PM


