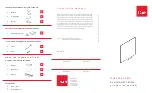
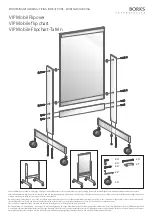
QuicKISS
Magnetic Dry-Erase Glass Boards
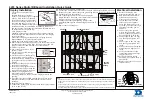
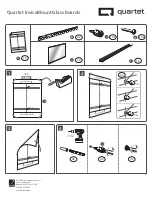
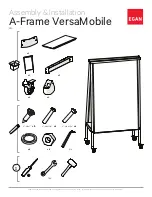
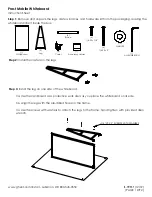
INSTALLATION INSTRUCTIONS (CONT.)
Portrait Installation Wall Bracket Length
2’ x 3’ Board
3’ x 4’ Board
4’ x 6’ Board
4’ x 8’ Board
Cut to 20”
Cut to 32”
Cut to 44”
Cut to 44”
Table 1: Wall bracket lengths required to install each board in portrait orientation
Minimum Structural Studs Required for Support
2’ x 3’ Board 3’ x 4’ Board 4’ x 6’ Board
4’ x 8’ Board
Landscape Orientation
2
3
4
5
Portrait Orientation
2
2
3
3
Table 2: Minimum structural studs required for support for each size board
MAINTENANCE & CARE
COMPATIBLE MARKERS & ACCESSORIES
A variety of markers are compatible with Bendheim glass marker boards, including:
•
Dry-erase markers
•
Wet-erase markers (neon pens, liquid chalk, etc.)
•
Permanent markers
Ultra-strong rare-earth magnets are recommended for best results. Magnetic
accessories, including magnets, erasers, and marker trays, are available from
Bendheim.
CLEANING THE BOARD
Bendheim glass marker boards are easy to maintain:
•
Dry-erase marker can be removed with any standard dry-erase eraser
•
Wet-erase marker can be removed using water or conventional glass cleaner
and lint-free cloth (terry cloth)
•
Permanent marker can be removed using conventional glass cleaner and a lint-
free cloth
Additionally, it is recommended to occasionally clean the glass surface with warm
water or conventional glass cleaner and a lint-free cloth to keep the board looking
new.