13
Windows
®
95 / 98 and NT
®
(continued)
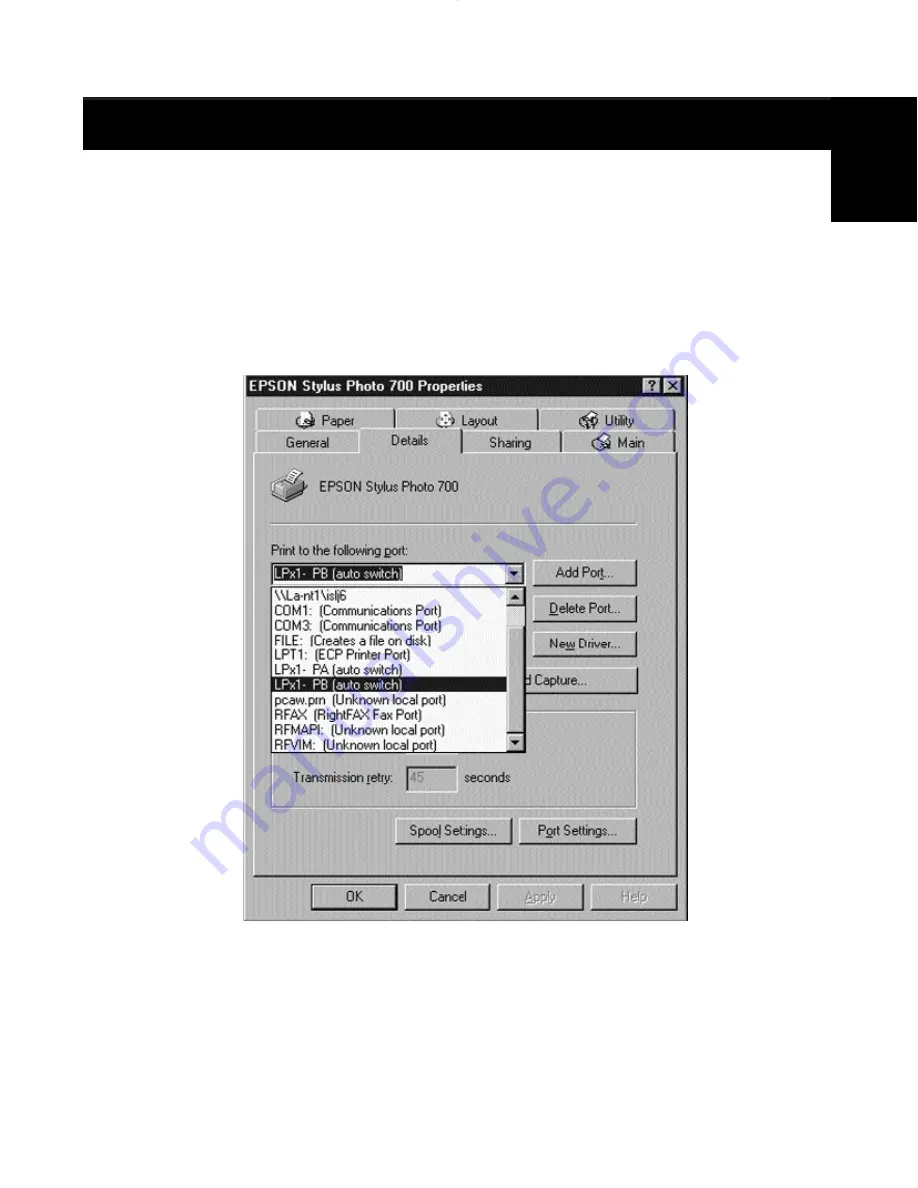
Click on the “Details” tab. In the pull-down menu “Print to the following port:”,
select the correct port this printer is connected to on the Bitronics switch:
•
LPx1 – PA (autoswitch) – Select this if the printer is connected to
Port A of the Bitronics switch.
•
LPx1 – PB (autoswitch) – Select this if the printer is connected to
Port B of the Bitronics switch. The same occurs for Ports C and D.
In the image above, the printer is connected to Port B of the Bitronics
switch. Therefore, LPx1 – PB (autoswitch) is selected. When finished,
click “OK”.
En
P73121/F1U126-KIT/EU/man.qxd 4/28/00 1:06 PM Page 13
Summary of Contents for Bitronics AutoSwitch F1U126
Page 1: ......
Page 3: ......
Page 4: ...Table of Contents En Fr De Ne It English 1 Fran ais 29 Deutsche 59 Nederlands 89 Italiano 119...
Page 5: ......


