background image

Television / User Manual

25 / 80  EN

PICTURE / SOUND SETTINGS

 ---------------------------------------------------------

Sound settings

Open the menu with »

MENU

«.

Press »

V

« or »

Λ

« to select the »Sound« 

menu and press »

>

« to confirm.


– The »Sound« menu is not enabled.
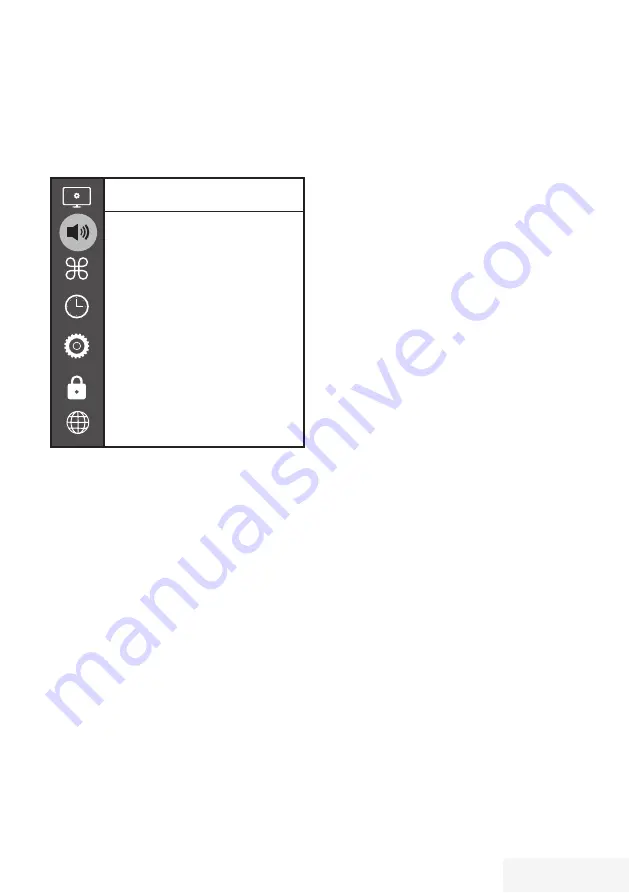
Sound

Sound Mode

Balance

Auto Volume

Off

Surround Sound

Off

DTS DRC

Off

AD Switch

SPDIF Mode

PCM

Audio Delay

Headphone Volume

Note:

Additional operations are explained in the 

following sections.

Sound Mode

Press »

V

« and »

Λ

« to select »Sound 

Mode« and press »

OK

« to confirm.

Press »

<

« or »

>

« to select »User«, 

»Standard«, »Music«, »Movie« or »Sport«.

Press »

BACK


<

« to return to the previous 

menu.

Balance

Press »

V

 « or »

Λ

« to select »Balance« and 

press »

OK

« to confirm.


– »Balance« menu will be displayed.

Select the setting with »

<

« or »

>

«.

Press »

BACK


<

« to return to the previous 

menu.

Auto volume

The television channels broadcast at different 

volumes. The Auto Volume Level Limiting (AVL) 

function means the volume is kept the same 

when you switch between channels.

Press »

V

« or »

Λ

« to select »Auto Volume« 

and press »

OK

« to confirm.

Press »

V

« or »

Λ

« to select »On«.

Press »

BACK


<

« to return to the previous 

menu.

Surround Sound

Surround Sound is an audio technology, which 

is integrated in the television set and only 

requires the built-in speakers to produce a 

Surround Sound effect.

Press »

V

« or »

Λ

« to select »Surround 

Sound« and press »

OK

« to confirm.

Press »

V

« or »

Λ

« to select »On«.

Press »

BACK


<

« to return to the previous 

menu.

Press »

<

« or »

>

« to select »Stand« or »Wall-

Mount«.

Equalizer

Equalizer offers a sound setting that you can 

create.
Equalizer setting is active when »Sound Mode« 

is selected as »User«.

Press »

V

« and »

Λ

« to select »Sound 

Mode« and press »

OK

« to confirm.

Select »Sound Mode« and press »

<

« or 

»

>

« to select »User«.

Press »

V

« or »

Λ

« to select »120Hz« 

frequency band.


Press »

<

« or »

>

« to set the preferred value.

Select the next frequency band with »

V

« or 

»

Λ

« to repeat the adjustment procedure.

To save the setting, press »

BACK


<

« .

Summary of Contents for B50 A 800 B

Page 1: ...Televizyon Kulanım Kılavuzu Television User Manual Fernseher Benutzerhandbuch TR EN DE ...

Page 2: ...nlar 17 AYARLAR 17 Ev ağına bağlanma ayarları 17 Televizyon kanallarının ayarlanması 18 İlk kurulum genel bakış 19 İlk kurulumun yapılması 22 Dijital kanallar için Kanal Düzenleyicisi 24 GÖRÜNTÜ SES AYARLARI 24 Görüntü ayarları 26 Ses ayarları 28 TV NİN ÇALIŞMASI TEMEL FONKSİYONLARI 28 Açma ve kapatma 28 Kanalları seçme 28 Kanalları listelerden seçme 28 Sinyal kaynağı seçme 28 Ses seviyesini ayarl...

Page 3: ... çalışmasını durdurma 50 WEB TARAYICISI 50 Web tarayıcısı menüsü 50 Web tarayıcısı uygulaması 51 DİL AYARLARI 51 Menü dilinin değiştirilmesi 51 Ses dilinin değiştirilmesi 51 Altyazı dilinin değiştirilmesi 52 ERİŞİLEBİLİRLİK FONKSİYONLARI 53 ZAMANLAYICI FONKSİYONLARI 53 Otomatik Senkron 53 Saat ve tarih 53 Saat Dilimi 53 Kapanma Süresi 53 Otomatik kapanma 54 KİLİT AYARLARI 54 PIN kodunu değiştirme ...

Page 4: ...arının otomatik olarak aranması 70 Kablo bağlantılı dijital televizyon istasyonlarının manuel aranması 71 Anten bağlantılı dijital televizyon istasyonlarının otomatik olarak ayarlanması 71 Anten bağlantılı dijital televizyon istasyonlarının manuel aranması 72 Analog televizyon kanallarını ayarlama 73 Sinyal bilgilerini görüntüleme 74 Yetkili satıcılar için servis bilgileri 74 Kablosuz WLAN bağlant...

Page 5: ...rüntü ekranda kalırsa ekranda kalıcı izler belirebilir Bu bir garanti talebinde kullanılabilecek bir kusur değildir Arayüz kriterleri Bu ürün Türk Telekominikasyon şebekelerinde kullanıma uygun olarak üretilmiştir Güvenlik UYARI Elektrik kazası riski 7 Televizyonun içini açmayın Açılması durumunda güvenlik riski oluşabilir ve ayrıca ürününüz garanti kapsamından çıkar 7 Televizyon yalnızca birlikte...

Page 6: ... altında camdan veya plastikten yapılmış bir levha kullanabilirsiniz Kumaş veya paspas benzeri altlıklar kullanmayın Elektromanyetik gürültü 7 Ürünle bağlantılı olarak kullanılan cihazlar uydu alıcısı DVD oynatıcı vb ya da ürünün yakınındaki yayınım yapan cihazlar modem vb görüntüde parazite ve seste gürültüye neden olabilir 7 Ürün üzerinde kullanılan bağlantı kabloları 3m den küçük olmalıdır 7 Ci...

Page 7: ...ar için yayıncı kuruluş sağlıyorsa her türlü program değişikliğini size hemen gösterir ve sonraki birkaç güne ait tüm kanal programlarını gözden geçirmenizi sağlar 7 Örneğin harici sabit disk USB bellek çubuğu ya da dijital fotoğraf makinesi gibi çeşitli veri ortamlarını USB bağlantı noktasına bağlayabilirsiniz Dosya tarayıcıyı kullanarak istediğiniz dosya biçimlerini örneğin MP4 MP3 ya da JPEG ve...

Page 8: ...TV ye bağlanmalıdır 7 Analog yayınların aksine her kanalın kendi yayın frekansı yoktur Bunun yerine birkaç kanal bölgesel ya da ulusal düzeyde demetler olarak bilinen gruplar halinde birleştirilir 7 Çeşitli kanallardan alınan teleteks yayınında mevcut yayın bilgilerini bulabilir ya da TV rehberine veya internete göz atabilirsiniz 7 Özel yayın şirketlerine ait çeşitli dijital televizyon istasyonlar...

Page 9: ...ER 4 2 5 6 User Manual 3 1 7 Standart aksesuarlar 1 Televizyon 2 Ayak 3 Uzaktan kumanda 4 Uzaktan kumanda için pil 5 Ayak için vidalar ve montaj talimatları 6 Kolay kullanım kılavuzu 7 Şebeke kablosu Opsiyonel aksesuarlar Temizleme bezi Duvar askı vidaları ...

Page 10: ...istasyonları için anten kablosunu televizyon seti üzerindeki ANT IN anten girişine takın veya 2c Analog istasyonlar için anten kablosunu televizyon seti üzerindeki ANT IN girişine takın Not 7 İç mekan antenini bağlarken yayını en iyi şekilde alana kadar anteni farklı konumlarda denemeniz gerekebilir 3 Elektrik kablosunu duvardaki prize takın Not 7 Cihazı elektrik prizine yalnızca harici cihazları ...

Page 11: ...tkili bayii ile görüşün Şunlara ihtiyacınız olacaktır 7 Bir makas 7 Bir yıldız başlı tornavida VESA montaj kiti için montaj talimatlarını izleyin 1 Televizyonu üzerindeki filmi çıkartmadan ekran altta kalacak şekilde düzgün bir yüzeye koyun 2 Makasları kullanarak arka taraftaki filmi keserek açın 3 Gerekli kabloları televizyonun konektörlerine bağlayın Bu kılavuzdaki Bağlantılar bölümüne bakın 4 K...

Page 12: ...naklanan zararlardan dolayı üretici sorumluluk kabul etmemektedir Çevre uyarısı 7 Pil veya cihaz ambalajı üzerinde bulunan bu sembol bu cihazla birlikte verilen pilin evsel atık olarak değerlendirilmemesi gerektiğini göstermektedir Bazı piller üzerinde bu sembol kimyasal bir sembolle birlikte kullanılabilir Pillerin içindeki cıva oranı 0 0005 den fazlaysa cıva için HG kimyasal sembolü kurşun oranı...

Page 13: ... 83 TR GENEL BAKIŞ Televizyon cihazının bağlantıları SATELLITE OPTIC OUT LAN ANT IN HDMI2 HDMI3 ARC SERVICE USB2 HDD 1A USB1 COMMON INTERFACE HDMI1 SATELLITE 13 18V max 500mA OPTIC OUT LAN ANT IN HDMI2 HDMI3 ARC SERVICE IR OUT IR OUT ...

Page 14: ...ma amaçlı CA modülleri için 7 USB2 HDD Programları kaydetmek için harici bir sabit disk gibi veri medyaları buraya bağlanır 7 Optic Out optik ses çıkışı 7 U IR OUT Adaptörlü kulaklık jakı IR Out girişi bu üründe bulumamaktadır 7 SERVICE Servis amaçlıdır 7 LAN Ağ bağlantısı 7 HDMI2 Dijital ses ve görüntü verileri için giriş 7 HDMI3 ARC Dijital ses ve görüntü verileri için giriş 7 SATELLITE Uydu ant...

Page 15: ...rür Menüyü açar Hızlı menüsünü açar Teletekst modu ile TV modu arasında geçiş yapar Uygulamalar menüsünü açar Kanalları adım adım seçer Ses seviyesini ayarlar Bilgi görüntüler Menü ve uygulamalardan çıkar Kanal listesini açar Elektronik TV rehberini açar Kanalları doğrudan seçer Favori listesini görüntüler Kaydetme oynatma duraklatma veya durdurma sadece dijital televizyon kanalları Netflix uygula...

Page 16: ...larında geriye doğru görüntü aramayı başlatır 4 Teletekst modunda sayfa durdurma dosya tarayıcısında ve bazı video uygulamalarında ileriye doğru görüntü aramayı başlatır Kaydı başlatır dijital TV modunda kayıt yalnızca harici veri ortamı üzerindendir 8 Dosya tarayıcısında ve bazı video uygulamalarında oynatmayı başlatır Dosya tarayıcısında ve bazı video uygulamalarında oynatmayı duraklatır Canlı s...

Page 17: ...arı IP Adresi Netmask Gateway ve DNS bilgileri modemden otomatik olarak alınır Manuel bağlantı tüm bağlantı ayarları IP Adresi Netmask Gateway ve DNS bilgileri manuel olarak yapılandırılması gerekir WLAN kullanılırken pek çok seçenek vardır Otomatik bağlantı tüm bağlantı ayarları IP Adresi Netmask Gateway ve DNS bilgileri modemden otomatik olarak alınır Yönlendiriciye bağlı olarak aşağıdaki seçene...

Page 18: ...ik Politikası sayfa 19 20 adım 9 16 Kablolu sayfa 20 adım 8 Kablosuz sayfa 20 adım 16 Oto sayfa 20 adım 8 Manuel Bölüm sayfa 63 Oto sayfa 20 adım 15 IPv4 IPv6 Kanal Düzenleyici sayfa 22 TV kanalları ayarı sayfa 21 adım 23 Netflix i Başlat DVB T sayfa 21 adım 29 DVB C sayfa 21 adım 27 DVB S sayfa 21 adım 23 Oto sayfa 21 adım 27 Manuel bölüm sayfa 70 Oto sayfa 21 adım 23 Manuel bölüm sayfa 68 Oto sa...

Page 19: ... ve OK düğmesiyle onaylayın Veri toplama ve yazılım güncelleme bildirimi görüntülenir 4 veya düğmesiyle Kabul Et öğesini seçip OK düğmesiyle onaylayın Ülke Seçimi menüsü görüntülenir 5 V veya Λ düğmesiyle televizyonun kullanılacağı ülkeyi seçin ve OK düğmesiyle onaylayın Saat Ayarı menüsü görüntülenir 6 Otomatik seçeneğini OK düğmesiyle onaylayın veya Manuel seçeneği ile saat tarih bilgilerini gir...

Page 20: ... V veya Λ düğmesiyle Kablosuz Ağ seçeneğini seçin ve OK düğmesiyle onaylayın Akıllı TV Gizlilik Politikası menüsü görünür 16 Devam etmek için Gizlilik Politikasını okuyup veya düğmesiyle Onayla seçeneğini seçip OK düğmesiyle onaylayın 17 Kablosuz ağlar taranarak menüde görüntülenir 18 V veya Λ düğmesi ile bağlanmak istediğiniz ağı seçip OK düğmesine basarak onaylayın Kablosuz bağlantı şifre ekranı...

Page 21: ...n 7 Hizmet Türü nü seçin Yalnızca dijital kanallarını mı DTV yoksa yalnızca radyo mu Radyo ya da ikisini birden mi DTV Radyo aramak istediğinizi belirlemek için V veya Λ düğmesiyle DTV Radyo ve veya DTV Radyo öğelerini seçip işaretlemek için OK düğmesine basın Önceki menüye dönmek için MENU düğmesine basın 27 Aramaya başlamak için Arama Başlat öğesini seçip OK düğmesine basın Otomatik Kanal Arama ...

Page 22: ...yın 3 V veya Λ düğmesiyle Program Düzenleme satırını seçin ve OK düğmesiyle onaylayın Program Düzenleme menüsü görüntülenir Önemli 7 Tüm kaynaklar için uydu kablo ve anten program tablosu ve favori listeleri ayrı ayrı saklanmaktadır 7 Program tablosu seçildiğinde bulunduğunuz kaynağın program tablosu görüntülenir Notlar 7 Program Tablosunda bir kanal isminin yanında Anahtar Kilit işareti varsa kan...

Page 23: ...p yeşil düğmesi ile onaylayın 2 V veya Λ düğmesine basarak kanalı yeni konumuna taşıyarak yeşil düğmesi ile onaylayın Not 7 Diğer kanalları taşımak için 1 ve 2 adımları tekrar edin 3 Program Tablosu çıkmak için EXIT düğmesine basın Favoriler listesi oluşturma Favori kanallarınızı seçebilir ve bunları liste halinde kaydedebilirsiniz Not 7 Tüm kaynaklar için uydu kablo ve anten favori listeleri ayrı...

Page 24: ...tırır Bu ayar çoğunlukla normal resimlerle kullanım için çok güçlüdür ve sadece gerekli olursa kullanılmalıdır düşük veya kapalı aksi halde görüntüdeki ince ayrıntılar yok edilebilir 7 Dinamik Kontrast Bu fonksiyon görüntüleri analiz ederek ve ardından kontrasttaki değişime bağlı olarak bunu değiştirerek ilgili resim içeriğinin kontrastını dinamik ve optimal olarak ayarlar Kontrasttaki bu artış ay...

Page 25: ...k Yönetim Sistemi Renklerin ayrı ayrı parlaklık kontrast ve ton ayarlarının yapılmasını sağlar Kırmızı yeşil mavi macenta siyan ve sarı renkler için bu ayarları ayrı ayrı yapmak mümkündür Bu fonksiyon ile çok spesifik içeriklerde gelişmiş ayar yapılabilir Öntanımlı Görüntü Ayarlarına dönüş 1 Görüntü menüsünde V ile Öntanımlı Görüntü Ayarlarına Dön öğesini seçin ve OK düğmesiyle onaylayın 2 Güvenli...

Page 26: ...e sesin aynı seviyede korunmasını sağlar 1 V veya Λ düğmesiyle Otomatik Ses Düzeyi satırını seçip OK düğmesiyle onaylayın 2 V veya Λ düğmesiyle Açık seçeneğini seçin 3 Önceki menüye dönmek için BACK düğmesine basın Çevresel Ses Çevresel ses televizyon setine entegre olarak kurulmuş ve Surround Sound etkisi yaratmak için yalnızca cihaz içi hoparlörlere gereksinimi olan bir ses teknolojisidir 1 V ve...

Page 27: ... basın Kulaklık Sesi Kulaklık ses seviyesini ayarlamanızı sağlar 1 V veya Λ düğmesiyle Kulaklık Sesi satırını seçip OK düğmesiyle onaylayın 2 veya düğmesiyle değeri seçin 3 Önceki menüye dönmek için BACK düğmesine basın TV konumu Bu özellik ile televizyonun konumunu seçmek otomatik ses ayarı için önemlidir 1 V veya Λ düğmesiyle TV Konumu satırını seçin 2 veya düğmesiyle Ayakta veya Duvara Asılı se...

Page 28: ...ylayın Ses seviyesini ayarlama 1 o düğmesiyle ses seviyesini ayarlayın Sesi kapatma 1 Sesi kapatıp mute yeniden açmak için p düğmesini kullanın Bilgileri görüntüleme 1 Bilgileri görüntülemek için düğmesine basın Kısa bir süre ekrandaki menü otomatik olarak kaybolur Ses dili Dijital kanalları seyrederken çeşitli dilleri seçebilirsiniz Bu yayınlanan programa bağlıdır 1 düğmesine basarak seçim menüsü...

Page 29: ...kurulumunuza bağlı olarak televizyonu 4 6 veya 8 saat içinde stand by moduna geçirir 1 TOOLS düğmesi ile Hızlı menüsünü açın 2 V veya Λ düğmesiyle Otomatik Kapanma satırını seçin 3 veya düğmesiyle kapanma zamanını seçin Not 7 Fonksiyonu veya düğmesiyle Kapalı konumuna ayarlayarak kapatın 4 Ayarları sonlandırmak için EXIT düğmesine basın TV NİN ÇALIŞMASI EK FONKSİYONLAR TV ve Radyo kanalları arasın...

Page 30: ...ü geometrisi yatay olarak gerilir Gerçek 16 9 sinyal kaynaklarında uydu alıcısından veya Euro AV soketinde görüntü doğru geometriye sahip olacak şekilde ekranı tümüyle doldurur Film formatı Letterbox ayarı özellikle 16 9 formatındaki programlar için uygundur Genellikle ekranın üst ve altında bulunan siyah kenarlıklar ortadan kaldırılır 4 3 görüntü ekranı doldurur İletilen görüntüler büyütülür anca...

Page 31: ...vardır 2 V veya Λ ile kanalı seçin Asıl program hakkındaki bilgi seçili televizyon kanalında görüntüler Not 7 9 arlı adımlar halinde kanalları atlamak için P veya P düğmesine basın 3 Mevcut program hakkındaki bilgiye yeşil düğmesini kullanarak geçiş yapın Notlar 7 Seçilen program kaydedilebilir harici bir veri ortamı bağlıysa Bunu yapmak için kırmızı düğmesiyle detay sayfasına geçip kayıt bilgiler...

Page 32: ...örüntü ve videolarıyla yayın ve genişbantın beraber kullanılabildiği ve yayının internet üzerinden verdiği interaktif uygulamalara erişimin sağlandığı yeni nesil bir teknolojidir HbbTV yayını almak için televizyon Internet e bağlı olması gerekir HbbTV hizmeti sunan bir TV kanalına geçilince ilgili mesaj görüntülenir ...

Page 33: ...arak istediğiniz seçeneği seçin ve OK düğmesiyle onaylayın 4 kırmızı düğmesi ile HbbTV yi kapatın Not 7 HbbTV modunda navigasyon çalışmazsa EXIT düğmesine basarak fonksiyondan çıkabilirsiniz Video dizinleri için ek fonksiyonlar 1 Oynatmaya başlamak için 8 düğmesine basın 2 düğmesi ile oynatma işlemini duraklatın 3 8 düğmesi ile oynatma işlemine devam edin 4 3 düğmesiyle ile geri 4 düğmesiyle ise i...

Page 34: ... e dönmek için 8 düğmesine basın 3 Bir sayfa geri gitmek için P düğmesine basın 4 Bir sayfa ileri gitmek için P düğmesine basın 5 Teletekst modundan çıkmak için TXT düğmesine basın Ek fonksiyonlar Bekleme süresini atlama Bir sayfa aranırken televizyon kanalına geçebilirsiniz 1 1 0 düğmelerini kullanarak teletekst sayfa numarasını girin ve ardından 7 düğmesine basın Sayfa bulunduğunda sayfa numaras...

Page 35: ...nım bileşenlerinin değiştirilmesi gerektiğinde kayıtlarınızı onarılan televizyonda izleyemeyebilirsiniz 7 Beko harici depolama aygıtı üzerinde depolanan veri kaybından sorumlu değildir 7 DTV kaynağında kaydettiğiniz dosyaları PVR medya oynatıcı ile oynatmanız önerilir Harici veri ortamı kullanımında muhtemel kısıtlamalar Yayını yapan istasyona bağlı olarak bazı televizyon istasyonlarının çeşitli k...

Page 36: ...B aygıt bağlanır 1 Harici sabit diski televizyonun USB2 HDD USB arayüzüne takın veya bellek çubuğunu televizyonun USB1 arayüzüne takın Notlar 7 USB standardına göre televizyonun USB1 soketi 500 mA lık akımı destekler Harici sabit disk vb gibi daha yüksek güç harcayan cihazlarınızı televizyonun sadece USB2 HDD USB arayüzüne bağlayabilirsiniz 7 USB2 HDD USB arayüzüne bağlanılan harici sabit disk ile...

Page 37: ...rici veri ortamında bölüm seçme Harici veri ortamında birkaç bölüm varsa birini seçin 1 Zaman Kaydırma Dosya Sistemi menüsünde V veya Λ ile Disk Seç satırını seçin ve OK düğmesine basarak onaylayın 2 V veya Λ düğmesi ile bölümü seçip veya düğmesine basarak birden fazla bölüm varsa bölümü seçin 3 BACK düğmesi ile geri dönün veya ayarları sonlandırmak için EXIT düğmesine basın Zaman kaydırma büyüklü...

Page 38: ...ntülenir ve zaman kaydırma harici veri ortamına kaydedilir Zaman kaydırma modunda harici veri ortamında ayarlamış olduğunuz boş hafıza kadar kayıt yapılabilir Not 7 Kesintisiz bir Kalıcı Zaman Kaydırma için harici USB hard disk kullanın 1 Yayın sırasında düğmesine basın Televizyon görüntüsü durdurulur ve gecikme süresi görüntülenir 2 Yayına kaldığı yerden devam etmek için 8 düğmesine basın Siz yay...

Page 39: ...t otomatik olarak iptal edilir ve harici veri ortamına kaydedilemez Kayıt sırasında televizyonun stand by konumuna alınması 1 Kaydetmek istediğiniz kanalı seçip düğmesine basıp kaydı başlatın 2 Televizyonu stand by konumuna almak için 8 düğmesine basın 3 Kayıt işlemine davam edip stand by konumuna geçmek için düğmesine basın veya kayıt işlemini sonlandırıp televizyonu stand by konumuna almak için ...

Page 40: ...mının kayda dahil edilmesi söz konusu olabilir Böyle bir durumda bu programlardan biri veya daha fazlasında aile koruma derecelendirmesi varsa tüm kayıt için en yüksek seviyedeki aile koruma derecesinin geçerli olacağını göz önünde bulundurun bilgileri manuel girerek 1 Elektronik program rehberini açmak için GUIDE düğmesine basın 2 kırmızı düğmesine basın 3 Kanal satırından veya düğmesiyle kaydede...

Page 41: ...ek programın başlığını V veya Λ ile seçin ve zamanlayıcıyı kırmızı düğmesi ile silin Zamanlayıcı silinmiştir 4 Ayarı sonlandırmak için EXIT düğmesine basın USB KAYIT Oynatma Kaydedilen programlar ister elle başlatılmış olsun ister zamanlayıcı fonksiyonunu kullanarak tamamı harici veri ortamında saklanır Harici veri ortamındaki arşivi Kayıt Listesi menüsünden görüntüleyebilirsiniz Kayıtlı dosyalar ...

Page 42: ...ü açın 2 V Λ düğmesiyle Kayıt Listesi menü öğesini seçip OK düğmesiyle onaylayın Kayıt Listesi menüsü görüntülenir 3 V veya Λ düğmesiyle silinecek yayınları seçin 4 Yayını silmek için kırmızı düğmesine basın 5 Silme işlemini onaylamak için düğmesiyle Evet seçeneğini seçin veya silme işlemini iptal etmek için düğmesiyle Hayır seçeneğini seçin 6 Ayarları sonlandırmak için EXIT düğmesine basın ...

Page 43: ...e Expert Group tarafından geliştirilen MPEG 1 standardına göredir AAC İleri Ses Kodlaması nı belirtir Advanced Audio Coding ve MPEG tarafından geliştirilmiştir AAC aynı veri oranında bitrate daha yüksek ses kalitesi sunar Bu formatlar ses dosyalarının CD ses kalitesine benzer kalitede depolama cihazlarına kaydedilmesini sağlar Cihazın desteklediği dosya uzantıları mp3 m4a aac wav MP3 dosyaları bil...

Page 44: ...B arayüzüne bağlanılan harici sabit disk ile beraber güç kablosu kullanıldığı durumlarda TV kapatıldığında harici hard diskin de güç kablosu çekilmelidir 7 USB Aygıtından herhangi bir dosya okunurken USB Aygıtının TV den çıkarılmaması gerekmektedir 7 ITE Bilgi Teknolojisi Donanımları cihazları için EN 55022 EN 55024 te tanımlandığı üzere iki yönlü veri aktarımı mümkün değildir 7 USB üzerinden akta...

Page 45: ...ileri düğmesine basarak izleyebilirsiniz 7 MP3 verilerini çalarken albüm bilgileri şarkı şarkıcı ekranda görüntülenir 7 Görüntü verilerini oynatırken kontrol panelini açmak için MENU düğmesine basın 5 Oynatmayı duraklatmak için düğmesine basın 6 Oynatmaya devam etmek için 8 düğmesine basın 7 Oynatmayı sona erdirmek için 7 düğmesine basın Dosya tarayıcı görünür Notlar 7 USB modunda desteklenen bazı...

Page 46: ...üreyi girip OK düğmesiyle onaylayın İleriye doğru arama yalnızca video ve ses dosyaları Farklı hızları seçebilirsiniz ileriye ya da geriye doğru 2 kat 4 kat 8 kat 16 kat ve 32 kat hızlı 1 Oynatma esnasında oynatma çalma hızını 3 veya 4 düğmelerine basarak seçebilirsiniz 2 Oynatmaya devam etmek için 8 düğmesine basın Resim görüntüsünü döndürme yalnızca resim dosyaları Resimler 90 döndürülebilir 1 O...

Page 47: ... içeriğin dikkatlice okuyarak hareket ediniz SMART Interactive TV internet uygulamaları SMART Interactive TV interaktif uygulamaları televizyonunuza internet hizmetleri ve sayfaları sağlar Bu uygulamalar televizyonunuza göre tasarlanmıştır SMART Interactive TV özelliği ile lokal ve global birçok internet uygulamasını çalıştırabilirsiniz Bu uygulamalar video resim müzik oyun sosyal paylaşım uygulam...

Page 48: ...tüleyebilir ve seçebilirsiniz 1 düğmesiyle uygulama menüsünü açın Uygulamalar görüntülenir 2 Tüm Uygulamalar a giriş yapmak için Smart TV Apps öğesini V Λ veya ile seçin ve OK ile onaylayın Tüm Uygulamalar menüsü görüntülenir Netflix uygulamasını başlatma 1 düğmesiyle uygulama menüsünü açın 2 veya düğmesiyle Netflix uygulamasını seçip OK düğmesiyle onaylayın Netflix uygulaması başlangıç ekranı gör...

Page 49: ...landa çalışmasını durdurabilirsiniz 1 MENU düğmesiyle menüyü açın 2 V veya Λ düğmesiyle Tercihler menü öğesini ile onaylayın 3 V veya Λ ile Uygulama Ayarları satırını seçin ve OK düğmesiyle onaylayın 4 Netflixten Çıkış Yap satırını OK düğmesiyle onaylayın 5 Uygulamayı durdurmak için düğmesine basın veya işlemi iptal etmek için düğmesine basın ...

Page 50: ... menüyü açın 2 V Λ veya ile Browser menü ögesini seçip OK düğmesiyle onaylayın Web Tarayıcı görüntülenir 3 kırmızı düğmesine basıp URL girişi alanını görüntülryin 4 Λ veya V düğmesiyle URL giriş alanını seçin ve OK düğmesiyle onaylayın Sanal klavye görüntülenir 5 Adresi girip kırmızı düğmesiyle onaylayın Notlar 7 Diğer fonksiyonlar ekranda açıklanmaktadır 7 Web tarayıcısında kullanmak için hem USB...

Page 51: ...V veya Λ düğmesiyle birinci ses dilini seçip OK düğmesiyle onaylayın 4 Bir menü seviyesi geri gitmek için BACK düğmesine basın 5 V veya Λ düğmesi ile İkinci Ses Dili satırını seçin ve OK düğmesiyle onaylayın 6 V veya Λ düğmesiyle ikincil ses dilini seçip OK düğmesiyle onaylayın 7 Bir menü seviyesi geri gitmek için BACK düğmesine basın veya ayarı sonlandırmak için EXIT düğmesine basın Altyazı dilin...

Page 52: ...ıştır İşitme Engelliler için Altyazı Sesli anlatım görme engelliler için ek bir ses kanalıdır Aktörlerin aktiviteleri etraflarında bulunanlar sahne değişiklikleri görünüşleri jestleri ve mimikleri anlatılır Bu ses dijital televizyon istasyonlarında normal sesle aynı anda iletilir Bu yayınlanan programa bağlıdır 1 V veya Λ ile İşitme Engelliler için Altyazı satırını seçin ve OK düğmesiyle onaylayın...

Page 53: ...ndırmak için EXIT düğmesine basın Saat Dilimi 1 V veya Λ düğmesiyle Saat Dilimi satırını seçip OK düğmesiyle onaylayın 2 V veya Λ düğmesiyle zaman dilimini seçin 3 Önceki menüye dönmek için BACK düğmesine basın veya ayarı sonlandırmak için EXIT düğmesine basın Kapanma Süresi Kapanma Süresi televizyon için bir kapanma zamanı girebilirsiniz Bu süre sona erdikten sonra televizyon stand by moduna geçe...

Page 54: ...l bir kod girebilirsiniz Lütfen kişisel kodunuzu not edin 1 V veya Λ düğmesi ile Parola Ayarla öğesini seçin ve OK düğmesi ile onaylayın 2 1 0 düğmeleriyle dört haneli mevcut PIN kodunuzu girin 3 1 0 düğmeleriyle dört haneli yeni kişisel PIN kodunuzu girin 4 1 0 düğmeleriyle kişisel PIN kodunuzu yeniden girin 5 Ayarı sonlandırmak için EXIT düğmesine basın Bir televizyon kanalını engelleme Çocuklar...

Page 55: ...t 7 Kanal değiştirildiğinde kanal tekrar engellenecektir Ebeveyn Kontrolü Çocuklar için uygun olmayan içeriklere veya sahnelere sahip filmler vardır Belirli programlar bu içerikleri ve sahneleri tanımlayan bilgiler içermekte olup bunlar için 4 ila 18 arasında bir erişim düzeyi tanımlanmıştır Bu erişim düzeylerinden birini seçerek yayının gösterilmesini onaylayabilirsiniz 1 V veya Λ düğmesi ile Ebe...

Page 56: ...OK düğmesiyle onaylayın USB bellekteki yazılım kurulur Yazılımı güncelleme NetReady 1 V veya Λ düğmesiyle Yazılım Güncelleme NetReady seçeneğini seçin ve OK düğmesiyle onaylayın Yeni yazılım araması yapılır Not 7 Herhangi bir yazılım yoksa menü otomatik olarak kapanır 2 Yeni yazılım varsa Evet seçeneğini seçin ve OK düğmesiyle onaylayın Yeni yazılım yüklenecek Televizyonu en baştaki durumuna sıfır...

Page 57: ...oynatıcı açtığınızda televizyonunuz harici cihazın bağlı olduğu HDMI kaynağına geçecektir televizyonunuz açık olması gerekir Menü dilinin seçilmesi Televizyonunuzdan menü dilini seçtiğinizde harici cihazınızında menü dili değişecektir DVD oynatıcınız destekliyorsa HARİCİ CİHAZ KULLANMA Standby modundan cihazın kapatılması Televizyonununuz bekleme konumuna standby aldıktan sonra harici cihaz açıksa...

Page 58: ...ğlantı seçenekleri 7 Harici cihazlarınızı bağladığınız televizyon soket ler i harici cihaz da bulunan soketlere ve kullanılabilir sinyallere bağlıdır 7 Çoğu harici cihaz da görüntü sinyalinin çözünürlüğü televizyondaki giriş soketlerine uyarlanmalıdır harici cihazın kullanım kılavuzuna bakın Bağlantı seçenekleriyle ilgili bölümdeki yönergelere bakarak hangi değerleri ayarlamanız gerektiğini öğrene...

Page 59: ...uza zarar verebilir HARİCİ CİHAZLARI KULLANMA Hi fi sistemi Dijital çok kanallı amplifikatör AV alıcısı bağlama 1 Televizyonun üzerindeki HDMI3 ARC HDMI 1 4 Ses Dönüş Kanalı soketini HDMI ARC uyumlu Dijital çok kanallı amplifikatör AV alıcısı üzerindeki ilgili sokete bir standart HDMI kablosu kullanarak bağlayın dijital ses sinyali veya 2 Televizyonun üzerindeki Optic Out soketini AV alıcısı üzeri...

Page 60: ... ray Oynatıcı bağlanırsa kayıt sırasında lütfen Diski Oynatıcıdan çıkarın 7 Televizyonun dahili hoparlörleri otomatik olarak kapanır 7 AV alıcısının ses seviyesini televizyonun uzaktan kumandasıyla ayarlayabilirsiniz 7 HDMI ARC özelliğini kapatmak için veya ile Kapalı seçeneğini seçin 7 Televizyon kapatılırken ARC fonksiyonu devre dışı kalır ve dahili hoparlörler tekrar aktif hale gelir 8 Ayarı so...

Page 61: ...akın Not 7 Ortak Arayüz yuvasında hangi CA modülünün bulunduğunu görmek için CA Modülü alt menüsüne gidin 7 Televizyonunuzdaki CI yuvasına ilk kez bir CA modülü takarken televizyon CA modülünü kaydedene kadar kısa bir süre bekleyin CA modülü ve akıllı kartlar için erişim kontrolü 1 MENU düğmesi ile menüyü açın 2 V veya Λ düğmesi ile Kanal menüsünü seçin ve düğmesi ile onaylayın 3 Λ veya V düğmesiy...

Page 62: ...tomatik olarak alınır B Manuel bağlantı tüm bağlantı ayarları IP Adresi Netmask Gateway ve DNS bilgileri manuel olarak yapılandırılması gerekir Otomatik bağlantı Bir çok ev ağı Dinamik Ağdır Dinamik bir ağa sahipseniz DHCP destekleyen bir DSL modem kullanmalısınız DHCP yi destekleyen modemler ve IP paylaştırıcılar IP Adresi Netmask Gateway ve internet erişimi için gereksinim duyulan DNS değerlerin...

Page 63: ...üğmesiyle Onayla seçeneğini seçin ve OK düğmesiyle onaylayın 5 Ağ altyapınıza göre V veya Λ düğmesiyle IPv4 veya IPv6 seçeneğini seçip OK düğmesiyle onaylayın Not 7 IPv6 ile internete erişebilmek için internet servis sağlayıcınızın ve modemin IPv6 desteklemesi gerekmektedir Sadece modem IPv6 destekliyorsa sadece modeminizle bağlantı kurabilir internete bağlantısı sağlanmaz 6 V veya Λ düğmesiyle Ma...

Page 64: ...le Ağ menü öğesini ile onaylayın 3 V veya Λ düğmesiyle Kablosuz Ağ seçeneğini seçin ve OK düğmesiyle onaylayın 4 Gizlilik Politikasını onaylamak için veya düğmesiyle Onayla seçeneğini seçin ve OK düğmesiyle onaylayın Wi Fi Ağı menüsü görüntülenir 5 Ağ altyapınıza göre V veya Λ düğmesiyle IPv4 veya IPv6 seçeneğini seçip OK düğmesiyle Açık olarak ayarlayın Not 7 IPv6 ile internete erişebilmek için i...

Page 65: ...ın Not 7 IPv6 ile internete erişebilmek için internet servis sağlayıcınızın ve modemin IPv6 desteklemesi gerekmektedir Sadece modem IPv6 destekliyorsa sadece modeminizle bağlantı kurabilir internete bağlantısı sağlanmaz 6 V veya Λ düğmesiyle Erişim Noktası seçeneğini seçip OK düğmesiyle onaylayın Mevcut kablosuz ağlar taranarak WIFI Listesi menüsünde görüntülenir 7 WPS bağlantı için mavi düğmesine...

Page 66: ...N kodunun bir bilgisayar yardımıyla nasıl girileceğini öğrenmek için yönlendiricinizin kılavuzuna bakın 9 Yönlendiriciye pin kodu girmek için bir bilgisayar kullanın örn AVM FRITZ Box menü öğesi WLAN Ayarları WPS ve kaydet Not 7 Televizyonun üretmiş olduğu 8 haneli PIN kodu modem arayüzüne 2 dakika içinde girilmelidir girilmediği taktirde televizyon modem ile bağlantısını keser 10 Kaydı onaylamak ...

Page 67: ...arın LNB Ayarlarının doğru olduğunu kontrol edin 9 Önceki menüye dönmek için MENU düğmesine basın 10 V veya Λ düğmesi ile Tarama Modu öğesini seçip OK düğmesi ile onaylayın Sadece şifresiz kanallar için Şifresiz sadece şifreli kanallar için Şifreli veya tüm uydu kanalları için Şifresiz Şifreli seçimi için V veya Λ seçip önceki menüye dönmek için MENU düğmesine basın 11 V veya Λ düğmesi ile Hizmet ...

Page 68: ...öğeleri V veya Λ düğmesi ile seçip OK düğmesi ile onaylayın Frekans Kanal frekansını 1 0 düğmeleriyle 5 basamaklı olarak girin Sembol Kanal sembol oranını 1 0 düğmeleriyle 5 basamaklı olarak girin Polarizasyon Kanal polarizasyonunu veya düğmesi ile Dikey veya Yatay seçin 7 V veya Λ düğmesi ile Tarama Modu öğesini seçip OK düğmesi ile onaylayın Sadece şifresiz kanallar için Şifresiz sadece şifreli ...

Page 69: ...ücü LNB gücünü Kapalı veya LNB tipine göre 13 18V 13V 18V veya Kapalı seçimini veya düğmesi ile seçin Uzun Kablo Kompanzasyonu düğmesi ile seçin Açık veya Kapalı seçimini yapın LNB Tipi LNB Tipini OK düğmesine ardından veya düğmesi ile seçin Not 7 Universal LNB kullanıyorsanız listeden Evrensel öğesini seçin 22KHz Tone Otomatik OK düğmesine ardından V veya Λ düğmesi ile Otomatik Açık veya Kapalı s...

Page 70: ... veya Internet teki forumlardan bulabilirsiniz 8 Aramayı başlatmak için OK düğmesine basın DVB C Otomatik Ayarlama menüsü görünür ve TV kanallarının aranmasına başlanır Arama işlemi alınan televizyon kanallarının sayısına bağlı olarak birkaç dakika sürebilir Not 7 Arama işlemi bitmeden önce EXIT düğmesi ile sona erdirilebilir 9 Ayar işlemini sonlandırmak için EXIT düğmesine basın DETAYLI KANAL AYA...

Page 71: ...n televizyon kanallarının sayısına bağlı olarak birkaç dakika sürebilir Not 7 Arama işlemi bitmeden önce EXIT düğmesi ile sona erdirilebilir 7 Ayar işlemini sonlandırmak için EXIT düğmesine basın Anten bağlantılı dijital televizyon istasyonlarının manuel aranması 1 düğmesi ile Kaynak menüsünü açın 2 veya düğmesi ile DVB T T2 öğesini seçip OK düğmesi ile onaylayın 3 MENU düğmesi ile menüyü açın 4 V...

Page 72: ...r 7 Ayar işlemini sonlandırmak için EXIT düğmesine basın Kanal numaralarını girerek analog televizyon kanallarını ayarlama 1 düğmesi ile Kaynak menüsünü açın 2 veya düğmesi ile Analog TV öğesini seçip OK düğmesi ile onaylayın 3 MENU düğmesi ile menüyü açın 4 V veya Λ düğmesi ile Kanal menüsünü seçin ve düğmesi ile onaylayın Kanal menüsü etkindir 5 V veya Λ düğmesi ile ATV Manuel Arama öğesini seçi...

Page 73: ...aylayın Kanal menüsü etkindir 3 V veya Λ düğmesi ile Sinyal Bilgisi öğesini seçip OK düğmesi ile onaylayın Sinyal Bilgisi menüsü görüntülenir Notlar 7 Bulunduğunuz kaynağa göre sinyal bilgileri değişmektedir 7 Sinyal düzeyi yalnızca alıcı sisteminizde değil halihazırda aktif olan kanala da bağlıdır Sinyal düzeyi ekranını kullanarak anteninizi ayarlarken bunu unutmayın 4 Ekran görüntüsünü sonlandır...

Page 74: ...k regülasyonu 2010 30 EU Enerji İle İlgili Ürünlerin Enerji Etiketlemesi direktifi ve aşağıdaki alt direktifler 1062 2010 Televizyonların enerji etiketlemesine dair regülasyon 2011 65 EU Elektrik elektronik ev ve ofis ekipmanları belirli tehlikeli maddelerin kullanılmasının kısıtlanması direktifi Uygunluk beyanının DoC bir kopyasını elde etmek için http www grundig com download doc adresini ziyare...

Page 75: ... doğal kaynakların korunmasına yardımcı olun Ürünü atmadan önce çocukların güvenliği için elektrik fişini kesin Türkiye deki müşteriler için Bu Cihazın WLAN Wifi özelliği sadece bina içersinde kullanılır Türkiye de bina dışında kullanımı yasaktır Bina dışı kullanımında WLAN Wifi özelliğinin kapalı olduğundan emin olunuz Rusya daki müşteriler için FHSS Modülasyonlu Kısa Menzilli Cihaz Uygulamaları ...

Page 76: ...mumda Rengi açın TV standart ayarı ayar seçeneği varsa Doğru renk standardını seçin Kanalda sorun var Başka bir kanalla test edin Görüntü var ses yok Ses minimuma ayarlanmıştır Sesi açın Teletekst yok veya hatalı Kanalda sorun var Başka bir kanalla test edin Televizyon istasyonu teletekst yok veya anten sistemi ince ayar ve gölgeler için başka bir kanalı test edin İstasyon sinyali çok zayıf Anten ...

Page 77: ...ablolu bağlantıda video uygulamalarında videolar takılıyor Internet Bağlantı hızı düşük İnternet Bağlantı hızı düşüklüğü abone olduğunuz paketteki hızı nızla ya da internet altyapısındaki bir sorunla ilgilidir Servis sağlayı cınızla İSS ile iletişime geçin İnter ctive uygulamala rında bağlantı sorunları var Bu uygulamaların sunucuların daki geçici sorunlar Uygulamalara yeniden bağlan maya çalışın ...

Page 78: ...l sistemdir DiSEqC e iki veya daha fazla uydu konumunun kontrol edilmesi gerektiğinde ihtiyaç duyulur Dinamik Arka Işık Cihaz burada ortalama görüntü parlaklığına bağlı olarak arka ışıklandırmayı düzenleyerek resim içeriğinin arka ışıklandırmasını en uygun şekilde ayarlar Bir görüntüde çoğunlukla karanlık bölgeler varsa gösterilen siyah seviyesi arka ışıklandırmanın aşağı doğru ayarlanmasıyla bu d...

Page 79: ... yüksek çözünürlükte görüntüye ve video dizini ile medya kütüphanelerine sahiptir HbbTV nin tam işlevsel olabilmesi için televizyon İnternete bağlı olmalıdır HD Full HD UHD Yüksek Çözünürlüklü HD Televizyon Arttırılmış dikey yatay ve zamansal çözünürlüğe sahip bir televizyon standardına verilen genel addır Full HD 1920x1080 piksel HD çözünürlük verebilen veya kaydedebilen HDTV özellikli cihazların...

Page 80: ...lunuyorsa bu anten sistemine bağlı televizyonlar programları birbirinden bağımsız olarak alabilir Güvenlik WEP WPA WEP kablolu eşdeğer gizlilik WLAN için standart şifreleme algoritmasıdır Hem ağa erişimi kontrol eder hem de verilerin gizliliği ve bütünlüğünü sağlar Bu işlem bu günlerde güvensiz olarak görülmektedir Bu nedenle yeni WLAN sistemlerinde daha güvenli olan WPA şifreleme kullanılmalıdır ...

Page 81: ...arısı 12 74 Çevreyle ilgili bilgiler 6 D Detaylı Kanal Ayarları 66 DİĞER AYARLAR 55 Dijital çok kanallı amplifikatör AV alıcısı bağlama 58 Dijital kanalları alma 8 DİL Ayarları 50 Diskin formatlanması 37 Dosya formatları 43 Dosya tarayıcı 45 Dosya tarayıcısı ana menüsü 45 Durağan resimler ile ilgili notlar 8 DVD kayıt cihazı DVD oynatıcı video kayıt cihazı veya set üst kutusu kullanımı 58 E Ebevey...

Page 82: ...rın silinmesi 42 Kayıt için program ayarı 40 Kayıtlı dosyalar listesinden bir yayın seçme 41 KİLİT Ayarları 53 Kulaklıklar 58 Kulaklıkları takma 58 Kulaklık Sesi 27 Kurulum ve Güvenlik 5 Kurulum veya asma 11 L LNB Ayarları 68 M Manuel bağlantı 62 Menü dilinin değiştirilmesi 50 Menü dilinin seçilmesi 56 Menüyü seçme 37 N Normal text modu 34 O Ortak Arayüzle Çalıştırma 60 Ortak arayüz nedir 60 Otoma...

Page 83: ...nksiyonlar 28 TV ve Radyo kanalları arasında geçiş 29 U USB İşlemi 43 USB Kaydı 35 Uydu bağlantılı dijital televizyon istasyonlarının manuel aranması 67 Uydu bağlantılı tüm dijital televizyon istasyonla rının otomatik olarak aranması 66 USB kayıt ayarları 37 Uydu sinyali ile televizyon kanallarının aranması DVB S 21 Uyku zamanlayıcısı 29 Uzaktan kumanda ana fonksiyonlar 15 Uzaktan kumanda tüm fonk...

Page 84: ...or connecting to the home network 17 Tuning television channels 18 Initial set up overview 19 Initial Set up 22 Channel Editor for digital channels 24 PICTURE SOUND SETTINGS 24 Picture settings 25 Restore default settings 25 Concluding the settings 26 Sound settings 27 Concluding the settings 28 FUNCTIONING OF THE TV BASIC FUNCTIONS 28 Switching on and off 28 Selecting channels 28 Selecting channe...

Page 85: ...ning in the background 49 WEB BROWSER 49 Web browser menu 49 Web browser application 50 LANGUAGE SETTINGS 50 Changing the menu language 50 Changing the audio language 50 Changing the subtitle language 51 ACCESSIBILITY FUNCTIONS 52 TIMER FUNCTIONS 52 Auto Sync 52 Time and date 52 Time Zone 52 Sleep Timer 52 Auto standby 53 LOCK SETTINGS 53 Changing the PIN code 53 Blocking a television channel 53 W...

Page 86: ...els through cable automatically 68 Searching for digital television channels through cable manually 69 Searching for digital television channels through aerial automatically 69 Searching for digital television channels through aerial manually 70 Tuning analogue television stations 71 Displaying signal information 72 Service information for authorised dealers 72 Notes for wireless WLAN connection 7...

Page 87: ...me This is not a defect that can be used as the basis for a warranty claim Interface criteria This product has been manufactured in compatibility with Turkish Telecommunication networks Safety WARNING Risk of electrical accident 7 Do not dismantle the TV set Safety risk may arise and also the guarantee of the product can be void if the television set is opened 7 The TV set can only be operated wit...

Page 88: ...r the stand Do not use textile underlays or mats such as doilies Electromagnetic interference 7 Devices connected to the product satellite receiver DVD player and etc or signal emitting devices router and etc close to the product may cause disturbance in the image and noise in the sound 7 Connection cables used on the product must be shorter than 3 m 7 If the product cannot perform its function du...

Page 89: ...g audio and picture quality 7 The TV guide only for digital stations if provided by the broadcaster tells you of any schedule changes at short notice and provides an overview of all the stations schedules for the next few days 7 You can connect various data media for example an external hard drive a USB memory stick or a digital camera to the USB socket Using the file browser you can then select a...

Page 90: ...at broadcast in DVB C must be plugged into TV in order to receive the DVB C broadcasts 7 Unlike analogue broadcasting not every station has its own transmission frequency Instead several stations are grouped into what are known as bouquets on a regional or national level 7 You can find the current transmission information on teletext from various broadcasters or look in a TV guide or on the Intern...

Page 91: ...S 4 2 5 6 User Manual 3 1 7 Standard accessories 1 TV 2 Stand 3 Remote control 4 Battery for remote control 5 Screws and mounting instructions for stand 6 Quick Instruction Manual 7 Power cord Optional accessories Cleaning cloth Wall hanging screws ...

Page 92: ... TV network DVB C plug the antenna cable into the antenna socket ANT IN on the television set or 2c For analogue stations plug the antenna cable into the antenna socket ANT IN on the television set Note 7 When connecting an indoor antenna you may have to try it out at different positions until you get the best reception 3 Plug the mains cable into the wall socket Note 7 Only plug the device into t...

Page 93: ...urchase the bracket You will need the following 7 A pair of scissors 7 A cross tip screwdriver Follow the installation instructions for the VESA installation kit 1 Place the TV set in the film on a smooth surface with the screen facing down 2 Cut open the film on the back side using the scissors 3 Connect the required cables to the connectors on the TV set See the Connections section in this manua...

Page 94: ...turer accepts no liability for damage resulting from used batteries Environmental note 7 This symbol on the battery or on the packaging indicates that the battery provided with this product shall not be treated as household waste On certain batteries this symbol might be used in combination with a chemical symbol The chemical symbols for mercury Hg or lead Pb are added if the battery contains more...

Page 95: ...nual OVERVIEW Connections of the television set SATELLITE OPTIC OUT LAN ANT IN HDMI2 HDMI3 ARC SERVICE USB2 HDD 1A USB1 COMMON INTERFACE HDMI1 SATELLITE 13 18V max 500mA OPTIC OUT LAN ANT IN HDMI2 HDMI3 ARC SERVICE IR OUT IR OUT ...

Page 96: ...els 7 USB2 HDD Data media such as an external hard disk to record programs will be connected here 7 Optic Out optical audio output 7 U IR OUT External audio output or headphone jack with adapter IR Out is not available on this product 7 SERVICE Service only 7 LAN Network connection 7 HDMI2 Input for digital audio and image data 7 HDMI3 ARC Input for digital audio and image data 7 SATELLITE Input f...

Page 97: ...enu Opens the quick menu Switches between teletext and TV modes Opens the applications menu Selects the channels step by step Adjusts the volume Displays information Exits menu and applications Opens the channel list Opens the electronic TV guide Directly selects the channels Displays the favorite list Record playback pause or stop only digital television channels Launches the Netflix application ...

Page 98: ...cture search in the file browser and in some video applications 4 Page pause in teletext mode starts forward picture search in the file browser and in some video applications Starts recording in digital TV operation recording only via external data media 8 Starts playing in the file browser and in some video applications Pauses playing in the file browser and in some video applications Time shift ...

Page 99: ...ion Automatic connection all data regarding connection settings IP Address Netmask Gateway and DNS are obtained from modem automatically Manual connection all data regarding connection settings IP Address Netmask Gateway and DNS must be configured manually There are various options when using WLAN Automatic connection all data regarding connection settings IP Address Netmask Gateway and DNS are ob...

Page 100: ...step 7 Privacy Policy page 18 19 step 9 16 Wired page 18 step 8 Wireless page 19 step 16 Auto page 18 step 8 Manual Section page 60 Auto page19 step 15 IPv4 IPv6 Channel Editor page 21 Setting TV channels page 19 step 23 Start Netflix DVB T page 20 step 33 DVB C page 20 step 28 DVB S page 19 step 23 Auto page 20 step 28 Manual section page 67 Auto page 19 step 23 Manual section page 65 Auto page 2...

Page 101: ...ou want to connect your TV to home network continue at point 12 for an automatic LAN SETTINGS connection or continue at point 16 for an automatic WLAN connection 7 If it is not necessary to connect to a home network select Skip and continue with the setup from point 22 26 or 28 Connecting to a home network with a LAN cable 8 Press V or Λ to select Wired Network and press OK to confirm Privacy Poli...

Page 102: ...see the Detailed Channel Settings section on page 64 7 If you select Skip continue searching TV channels point 22 for DVB S reception point 26 for DVB C reception point 28 for DVB T reception Searching television channels with satellite signal DVB S S2 23 Press or to select DVB S S2 and press OK to confirm 24 Press or to select Operator and press OK to confirm 25 Select Satellite with V or Λ and p...

Page 103: ...s OK to confirm Auto Channel Search menu will be displayed and the channel search will start The scan is complete as soon as the Completed appears Tuning terrestrial digital television channels DVB T T2 30 Press or to select DVB T T2 and press OK to confirm Auto Channel Search menu will be displayed and the channel search will start The scan is complete as soon as the Completed appears ...

Page 104: ...rm 3 Press V or Λ to select Program Edit and press OK to confirm Program Edit menu will be displayed Important 7 Programme table and favourite lists are stored separately for all sources satellite cable and air 7 Programme table of the current source will be displayed when you select programme table Notes 7 A Cl module and smart card is required to watch the channel if there is a Key Lock sign nex...

Page 105: ...d press green to confirm 2 Press V or Λ to move the channel to its new position and confirm with green Note 7 Repeat steps 1 and 2 to move other channels 3 Press EXIT to quit the Program Edit Creating a list of favourites You can select your favourite channels and save them as a list Note 7 Favorite lists must be created separately for all sources satellite cable and air 7 To select the favorite l...

Page 106: ...nly be used where necessary low or off otherwise nuances in the image can be suppressed 7 Dynamic Contrast The function dynamically and optimally adjusts the contrast for the respective picture content by analysing images and then altering this depending in a change in contrast This increase in the contrast however may also reduce the visible brightness levels in the picture 7 Noise Reduction Redu...

Page 107: ...htness contrast and hue settings of the colors are adjusted separately It is possible to set it separately for red green blue magenta cyan and yellow This function allows you to perform advanced tuning in very specific contents Restore default settings 1 In the menu Picture select the line Restore default display settings with V or Λ and press OK to confirm 2 Select push button Yes with or to conf...

Page 108: ... Level Limiting AVL function means the volume is kept the same when you switch between channels 1 Press V or Λ to select Auto Volume and press OK to confirm 2 Press V or Λ to select On 3 Press BACK to return to the previous menu Surround Sound Surround Sound is an audio technology which is integrated in the television set and only requires the built in speakers to produce a Surround Sound effect 1...

Page 109: ...he previous menu Selecting the volume for the head phones 1 Select the line Headphone Volume with V or Λ and press OK to confirm 2 Adjust the volume with or 3 To save the setting press BACK Location selection The function how to place the television set is important for the automatic audio settings 1 Select the line TV Location with V or Λ 2 Select the required option Stand or Wall mounted with or...

Page 110: ...the volume 1 Adjust the volume with o Muting 1 Use p to switch the sound off mute and to switch it on again Displaying information 1 Press to display the information The menu on the screen disappears automatically after a short while Audio language You can select various languages when watching digital channels This depends on the programme being broadcast 1 Press to open the selection menu 2 Sele...

Page 111: ...ding to European regulations the remote remains untouched for 10 minutes 1 Press TOOLS to open the Quick menu 2 Press V or Λ to select Auto Sleep 3 Select the switch off time with or Note 7 Set the function to Off with or 4 Press EXIT to end the setting FUNCTIONING OF THE TV ADDITIONAL FUNCTIONS Switching between TV and Radio channels 1 Press TOOLS to open the Quick menu 2 Press V or Λ to select D...

Page 112: ...l sources from a set top box on the Euro AV socket the picture fills the screen completely and with the correct geometry Movie format The letterbox setting is especially suitable for programmes in 16 9 The black borders which are usually at the top and bottom of the screen are eliminated 4 3 pictures fill the screen The transmitted pictures are enlarged but are slightly cropped at the top and bott...

Page 113: ...tion at all 2 Select the channel with V or Λ Information about the actual programme is displayed in the selected television channel Note 7 Press P or P to switch between the channels in increments of 9 3 Switch to the information about the current programme using green Notes 7 The programme selected can be recorded if an external data medium is connected To do this press red to go to the details p...

Page 114: ...bTV is a new technology where broadcast and the broadband can be used together and which permits access to interactive applications that the broadcast provides through internet The TV must be connected to internet to receive HbbTV broadcast When you switch to a TV channel that offers HbbTV service the relevant message will be displayed ...

Page 115: ...t the desired topic field 3 Select the option you want with V Λ or in the selected topic field and confirm with OK 4 Press red to close HbbTV Note 7 If navigation does not work in HbbTV mode press EXIT to exit the function Additional functions for video indexes 1 Start playback with 8 2 Pause playback with 3 Resume playback with 8 4 Press 3 to rewind press 4 to fast forward 5 Stop playing by press...

Page 116: ...3 Press P to go to the previous page 4 Press P to go to the next page 5 Press TXT to exit teletext mode Additional functions Skipping the waiting time While a page is being searched for you can switch to the television channel 1 Enter the teletext page number with 1 0 and then press 7 As soon as the page is found the page number is displayed 2 Press 7 to switch to the teletext page Page stop A mul...

Page 117: ...n t responsible for any loss of data stored on any external storage device 7 It is recommended to play the files saved on DTV by PVR media player 7 If the product cannot be recovered in the data playing sharing recording mode due to electrostatic discharge user intervention will be required Possible limitations when using an external data medium Depending on the broadcasting station you may experi...

Page 118: ...DD USB interface of the television or plug the memory stick in one of the USB1 sockets of the television Notes 7 USB1 port of the TV supports 500 mA current according to the USB standard Devices such as external hard disk and etc that consume more power can only be connected to the USB2 HDD USB interface of the television 7 If you are using a power cable for the external hard disk that you have co...

Page 119: ...a media select one of them 1 Under the TimeShift File System menu press V or Λ to select Select Disk and press OK to confirm 2 Press V or Λ to select the partition and press or to select multiple partitions if any 3 Return with BACK or press EXIT to end the setting Time shift size You can adjust the size of the time shift memory 1 Under the TimeShift File System menu press V or Λ to select Time Sh...

Page 120: ...ft function 4 To stop the timeshift press to select Yes or to continue the timeshift press to select No Recording programmes You can record a TV channel Programmes are recorded onto the external data media and the archive is managed via television A memory of 44 MB up to 110 MB is required for a 1 minute record Recording programs with one touch 1 Select the channel with 1 0 or P P and press to sta...

Page 121: ...rogram will be displayed 3 Press red to add broadcasts to the timer Information for the TV program to be recorded will be displayed 4 In the Program information line press or to select the program you want to record 5 Press red to confirm Recording data range appears 6 Press EXIT to end the setting Notes 7 A warning is displayed before the timer recording starts and counts down for 15 seconds to a...

Page 122: ...press OK to confirm 9 Select End Time Year and press OK Press V or Λ to select the year and press OK to confirm 10 Select End Time Month and press OK Press V or Λ to select the month and press OK to confirm 11 Select End Time Date and press OK Press V or Λ to select the day and press OK to confirm 12 Select End Time Time and press OK Press V or Λ to select the time and press OK to confirm 13 Selec...

Page 123: ...s OK to confirm The Recorded List menu will be displayed 3 With V or Λ select the broadcast you want to play and start playback with 8 4 Press 7 to end playback TV returns to media player menu Forward reverse picture search 1 Press 4 repeatedly during playback to select the playback speed 2x 4x 8x 16x or 32x or press 3 repeatedly to select the playback speed 2x 4x 8x 16x or 32x USB RECORDING Delet...

Page 124: ...tandard that was developed by MPEG Motion Picture Expert Group AAC indicates the Advanced Audio Coding and is developed by MPEG AAC provides higher audio quality with the same data rate bit rate These formats enable audio files to be saved on storage devices with a sound quality similar to that of a CD File extensions supported by your device mp3 m4a aac wav MP3 files can be organised into folders...

Page 125: ...e then the power cable of the external hard disk must also be unplugged when the TV is turned off 7 You must not disconnect the USB Device from the TV while a file on the USB Device is being read by the TV 7 A bi directional data transfer as defined for ITE Information Technology Equipment devices in EN 55022 EN 55024 is not possible 7 USB transfer is not an operating mode in itself It is only an ...

Page 126: ...rmation about the resolution and the size 7 When playing MP3 data album track and singer will be displayed on the screen 7 When playing picture data press MENU to open the control panel 5 Press to pause playback 6 Press 8 to resume playback 7 Press 7 to end playback The file browser appears Notes 7 It is possible that some files that are supported in USB mode do not operate due to some problems th...

Page 127: ...th OK Searching forward only video and audio files You can select different speeds 2 fold 4 fold 8 fold 16 fold and 32 fold forwards and backwards 1 Select the playback speed during playback by pressing 3 or 4 buttons 2 Press 8 to resume playback Turning the picture display only picture files The pictures can be rotated by 90 1 During playback switch on the control panel with MENU 2 Press or to se...

Page 128: ... the content of the Privacy Agreement SMART Interactive TV internet applications SMART Interactive TV interactive applications provides your TV with internet services and pages These applications are designed according to your television Through SMART Interactive TV feature you can run many local and global internet applications These applications include various types such as video picture music ...

Page 129: ...ct other applications in the Smart TV Apps menu 1 Press to open the application menu Applications will be displayed 2 To go to All Applications select Smart TV Apps with V Λ or and press OK to confirm All Applications menu will be displayed Launching the Netflix application 1 Press to open the application menu 2 Press or to select the Netflix application and press OK to confirm Start screen of the...

Page 130: ...top the Netflix app from running in the background 1 Open the menu with MENU 2 Press V or Λ to select Preferences and press to confirm 3 Press V or Λ to select App Settings and press OK to confirm 4 Press V or Λ to select Netflix Terminate Netflix and press OK to confirm 5 Press to stop the application or press to cancel ...

Page 131: ...s V Λ or to select Browser and press OK to confirm Web Browser will be displayed 3 Press red to display the URL input field 4 Select URL input area with Λ or V and press OK to confirm Virtual keyboard will be displayed 5 Enter the address and press red to confirm Notes 7 Other functions are explained on the screen 7 You can connect a keyboard or mouse to both USB1 or USB2 HDD sockets to use in the...

Page 132: ...age with V or Λ and press OK to confirm 3 Select primary audio language with V or Λ and press OK to confirm 4 Press BACK to go back one level in the menu 5 Select Secondary Audio Language with V or Λ and press OK to confirm 6 Select secondary audio language with V or Λ and press OK to confirm 7 Press BACK to go back one menu level or press EXIT to end the setting Changing the subtitle language onl...

Page 133: ...ns Subtitle Hearing Impaired Audio description is an additional audio channel for people who are visually impaired The activities surroundings scene changes or the appearance the gestures and facial expressions of the actors are described This sound is transmitted at the same time as the normal sound with digital television stations This depends on the programme being broadcast 1 Select Subtitle H...

Page 134: ...enu or press EXIT to end the setting Time Zone 1 Press V or Λ to select Time Zone and press OK to confirm 2 Press V or Λ to select the time zone 3 Press BACK to return to the previous menu or press EXIT to end the setting Sleep Timer With Sleep Timer you can enter a time for the television to switch off After this time has elapsed the television switches to standby mode 1 Press V or Λ to select Sl...

Page 135: ...e not suitable for children using a personal PIN code 1 Press V or Λ to select Block Program and press OK to confirm Block Program menu will be displayed 2 Press Λ or V to select the channel you want to block and press red 3 Press or to select the block type and press green The channel will be marked 4 Press EXIT to finish the setting Watching a blocked television channel You can watch a TV channe...

Page 136: ... in the USB memory stick is installed Software update NetReady 1 Press V or Λ to select Software Update NetReady and press OK to confirm New software will be searched Note 7 If no new software is available the menu automatically switches off 2 If new software is available press green to install the software The new software will be loaded Resetting the television to its original state This functio...

Page 137: ... from the television When you switch on your external device e g DVD player your television will switch to the HDMI source that the external device is connected to your television must be on Selecting the menu language When you select the menu language from your television menu language of the external device will change as well If your DVD player supports USING EXTERNAL DEVICES Switching off the ...

Page 138: ...devices to depends on the sockets the external device is equipped with and the signals which are available 7 Note that with many external devices the resolution of the video signal must be adapted to the input sockets on the television check the external device s instruction manual You can find out which values you need to set by referring to the guidelines in the section about connection options ...

Page 139: ...h the earphones can damage your hearing USING EXTERNAL DEVICES Hi fi system Connecting digital multi channel amplifier AV receiver 1 Connect the HDMI3 ARC HDMI 1 4 Audio Return Channel socket to the relevant socket on the HDMI ARC compliant Digital multichannel amplifier AV receiver with a standard HDMI cable digital audio signal or 2 Connect the Optic Out socket on the television to the correspon...

Page 140: ...cted to the AV receiver please remove the Disc from the Player during the registration 7 The internal speakers of the television are switching off automatically 7 AV receiver volume can be adjusted using TV remote control 7 For switching off the HDMI ARC function select Off with or 7 The ARC function will be deactivated while switching off the television and the internal speakers are active again ...

Page 141: ...e smart card into the CI slot on the television Note 7 To see which CA module is in the Common Interface slot go to the CA Module submenu 7 When you insert a CA module into the CI slot on the television for the first time wait a few moments until the television has registered the CA module Access control for CA module and smart card 1 Press MENU to open the menu 2 Press V or Λ to select the Channe...

Page 142: ...arding connection settings IP Address Netmask Gateway and DNS are obtained from modem automatically B Manual connection all data regarding connection settings IP Address Netmask Gateway and DNS must be configured manually Automatic connection Most of the home networks are Dynamic If you have a dynamic network you must use a DSL modem that supports DHCP Modems and IP sharers that support DHCP obtai...

Page 143: ... Accept and press OK to confirm 5 According to your network infrastructure press V or Λ to select IPv4 or IPv6 and press OK to confirm Note 7 To access the internet through IPv6 your internet service provider and modem must support IPv6 If only the modem supports IPv6 it can only connect to the modem you cannot connect to internet 6 Press V or Λ to select Manual Input and press OK to confirm IP Ad...

Page 144: ...o confirm 3 Press V or Λ to select Wireless Network and press OK to confirm 4 To approve the Privacy Policy press or to select Accept and press OK to confirm Wi Fi Network menu will be displayed 5 According to your network infrastructure press V or Λ to select IPv4 or IPv6 and press OK to set On Note 7 To access the internet through IPv6 your internet service provider and modem must support IPv6 I...

Page 145: ...finish the setting Wireless WPS network connection with PIN 1 Open the menu with MENU 2 Press V or Λ to select Network and press to confirm 3 Press V or Λ to select Wireless Network and press OK to confirm 4 To approve the Privacy Policy press or to select Accept and press OK to confirm Wi Fi Network menu will be displayed 5 According to your network infrastructure press V or Λ to select IPv4 or I...

Page 146: ...ff 4 Press EXIT to end the setting Displaying all applications Applications displayed on the SMART inter ctive TV applications menu are just a few of the applications that can run on the television You can display and select other applications in the Smart TV Apps menu 1 Press to open the application menu Applications will be displayed 2 To go to All Applications select Smart TV Apps with V Λ or a...

Page 147: ...e make sure that the LNB settings of the satellites are correct 9 Press MENU to return to the previous menu 10 Press V or Λ to select Scan Mode and press OK to confirm Select Free for free channels only select Scramble for encrypted channels only and select Free Scramble for all channels and press V or Λ press MENU to return to the previous menu 11 Press V or Λ to select Service Type Select DTV fo...

Page 148: ...u will be displayed 6 Press V or Λ to select the required items and press OK to confirm Frequency Enter the 5 digit channel frequency using 1 0 Symbol Enter channel symbol rate with 1 0 as a 5 digit number Polarization Press or to select channel polarization as Vertical or Horizontal 7 Press V or Λ to select Scan Mode and press OK to confirm Select Free for free channels only select Scramble for e...

Page 149: ...transponder or add a new transponder LNB Gücü Select the LNB Power as Off or 13 18V 13V 18V according to its type using or Long Cable Compensation Select with and select On or Off LNB Tipi Select the LNB Type with OK and then with or Note 7 Select Universal from the list if you use universal LNB 22KHz Tone Auto Press OK and then press V or Λ to select Auto On or Off Toneburst Press OK and then pre...

Page 150: ...network ID information are required You can obtain such information from your cable provider or find them in Internet forums 8 To start the search press OK DVB C Auto Tuning menu appears and the scan for TV channels begins Search may take several minutes depending on the number of television stations received Note 7 The search can be aborted with EXIT 9 Press EXIT to end searching DETAILED CHANNEL...

Page 151: ...everal minutes depending on the number of television stations received Note 7 The search can be aborted with EXIT 7 Press EXIT to end searching Searching for digital television channels through aerial manually 1 Press to open the Source menu 2 Press or to select DVB T T2 and press OK to confirm 3 Press MENU to open the menu 4 Press V or Λ to select the Channel menu and press to confirm CHANNEL men...

Page 152: ...minutes depending on the number of television stations received 7 Press EXIT to end searching Tuning the analogue television channels by entering the channel numbers 1 Press to open the Source menu 2 Press or to select ATV and press OK to confirm 3 Press MENU to open the menu 4 Press V or Λ to select the Channel menu and press to confirm Channel menu is now enabled 5 Press V or Λ to select ATV Man...

Page 153: ...hannel menu is now enabled 3 Select Signal Information using V or Λ and confirm with OK Signal Information menu will be displayed Notes 7 Signal information changes depending on the current source 7 The signal level not only depends on your receiver system but also on the channel which is currently active Remember this when aligning your antenna using the signal level display 4 Press EXIT to finis...

Page 154: ...ns 2010 30 EU Directives regarding Energy Labelling of Energy Related products as well as its following sub directives 1062 2010 Regulation regarding energy labelling of televisions 2011 65 EU Directive on limitations on use of certain hazardous materials on electric electronic domestic and office equipment To obtain a copy of declaration of compliance DoC please visit http www grundig com downloa...

Page 155: ...authority for the collection points in your region Help preserve the nature and natural resources by recycling used products For the safety of children cut the power cord before disposal For customers in Norway This device s WLAN Wifi feature can only be used indoors In Turkey outdoor use is not allowed Make sure WLAN Wifi feature is closed when using outdoors For the customers in Russia Short Ran...

Page 156: ... the colour TV standard setting if setting option is available Select the correct colour standard Problem at station Test with a different station Picture but no sound Volume set to minimum Turn up or switch on the volume Teletext missing or faulty Problem at station Test with a different station Television station has no teletext or antenna system Test another channel for fine tuning and ghosts S...

Page 157: ...ring playback in cable connection Internet connection speed is low Low Internet speed is a problem that is related with the speed of your subscription or a failure in the Internet infrastructure Contact with your service provided ISP There are connection problems in Inter ctive applications This may occur due to temporary problems in servers of these applications Try connecting to the applications...

Page 158: ...ntrolled DiSEqC is required when two or more satellite locations need to be controlled Dynamic Backlight Here the device optimally adjusts the back lighting for the picture content by regulating the back lighting depending on the average picture brightness If a picture has predominately dark areas then the black level displayed is improved by downward adjustment of the back lighting in this case t...

Page 159: ...cessor of video text which has content with a modern design high resolution images and video sequences as well as media libraries For full functionality of HbbTV the TV must be connected to the Internet HD Full HD UHD High Definition HD TV is a general name for the television standard that has increased vertical horizontal and timewise definition Full HD is a feature of devices with HDTV that can ...

Page 160: ... with a single cable system multi switch the televisions which are connected to this antennae system can receive television programmes independently from one another Security WEP WPA WEP wired equivalent privacy is the standard encryption algorithm for WLAN It controls both access to the network as well as ensuring the confidentiality and integrity of data This procedure is considered insecure now...

Page 161: ... home network with a LAN cable 19 Connection options 56 Connections of the television set 13 Control buttons on the TV 14 Creating a list of favourites 23 D Deleting a timer 41 Deleting channels in the channel editor 23 Deleting programmes from the recorded files menu 41 Detailed Channel Settings 65 Digi Link connection functions of TV 55 Disabling and enabling HbbTV 33 Displaying all applications...

Page 162: ...Display Settings 25 Restore default settings 25 Re tuning all analogue television channels 70 Reveal answer 34 S Searching and selecting the active external device 55 Searching for all digital television channels from a satellite automatically 65 Searching for digital television channels from a satellite manually 66 Searching for digital television channels through aerial automatically 69 Searchin...

Page 163: ...television stations 70 Tuning cable digital television channels DVB C 21 Tuning television channels 17 Tuning terrestrial digital television channels DVB T 21 Tuning the analogue television channels by entering the channel numbers 70 Turning the picture display 45 U USB Process 42 USB Recording 35 USB recording settings 37 USING EXTERNAL DEVICES 55 Using a DVD recorder DVD player video recor der o...

Page 164: ...ür die Anmeldung am Heimnetzwerk 17 Fernsehkanäle fein abstimmen 18 Erstinstallation Übersicht 19 Erstinstallation 22 Programmtabelle für digitale Kanäle 24 BILD TONEINSTELLUNGEN 24 Bildeinstellungen 25 Zurück zu den Standardwerten 26 Toneinstellungen 27 Einstellungen beenden 28 FUNKTIONSWEISE DES FERNSE HERS GRUNDFUNKTIONEN 28 Ein und ausschalten 28 Kanäle wählen 28 Kanäle aus Listen wählen 28 Ei...

Page 165: ...e Netflix App 51 WEBBROWSER 51 Webbrowser Menü 51 Webbrowser Anwendung 52 SPRACHEINSTELLUNGEN 52 Die Menüsprache ändern 52 Die Audiosprache ändern 52 Untertitelsprache wechseln 53 ZUGÄNGLICHKEITSFUNKTIONEN 54 TIMER FUNKTIONEN 54 Autom Synchronisation 54 Zeit und Datum 54 Zeitzone 54 Sleeptimer 54 Auto Standby 55 SPERREINSTELLUNGEN 55 PIN Code ändern 55 Einen Fernsehkanal blockieren 56 Einen blocki...

Page 166: ...Automatisch nach digitalen Kabelkanälen suchen 72 Manuell nach digitalen Kabelkanälen suchen 73 Automatisch nach digitalen Antennenka nälen suchen 73 Manuell nach digitalen Antennenkanälen suchen 74 Analoge Fernsehsender abstimmen 75 Signalinformationen anzeigen 76 Servicehinweise für den autorisierten Fachhandel 76 Hinweise zur Drahtlosverbindung WLAN 77 Entsorgung der Verpackung 77 Umwelthinweis...

Page 167: ...rd können für einige Zeit auf dem Bildschirm sichtbare Spuren davon zurückbleiben Dies ist kein Mangel der einen Anspruch auf Gewährleistung begründet Schnittstellenkriterien Dieses Gerät wurde in Übereinstimmung mit türkischen Telekommunikationsnetzwerken her gestellt Sicherheit WARNUNG Gefahr eines Stromunfalls 7 Demontieren Sie das Fernsehgerät nicht Bei Schäden die durch unsachgemäße Eingriffe...

Page 168: ...erwenden Sie keine textilen Unterlagen wie Deckchen Elektromagnetische Störungen 7 Mit dem Fernseher verbundene Geräte Sa tellitenempfänger DVD Player usw oder Signalübertragungsgeräte Router usw in der Nähe des Fernsehers können Bildstörungen und akustisches Rauschen verursachen 7 Mit dem Gerät verwendete Anschlusskabel müssen kürzer als 3 m sein 7 Falls das Gerät seiner Funktion aufgrund von ele...

Page 169: ... auch über kurzfristige Programmänderungen und bietet ihnen einen Überblick über das gesamte Fern sehprogramm der nächsten Tage 7 An die USB Buchsen können Sie verschiedene Datenträger wie zum Beispiel eine externe Festplatte einen USB Speicherstick oder eine Digitalkamera anschließen Mit Hilfe des Dateimanagers können Sie dann gezielt die gewünschten Dateiformate z B MP4 MP3 oder JPEG Daten anwäh...

Page 170: ...igitale Fernsehprogramme über Ihre Kabelanlage empfangen möchten DVB C muss das Antennenkabel des Kabelbetrei bers an das Fernsehgerät angeschlossen sein 7 Anders als bei analogen Sendungen werden viele digitale Sender nicht auf eigenen se paraten Frequenzen abgestrahlt Stattdessen werden unterschiedliche Sender auf regiona ler oder nationaler Ebene in Gruppen zusam mengefasst die manchmal auch Bo...

Page 171: ...FANG 4 2 5 6 User Manual 3 1 7 Beigepacktes Zubehör 1 Fernseher 2 Standfuß 3 Fernbedienung 4 Batterie für Fernbedienung 5 Schrauben und Montageanleitung für Standfuß 6 Kurzanleitung 7 Netzkabel Optionales Zubehör Reinigungstuch Wandmontageschrauben ...

Page 172: ...bel an den ANT IN des Fernsehgerätes an oder 2c Zum Empfang analoger Sender verbinden Sie das Antennenkabel mit dem ANT IN Anschluss des Fernsehgerätes Hinweis 7 Beim Anschluss einer Zimmerantenne muss diese evtl in verschiedenen Stellungen ausprobiert werden bis Sie optimalen Empfang erhalten 3 Stecken Sie den Stecker des Netzkabels in eine Steckdose ein Hinweis 7 Stecken Sie den Netzstecker des ...

Page 173: ...e sich zum Kauf der Halterung an einen autorisierten Händler Sie benötigen Folgendes 7 Schere 7 Kreuzschraubendreher Montageanleitung des VESA Installationssets beachten 1 Den Fernseher in der Folie mit dem Bildschirm nach unten auf eine glatte Fläche legen 2 Schneiden Sie die Folie auf der Rückseite mit einer Schere auf 3 Benötigte Kabel mit den Anschlüssen des Fernsehgeräts verbinden Siehe Kapit...

Page 174: ...ne Batterien entstehen übernehmen wir keine Haftung Umwelthinweis 7 Dieses Symbol auf Akkus Batterien oder an der Verpackung weist darauf hin dass der Akku die Batterie nicht mit dem regulären Hausmüll entsorgt werden darf Bei bestimmten Akkus Batterien kann dieses Symbol durch ein chemisches Symbol ergänzt werden Symbole für Quecksilber Hg oder Blei Pb werden angegeben wenn Akkus Batterien mehr a...

Page 175: ...eitung AUF EINEN BLICK Anschlüsse des Fernsehgerätes SATELLITE OPTIC OUT LAN ANT IN HDMI2 HDMI3 ARC SERVICE USB2 HDD 1A USB1 COMMON INTERFACE HDMI1 SATELLITE 13 18V max 500mA OPTIC OUT LAN ANT IN HDMI2 HDMI3 ARC SERVICE IR OUT IR OUT ...

Page 176: ... selter Kanäle 7 USB2 HDD Hier kann zur Aufnahme von Programmen ein Datenträger wie z B eine externe Festplatte angeschlossen werden 7 Optic Out Optischer Ausgang 7 U IR OUT Externer Audioausgang oder Kopfhöreranschluss mit Adapter IR Out ist für dieses Produkt nicht verfügbar 7 SERVICE Buchse nur für Service 7 LAN Netzwerkanschluss 7 HDMI2 Eingang für digitale Audio und Videodaten 7 HDMI3 ARC Ein...

Page 177: ...ine Ebene zurück Ruft das Menü auf Öffnet das Schnellmenü Wechselt zwischen Tele text und TV Modus Öffnet das Apps Menü Wählt die Kanäle Schritt für Schritt Ändert die Lautstärke Zeigt Informationen an Beendet Menüs und Apps Öffnet die Programmliste Öffnet den elektronischen Programmführer Wählt die Kanäle direkt Zeigt die Favoritenliste Aufnahme Wiedergabe Pause oder Stopp nur digitale Fernsehkan...

Page 178: ...d in einigen Videoanwendungen 4 Seitenpause im Teletext Modus startet den Vorlauf der Bildsuche im Dateibrowser und in einigen Video anwendungen Startet die Aufnahme nur bei digi talen Fernsehprogrammen die Auf nahme erfolgt auf einem externen Datenträger 8 Startet die Wiedergabe im Dateib rowser und in einigen VIdeoanwen dungen Hält die Wiedergabe im Dateib rowser und in einigen Videoanwen dungen...

Page 179: ...LAN Verbindung gibt es zwei Möglichkei ten Automatische Anmeldung dabei werden alle notwendigen Einstellungen IP Adresse Netzmaske Gateway und DNS vom Router automatisch vergeben Manuelle Anmeldung hier müssen alle notwendigen Einstellungen IP Adresse Netzmaske Gateway und DNS von Hand eingegeben werden Zur WLAN Verbindung gibt es verschiedene Möglichkeiten Automatische Anmeldung dabei werden alle...

Page 180: ...ärung Seite 18 19 Schritt 9 16 Kabelgebunden Seite 18 Schritt 8 Kabellos Seite 19 Schritt 16 Autom Seite 18 Schritt 8 Manuell Abschnitt Seite 63 Autom Seite19 Schritt 15 IPv4 IPv6 Programmtabelle Seite 21 Fernsehkanäle einstellen Seite 20 Schritt 23 Netflix starten DVB T Seite 20 Schritt 33 DVB C Seite 20 Schritt 28 DVB S Seite 20 Schritt 23 Autom Seite 20 Schritt 28 Manuell Abschnitt Seite 71 Aut...

Page 181: ...und Datum die Manuell Option und drücken Sie zum Bestätigen OK EINSTELLUNGEN 7 Lesen Sie Rechtliche Hinweise und drücken Sie zum Fortfahren mit dem Nächsten Schritt OK Hinweise 7 Wenn das Fernsehgerät am Heimnetzwerk angemeldet werden soll machen Sie weiter bei Punkt 12 für eine automatische LAN Verbindung oder weiter bei Punkt 16 für eine automatische WLAN Verbindung 7 Falls eine Anmeldung am Hei...

Page 182: ...chten und drücken Sie zum Bestätigen OK Der Bildschirm zur Eingabe des Drahtlosverbindung Kennwortes wird angezeigt 19 Wählen Sie mit V oder Λ das erforderliche Zeichen und wechseln Sie mit OK zum nächsten Zeichen Mit A1 OK können Sie zwischen Großschreibung Ziffern und Kleinschreibung Sonderzeichen wechseln Wählen Sie zum Löschen des eingegebenen Zeichens und drücken Sie zum Bestätigen OK 20 Wird...

Page 183: ...Wählen Sie Diensttyp Wählen Sie ob Sie nur digitale Kanäle DTV nur Radio Radio oder beides DTV Radio suchen möchten indem Sie mit V oder Λ zwischen DTV Radio und oder DTV Radio wählen und zum Markieren OK drücken Kehren Sie mit MENU zum vorherigen Menü zurück 27 Wählen Sie zum Starten der Suche Schnell Scan und drücken Sie OK Das Autom Kanalsuche Menü wird angezeigt und die Kanalsuche startet Die ...

Page 184: ...rbeiten und drücken Sie zum Bestätigen OK Das Menü Programme Bearbeiten wird angezeigt Wichtig 7 Programmtabelle und Favoritenlisten werden nach den unterschiedlichen Signalquellen Satellit Kabel Terrestrisch getrennt gespeichert 7 Beim Aufrufen der Programmtabelle erscheint jeweils die Programmtabelle der aktuellen Signalquelle Hinweise 7 Wird in der Programmtabelle zusätzlich zum Namen des Kanal...

Page 185: ...en Sie zum Bestätigen grün 2 Verschieben Sie den Kanal mit V oder Λ zu ihrer nächsten Position und bestätigen Sie mit grün Hinweis 7 Wiederholen Sie zum Verschieben weiterer Kanäle die Schritte 1 und 2 3 Verlassen Sie mit EXIT Programme Bearbeiten Favoritenliste erstellen Sie können Ihre Favoritenkanäle wählen und als Liste speichern Hinweis 7 Favoritenlisten müssen separat für alle Signalquellen ...

Page 186: ...se aber bei hervor ragender Übertragung und gutem Bildmaterial eher beeinträchtigen 7 Brillante Farben Erhöht den Farbkontrast und die Kontrasteinstellung Meist ist diese Einstellung bei normalen Bildern zu stark und sollte dosiert niedrig oder aus eingesetzt werden da sonst Nuancen im Bild unterdrückt werden 7 Dynamischer Kontrast Die Funktion passt den Kontrast dynamisch und optimal an die jewei...

Page 187: ...te und analysiert jeden dieser zur Ermittlung des besten Helligkeitswertes individuell Damit können bei dunklen Inhalten detailliertere Bilder erzeugt werden 7 Farbverwaltungssystem Stellt sicher dass Helligkeits Kontrast und Farbtoneinstellungen der Farben separat angepasst werden Dies kann für Rot Grün Blau Magenta Cyan und Gelb separat eingestellt werden Diese Funktion ermöglicht Ihnen eine erw...

Page 188: ... einheitliche Lautstärke wenn Sie von einem Fernsehprogramm auf ein anderes umschalten 1 Wählen Sie mit V oder Λ die Option Autom Lautstärke und drücken Sie zum Bestätigen OK 2 Wählen Sie mit V oder Λ die Option Ein 3 Kehren Sie mit BACK zum vorherigen Menü zurück Surround Sound Surround Sound ist eine in das Fernsehgerät integ rierte Audiotechnologie die Raumklangeffekte allein mit den Lautsprech...

Page 189: ... zurück Kopfhörer Lautstärke ändern 1 Die Zeile Kopfhörer Lautstärke mit V oder Λ wählen und mit OK bestätigen 2 Gewünschte Lautstärke mit oder einstellen 3 Kehren Sie mit BACK zum vorherigen Menü zurück Standfuß oder Wandmontage Die Toneinstellungen werden je nach Aufstellungsart Standfuß oder Wandmontage optimal eingestellt 1 Die Zeile Fernseherposition mit V oder Λ wählen und mit OK bestätigen ...

Page 190: ... die Lautstärke mit o an Ton aus und einschalten 1 Schalten Sie den Ton mit p aus und wieder ein Informationen einblenden 1 Drücken Sie zum Anzeigen der Informationen Das Menü wird nach kurzer Zeit automatisch ausgeblendet Audiosprache Beim Anschauen digitaler Kanäle können Sie unter verschiedenen Sprachen auswählen Die Verfügbarkeit hängt vom jeweiligen Programm ab 1 Rufen Sie das Auswahlmenü mit...

Page 191: ...t durch Europäische Richtlinie 1 Drücken Sie zum Öffnen des Schnellmenüs TOOLS 2 Wählen Sie mit V oder Λ die Option Autom Abschaltung 3 Wählen Sie mit oder die Ausschaltzeit Hinweis 7 Stellen Sie die Funktion mit oder auf Aus ein 4 Beenden Sie die Einstellung mit EXIT FUNKTIONSWEISE DES FERNSEHERS ZUSATZFUNKTIONEN Zwischen Fernseh und Radiokanälen umschalten 1 Drücken Sie zum Öffnen des Schnellmen...

Page 192: ...lichen 16 9 Signalquellen von einem Digitalempfänger an der Euro AV Buchse wird der Bildschirm voll ausgefüllt und ist die Bildgeo metrie korrekt Format Film Das Letterbox Format eignet sich besonders für Sendungen im Format 16 9 Die bisher üblichen schwarzen Balken oben und unten im Bild werden entfernt 4 3 Bilder werden bildschirmfüllend angezeigt Die gesendeten Bilder werden vergrößert dabei ge...

Page 193: ...nen anbieten 2 Wählen Sie den Kanal mit V oder Λ aus Informationen über das tatsächliche Programm werden im ausgewählten Fernsehkanal angezeigt Hinweis 7 Wechseln Sie mit P oder P in 9er Schritten zwischen den Kanälen 3 Wechseln Sie mit grün zu Informationen über das aktuelle Programm Hinweise 7 Das gewählte Programm kann aufgezeichnet werden wenn ein externen Datenträger angeschlossen ist Rufen S...

Page 194: ...bbTV eine neue Technologie bei der Broad cast und Breitband gemeinsam genutzt werden können und die Zugang zu interaktiven Apps erlaubt die Broadcast über das Internet bietet Der Fernseher muss zum Empfang von HbbTV Broadcast mit dem Internet verbunden sein Wenn Sie zu einem Fernsehkanal mit HbbTV Dienst wechseln wird eine entsprechende Mel dung angezeigt ...

Page 195: ...im ausgewählten Themenfeld und bestätigen Sie mit OK 4 Deaktivieren Sie HbbTV mit rot Hinweis 7 Falls Navigation im HbbTV Modus nicht funktioniert drücken Sie zum Deaktivieren der Funktion EXIT Weitere Funktionen für Videosequenzen 1 Starten Sie die Wiedergabe mit 8 2 Halten Sie die Wiedergabe mit an 3 Setzen Sie die Wiedergabe mit 8 fort 4 Mit 3 aktivieren Sie den Rücklauf mit 4 aktivieren Sie de...

Page 196: ...t P die vorherige Seite auf 4 Rufen Sie mit P die nächste Seite auf 5 Drücken Sie zum Beenden des Videotext Modus TXT Weitere Funktionen Wartezeit überbrücken Während eine Seite gesucht wird können Sie zum Fernsehprogramm umschalten 1 Geben Sie mit 1 0 die Videotext Seitennummer ein und drücken Sie 7 Sobald die Seite gefunden wurde wird die Seitennummer angezeigt 2 Drücken Sie zum Umschalten auf d...

Page 197: ...rlust gespeicherter Daten auf dem externen Datenträger 7 Sie sollten auf DTV gespeicherte Dateien per PVR Medienplayer wiedergeben 7 Falls das Produkt im Datenwiedergabe Freigabe Aufnahmemodus aufgrund elektrostatischer Entladung nicht wiederhergestellt werden kann muss der Nutzer eingreifen Mögliche Einschränkungen bei Betrieb mit externen Datenträgern Abhängig vom jeweiligen Programmanbieter kan...

Page 198: ...tplatte mit dem USB2 HDD Anschluss des Fernsehgerätes oder Schließen Sie einen Speicherstick an einen der USB1 Anschlüsse des Fernsehgerätes an Hinweise 7 Der Anschluss USB1 des Fernsehers unterstützt entsprechend dem USB Standard eine Stromstärke bis 500 mA Geräte wie externe Festplatten die mehr Strom benötigen dürfen daher nur mit dem USB2 HDD Anschluss des Fernsehgerätes verbunden werden 7 Wen...

Page 199: ...der beenden Sie die Einstellung mit EXIT Partition des externen Datenträgers wählen Wenn der externe Datenträger über mehrere Partitionen verfügt wählen Sie die gewünschte aus 1 Wählen Sie im Timeshift Dateisystem Menü mit V oder Λ die Option Laufwerk wählen und drücken Sie zum Bestätigen OK 2 Wählen Sie mit V oder Λ die Partition drücken Sie zur Auswahl mehrerer Partitionen falls vorhanden oder 3...

Page 200: ...r letz ten Szene die Sendung wird im Timeshift Spei cher des externen Datenträgers gespeichert Im Timeshift Modus kann die Größe der aufge nommenen Daten den freien Speicherplatz auf dem externen Datenträger nicht überschreiten Hinweis 7 Verwenden Sie für eine ununterbrochene Timeshift Funktion eine externe USB Festplatte 1 Halten Sie die aktuelle Sendung mit an Das Bild wird eingefroren der Zeitv...

Page 201: ...ss getrennt wird die Aufnahme automatisch abgebrochen und nicht gespeichert Fernseher während der Aufnahme in den Bereitschaftsmodus versetzen 1 Wählen Sie den Kanal den Sie aufnehmen möchten und drücken Sie zum Starten der Aufnahme 2 Versetzen Sie den Fernseher in den Bereitschaftsmodus indem Sie 8 drücken 3 Setzen Sie die Aufnahme fort und wechseln Sie in den Bereitschaftsmodus indem Sie drücken...

Page 202: ...s kann es vorkommen dass auch ein Teil des vorherigen oder der nächsten Programmes aufgezeichnet wird Die Ursache kann eine zeitliche Änderung oder eine Ungenauigkeit des elektronischen Programmführers sein Bitte beachten Sie dass der höchste Zugangslevel für alle Programme verwendet wird wenn eines oder mehrere dieser Programme jugendgeschützt sind durch manuelle Dateneingabe 1 Drücken Sie zum Ei...

Page 203: ...ücken Sie zur Anzeige von Planungsliste die Taste gelb 3 Wählen Sie mit V oder Λ den Titel des zu löschenden Programms und drücken Sie zum Löschen des Timers rot Der Timer wird gelöscht 4 Schließen Sie die Einstellungen mit EXIT ab USB Aufzeichnung Wiedergabe Die aufgezeichneten Programme ob von Hand gestartet oder mit der Timer Funktion werden auf dem externen Datenträger gespei chert Sie können ...

Page 204: ...n Sie mit V oder Λ die Option Aufnahmeliste und drücken Sie zum Bestätigen OK Das Aufnahmeliste Menü wird angezeigt 3 Wählen Sie das zu löschende Programm mit V oder Λ 4 Löschen Sie die Sendung mit rot 5 Bestätigen Sie die Löschung indem Sie mit die Option Ja wählen oder wählen Sie zum Abbrechen der Löschung mit die Option Nein 6 Beenden Sie die Einstellung mit EXIT ...

Page 205: ... wurde AAC steht für Advanced Audio Coding und wurde ebenfalls von der MPEG entwickelt AAC liefert eine bessere Tonqualität bei identischer Datenrate Solche Formate ermöglichen Aufzeichnung und Wiedergabe von Audiodateien die so gut wie eine CD klingen jedoch nur einen Bruchteil des Speicherplatzes belegen Unterstützte Dateinamenerweiterungen mp3 m4a aac wav MP3 Dateien können wie vom Computer ge ...

Page 206: ...ersorgungskabel verwenden muss dieses Kabel beim Abschalten des Fernsehgerätes ebenfalls getrennt werden 7 Externe Datenträger dürfen nicht vom Fernsehgerät getrennt werden während auf Dateien des Datenträgers zugegriffen wird 7 Ein bidirektionaler Datenaustausch im Sinne eines ITE Gerätes Information Technology Equipment gemäß EN 55022 EN 55024 ist nicht möglich 7 Die USB Übertragung ist kein eig...

Page 207: ...ährend der Wiedergabe von Bilddaten können Sie mit Informationen über Auflösung und Größe anzeigen 7 Bei Wiedergabe von MP3 Daten werden Album Titel und Interpret am Bildschirm angezeigt 7 Bei der Wiedergabe von Bilddaten können Sie mit MENU das Bedienfeld öffnen 5 Drücken Sie zum Anhalten der Wiedergabe 6 Drücken Sie zum Fortsetzen der Wiedergabe 8 7 Beenden Sie die Wiedergabe mit 7 Der Dateibrow...

Page 208: ...MENU 2 Wählen Sie mit oder und drücken Sie zum Bestätigen OK 3 Geben Sie mit 1 0 die Zeit an zu der Sie springen möchten und bestätigen Sie mit OK Schneller Vorlauf nur bei Video und Audiodateien Sie können zwischen unterschiedlichen Ge schwindigkeiten 2 fach 4 fach 8 fach 16 fach und 32 fach vorwärts und rückwärts wählen 1 Wählen Sie während der Wiedergabe mit den Tasten 3 oder 4 die Wiedergabege...

Page 209: ...ng USB VERARBEITUNG 2 Bestätigen Sie zum Zeitpunkt an dem die Wiederholung enden soll mit OK Das Ende wird mit B gekennzeichnet und die Zeit zwischen A B wird wiederholt 3 Bestätigen Sie zum Abbrechen der Wiederholung durch Drücken von OK ...

Page 210: ...e Verbindung zum Internet herstellen noch internetabhängige Funktionen nutzen Bitte lesen Sie die Datenschutzerklärung aufmerksam SMART Interactive TV Internetanwendungen Internetanwendungen von SMART Interactive TV bieten Ihrem Fernseher Internetdienste und seiten Diese Anwendungen sind entsprechend Ihrem Fernseher gestaltet Mit der Funktion SMART Interactive TV können Sie viele lokale und global...

Page 211: ...n Sie zum Öffnen des Anwendungsmenüs Anwendungen werden angezeigt 2 Wählen Sie zum Aufrufen aller Anwendungen mit V Λ oder die Option Smart TV Apps und drücken Sie zum Bestätigen OK Das Alle Anwendungen Menü wird angezeigt Netflix Anwendung ausführen 1 Drücken Sie zum Öffnen des Anwendungsmenüs 2 Wählen Sie mit oder eine Netflix Anwendung und drücken Sie zum Bestätigen OK Der Startbildschirm der N...

Page 212: ... läuft 1 Öffnen Sie das Menü mit MENU 2 Wählen Sie mit V oder Λ die Option Präferenzen und drücken Sie zum Bestätigen 3 Wählen Sie mit V oder Λ die Option App Einstellungen und drücken Sie zum Bestätigen OK 4 Wählen Sie mit V oder Λ die Option Netflix Terminate Netflix und drücken Sie zum Bestätigen OK 5 Drücken Sie zum Stoppen der Anwendung oder drücken Sie zum Abbrechen ...

Page 213: ...e zum Bestätigen OK Der Webbrowser wird angezeigt 3 Drücken Sie zur Anzeige des URL Eingabefeldes rot 4 Wählen Sie den URL Eingabebereich mit Λ oder V und drücken Sie zum Bestätigen OK Die virtuelle Tastatur wird angezeigt 5 Geben Sie die Adresse ein und drücken Sie zum Bestätigen rot Hinweise 7 Weitere Funktionen und Bedienmöglichkeiten werden unten am Bildschirm angezeigt 7 Zur Nutzung im Webbro...

Page 214: ...ie zum Bestätigen OK 3 Wählen Sie mit V oder Λ die primäre Audiosprache und drücken Sie zum Bestätigen OK 4 Kehren Sie mit BACK eine Menüebene zurück 5 Wählen Sie mit V oder Λ die Option Sekundäre Audiosprache und drücken Sie zum Bestätigen OK 6 Wählen Sie mit V oder Λ die sekundäre Audiosprache und drücken Sie zum Bestätigen OK 7 Kehren Sie mit BACK eine Menüebene zurück oder drücken Sie zum Been...

Page 215: ...tertitel für Hörgeschädigte Audiodeskription ist ein zusätzlicher Audioka nal für sehbehinderte Menschen Unter anderem werden Aktivitäten Umgebungen Szenenän derungen Gesten und Gesichtsausdrücke der Schauspieler beschrieben Dieser Audiokanal wird bei digitalen Fernseh sendern zeitgleich mit dem normalen Ton über tragen Die Verfügbarkeit hängt vom jeweiligen Programm ab 1 Wählen Sie mit V oder Λ d...

Page 216: ...n Menü mit EXIT verlassen Sie die Einstellung Zeitzone 1 Wählen Sie mit V oder Λ die Zeitzone und drücken Sie zum Bestätigen OK 2 Wählen Sie mit V oder Λ die Zeitzone 3 Mit BACK gelangen Sie wieder zum vorherigen Menü mit EXIT verlassen Sie die Einstellung Sleeptimer Mit Sleeptimer können Sie eine Zeit zur Ab schaltung des Fernsehers eingeben Das Fern sehgerät wechselt nach Ablauf der eingestellte...

Page 217: ...persönlichen PIN Code eingeben Notieren Sie sich bitte Ihren persönlichen PIN Code 1 Wählen Sie mit V oder Λ die Option Password einstellen und drücken Sie zum Bestätigen OK 2 Geben Sie die aktuelle vierstellige PIN über 1 0 ein 3 Geben Sie mit 1 0 die neue vierstellige PIN ein 4 Geben Sie Ihre persönliche PIN mit 1 0 erneut ein 5 Schließen Sie die Einstellungen mit EXIT ab Einen Fernsehkanal bloc...

Page 218: ... Das Fernsehprogramm wird nach einem Wechsel des Programmplatzes wieder gesperrt Jugendschutz Es gibt eine Vielzahl von Filmen die sich nicht für Kinder eignen Diese Sendungen enthalten Informationen die diese Inhalte oder die Szenen markieren und sind mit Zugangslevel von 4 bis 18 versehen Sie können einen der Zugangslevel wählen und damit die Wiedergabe autorisieren 1 Wählen Sie mit V oder Λ die...

Page 219: ... Software auf dem USB Speicherstick wird installiert Software Update NetReady 1 Wählen Sie mit V oder Λ die Option Software Update NetReady und drücken Sie zum Bestätigen OK Neue Software wird gesucht Hinweis 7 Ist keine neue Software vorhanden wird das Menü automatisch abgeschaltet 2 Ist eine neue Software vorhanden die Software mit grün installieren Die neue Software wird geladen Fernsehgerät au...

Page 220: ...Quelle vom Fernseher aus wählen Wenn Ihr Fernsehgerät eingeschaltet ist und Sie danach das externe Geräte z B einen DVD Player einschalten wird die passende HDMI Quelle am Fernsehgerät aktiviert Menüsprache wählen Beim Umstellen der Menüsprache am Fern sehgerät wechselt auch die Menüsprache am externen Gerät Sofern vom externen Gerät unterstützt BETRIEB MIT EXTERNEN GERÄTEN Externes Gerät in den B...

Page 221: ...avon ab mit welchen Anschlüssen das externe Gerät ausgestattet ist und welche Signale zur Verfügung stehen 7 Beachten Sie Bei vielen externen Geräten muss die Auflösung des Videosignals an die Eingänge des Fernsehgerätes angepasst werden siehe Bedienungsanleitung des externen Gerätes Welchen Wert Sie einstellen müssen entnehmen Sie bitte den angegebenen Richtwerten in den Kapiteln über die verschi...

Page 222: ...Fi System Digitalen Multikanal Verstärker AV Receiver anschließen 1 Verbinden Sie den Anschluss HDMI3 ARC HDMI 1 4 Audio Return Channel über ein normales HDMI Kabel digitale Audiosignale mit dem entsprechenden Anschluss am digitalen Multikanal Verstärker AV Receiver oder 2 Verbinden Sie den Anschluss Optic Out am Fernseher über ein herkömmliches optisches Kabel digitale Audiosignale mit dem entspr...

Page 223: ...st darf während des Anmeldevorganges im Player keine Disk eingelegt sein 7 Die Lautsprecher des Fernsehgerätes werden automatisch abgeschaltet 7 Die Lautstärke des AV Receivers kann über die TV Fernbedienung angepasst werden 7 Wählen Sie zum Abschalten der HDMI ARC Funktion mit oder die Option Aus 7 Wird das Fernsehgerät ausgeschaltet dann wird dadurch auch die ARC Funktion ausgeschaltet und die L...

Page 224: ...Smartcard in den CI Steckplatz des Fernsehgerätes ein Hinweis 7 Das CA Modul Untermenü informiert Sie was für ein CA Modul im CI Steckplatz eingesetzt ist 7 Wenn Sie ein CA Modul zum ersten Mal in den CI Steckplatz des Fernsehgerätes einsetzen müssen Sie einen Moment warten bis das CA Modul erkannt wurde Zugriffskontrolle für CA Modul und Smartcard 1 Rufen Sie mit MENU das Menü auf 2 Wählen Sie mi...

Page 225: ... Ihr Fernsehgerät am Heimnetzwerk anzumelden A Automatische Anmeldung dabei werden alle notwendigen Einstellungen IP Adresse Netzmas ke Gateway und DNS vom Router automatisch vergeben B Manuelle Anmeldung hier müssen alle notwendigen Einstellungen IP Adresse Netzmaske Gateway und DNS von Hand eingegeben werden Automatische Anmeldung Die meisten Heimnetze sind dynamisch Wenn Sie ein dynamisches Net...

Page 226: ...erk und drücken Sie zum Bestätigen OK 4 Wählen Sie zum Akzeptieren der Datenschutzerklärung mit oder die Option Akzeptieren und drücken Sie zum Bestätigen OK 5 Wählen Sie entsprechend Ihrer Netzwerkinfrastruktur mit V oder Λ die Option IPv4 oder IPv6 und drücken Sie zum Bestätigen OK Hinweis 7 Zum Zugreifen auf das Internet via IPv6 müssen Ihr Internetanbieter und das Modem IPv6 unterstützen Falls...

Page 227: ...and zwischen Modem und Fernsehgerät Verbindung automatisch durch Eingabe des Netzwerkkennworts herstellen 1 Öffnen Sie das Menü mit MENU 2 Wählen Sie mit V oder Λ die Option Netzwerk und drücken Sie zum Bestätigen 3 Wählen Sie mit V oder Λ die Option Drahtlosnetzwerk und drücken Sie zum Bestätigen OK 4 Wählen Sie zum Akzeptieren der Datenschutzerklärung mit oder die Option Akzeptieren und drücken ...

Page 228: ...len Sie mit V oder Λ die Option Drahtlosnetzwerk und drücken Sie zum Bestätigen OK 4 Wählen Sie zum Akzeptieren der Datenschutzerklärung mit oder die Option Akzeptieren und drücken Sie zum Bestätigen OK Das Menü WLAN Netzwerk wird angezeigt 5 Wählen Sie entsprechend Ihrer Netzwerkinfrastruktur mit V oder Λ die Option IPv4 oder IPv6 und drücken Sie zum Einstellen von Ein auf OK Hinweis 7 Zum Zugrei...

Page 229: ... drücken Sie zum Bestätigen OK Das Menü WLAN Netzwerk wird angezeigt 5 Wählen Sie entsprechend Ihrer Netzwerkinfrastruktur mit V oder Λ die Option IPv4 oder IPv6 und drücken Sie zum Einstellen von Ein auf OK Hinweis 7 Zum Zugreifen auf das Internet via IPv6 müssen Ihr Internetanbieter und das Modem IPv6 unterstützen Falls nur das Modem IPv6 unterstützt können Sie nur eine Verbindung zum Modem hers...

Page 230: ...en erfolgreich 11 Schließen Sie die Einstellungen mit EXIT ab Netzwerkstatus Zeigt alle Informationen über das Netzwerk wie Verbindungstyp verbundenes Netzwerk und IP Adresse an 1 Öffnen Sie das Menü mit MENU 2 Wählen Sie mit V oder Λ die Option Netzwerk und drücken Sie zum Bestätigen 3 Wählen Sie mit V oder Λ die Option Netzwerkstatus und drücken Sie zum Bestätigen OK Informationen zum Netzwerk w...

Page 231: ...llungen der Satelliten stimmen falls Sie mehr als einen Satelliten suchen möchten 9 Kehren Sie mit MENU zum vorherigen Menü zurück 10 Wählen Sie mit V oder Λ die Option Scan Modus und drücken Sie zum Bestätigen OK Wählen Sie mit V oder Λ zwischen Frei ausschließlich freie Kanäle Verschlüsselt ausschließlich verschlüsselte Kanäle und Frei Verschlüsselt alle Kanäle und kehren Sie mit MENU zum vorher...

Page 232: ...e mit V oder Λ die erforderlichen Elemente und drücken Sie zum Bestätigen OK Frequenz Geben Sie mit 1 0 die 5 stellige Kanalfrequenz ein Symbol Geben Sie mit 1 0 die Kanalsymbolrate als 5 stellige Nummer ein Polarisation Wählen Sie mit oder die Kanalpolarisation als Vertikal oder Horizontal 7 Wählen Sie mit V oder Λ die Option Scan Modus und drücken Sie zum Bestätigen OK Wählen Sie mit V oder Λ zw...

Page 233: ...wechseln oder löschen oder einen neuen Transponder hinzufügen LNB Leistung Stellen Sie die LNB Leistung entsprechend ihres Typs mit oder auf Aus 13 18V 13V oder 18V ein Kompensation für langes Kabel Wählen Sie mit zwischen Ein und Aus LNB Typ Wählen Sie den LNB Typ mit OK und dann mit oder Hinweis 7 Wählen Sie Universal aus der Liste falls Sie universelles LNB nutzen 22 kHz Ton Drücken Sie OK und ...

Page 234: ... und Netzwerk ID Sie erhalten solche Informationen von Ihrem Kabelanbieter oder in Internetforen 8 Drücken Sie zum Starten der Suche OK Das Menü DVB C Autom Sendersuche wird eingeblendet die Suche nach TV Kanälen beginnt Je nach Anzahl der empfangenen Fernsehsender kann dies durchaus einige Minuten dauern Detaillierte Kanaleinstellungen Hinweis 7 Mit EXIT kann die Suche abgebrochen werden 9 Drücke...

Page 235: ...Je nach Anzahl der empfangenen Fernsehsender kann dies durchaus einige Minuten dauern Hinweis 7 Mit EXIT kann die Suche abgebrochen werden 7 Drücken Sie zum Beenden der Suche EXIT Manuell nach digitalen Antennenkanälen suchen 1 Öffnen Sie mit das Quelle Menü 2 Wählen Sie mit oder die Option DVB T T2 und drücken Sie zum Bestätigen OK 3 Rufen Sie mit MENU das Menü auf 4 Wählen Sie mit V oder Λ das K...

Page 236: ...um Beenden der Suche EXIT Analoge Fernsehkanäle durch Eingeben der Kanalnummern einstellen 1 Öffnen Sie mit das Quelle Menü 2 Wählen Sie mit oder die Option ATV und drücken Sie zum Bestätigen OK 3 Rufen Sie mit MENU das Menü auf 4 Wählen Sie mit V oder Λ das Kanal Menü und drücken Sie zum Bestätigen Das Menü Kanal ist nun aktiviert 5 Wählen Sie mit V oder Λ die Option ATV Manuelle Sendersuche und ...

Page 237: ...as Menü Kanal ist nun aktiviert 3 Wählen Sie mit V oder Λ die Option Signalinformationen und bestätigen Sie mit OK Das Signalinformationen Menü wird angezeigt Hinweise 7 Die Signalinformationen wechseln je nach aktueller Signalquelle 7 Die Signalqualität hängt nicht nur von Empfänger und Antennenanlage ab sondern auch vom gerade empfangenen Kanal Bitte denken Sie daran wenn Sie Ihre Antenne ausric...

Page 238: ...uktinformationen 1062 2010 Richtlinie im Hinblick auf die Kenn zeichnung von Fernsehgeräten in Bezug auf den Energieverbrauch 2011 65 EU Richtlinie im Hinblick auf die Be schränkung der Verwendung bestimmter gefähr licher Stoffe in Elektro und Elektronikgeräten Den genauen Wortlaut der Konformitätserklä rung DoC finden Sie hier http www grundig com download doc Sie können auf die Konformitätserklä...

Page 239: ...geben Sie es ei ner Sammelstelle für das Recycling elektrischer und elektronischer Geräte Über Sammelstellen in Ihrer Region können Sie sich bei Ihrer örtlichen Behörde informieren Durch das Recycling von Altgeräten leisten Sie einen Beitrag zum Umweltschutz und zur Schonung natürlicher Rohstoffe Schneiden Sie vor der Entsorgung das Netzkabel ab da dieses eine Gefahr für Kinder darstellen kann Für...

Page 240: ...mmeinstellung Automatische oder manuelle Programmeinstellung Feinabstimmung Antenne Antennenkabel oder anlage überprüfen lassen Keine Farbe Farbintensität auf Minimum Farbe hochregeln TV Norm anpassen wenn Einstellmöglichkeit vorhanden Richtige Farbnorm wählen Problem liegt beim Sender Mit anderem Sender testen Bild vorhanden aber kein Ton Lautstärke auf Minimum eingestellt Lautstärke hochregeln e...

Page 241: ...Geschwindigkeit Ihres Internetproviders oder an Mängeln in der Netzinfrastruktur Bitte kontaktieren Sie Ihren Provider Schlechte Bildqualität Ruckeln bei Videos in Applikationen im LAN Betrieb Internetverbindung ist langsam Eine langsame Internetverbindung liegt an einer geringen verfügbaren Geschwindigkeit Ihres Internetproviders oder an Mängeln in der Netzinfrastruktur Bitte kontaktieren Sie Ihr...

Page 242: ...gitales System das sicherstellt dass die motorisierten Mehrfach LNB Satellitensysteme gesteuert werden DiSEqC wird benötigt wenn zwei oder mehr Satellitenpositionen angesteuert werden sollen Dynamische Beleuchtung Hier stellt das Gerät die Hintergrundbeleuch tung optimal auf die Bildinhalte ein indem es abhängig von der durchschnittlichen Bildhellig keit die Hintergrundbeleuchtung regelt Sind bei ...

Page 243: ...t Dazu ge hören alle Baugruppen wie Prozessor Display usw HbbTV HbbTV ist der interaktive Nachfolger des Video texts mit modern gestalteten Inhalten hochauf lösenden Bildern und Videosequenzen sowie Mediatheken Voraussetzung für die vollständige Funktionalität von HbbTV ist dass das Fernsehgerät mit dem Internet verbunden ist HD Full HD UHD High Definition HD TV ist die allgemeine Bezeichnung für ...

Page 244: ...wissen Graupegel dieser vollständig auf Schwarz gestellt wird Verringert dabei aber in dunklen Bildbereichen die sichtbaren Grauwerte SCR Single Channel Router Einkabelsystem EN 50494 Wenn Ihre Antennenanlage mit einem Einkabel system Multiswitch ausgestattet ist können die Fernsehgeräte die an dieser Antennenanlage angeschlossen sind die Fernsehprogramme unabhängig voneinander empfangen Sicherhei...

Page 245: ... Kontrasteinstellun gen Diese Einstellung ist sehr leistungsfähig bei normalen Bildern und sollte nur bei Bedarf ver wendet werden Niedrig oder Aus Andernfalls könnten unauffällige Details im Bild unterdrückt werden Wi Fi Drahtlosübertragung von Internet und Intranet paketen ...

Page 246: ...instellungen 24 Bildformat umschalten 30 Bild Standardeinstellungen wählen 25 Bildsuche vorwärts rückwärts 41 Bild Toneinstellungen 24 25 C CA Module einsetzen 62 D Dateibrowser 45 Dateiformate 43 Datenträger formatieren 37 Detaillierte Kanaleinstellungen 69 Die Audiosprache ändern 52 Die Menüsprache ändern 52 Digi Link Verbindungsfunktionen des Fernse hers 58 Digitale Fernsehkanäle eines Satellit...

Page 247: ...55 56 K Kanäle aus Listen wählen 28 Klangmodus 26 Kopfhörer 60 Kopfhörer anschließen 60 Kopfhörer Lautstärke ändern 27 L LAN Kabel anschließen 63 LAN Verbindung zum Heimnetzwerk 63 Lautstärke anpassen 28 Lieferumfang 9 LNB Einstellungen 71 M Manuelle Anmeldung 64 Manuell nach digitalen Antennenkanälen suchen 73 Manuell nach digitalen Kabelkanälen suc hen 72 Menüsprache wählen 58 Menü wählen 37 Mit...

Page 248: ...ertitel 28 Untertitelsprache wechseln 52 USB Aufnahme 35 USB Aufnahmeeinstellungen 37 USB Verarbeitung 43 V Verbindung automatisch durch Eingabe des Netzwerkkennworts herstellen 20 65 Verbindung mit Drahtlosnetzwerk über WPS Taste 66 67 Vertragsbedingungen und Datenschutzerklärung 48 Videodaten 43 Videotext Modus 34 W Wartezeit überbrücken 34 Was ist das Common Interface 62 Was ist HbbTV 32 Webbro...

Page 249: ......

Reviews: