background image

57

NAVIGATION MODE

>>>

> D

> GB

> F

> I

> PL

>

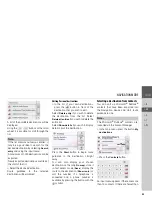
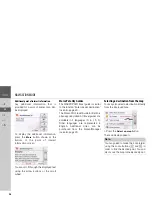
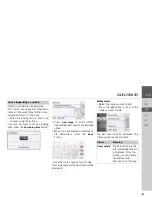
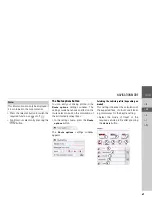
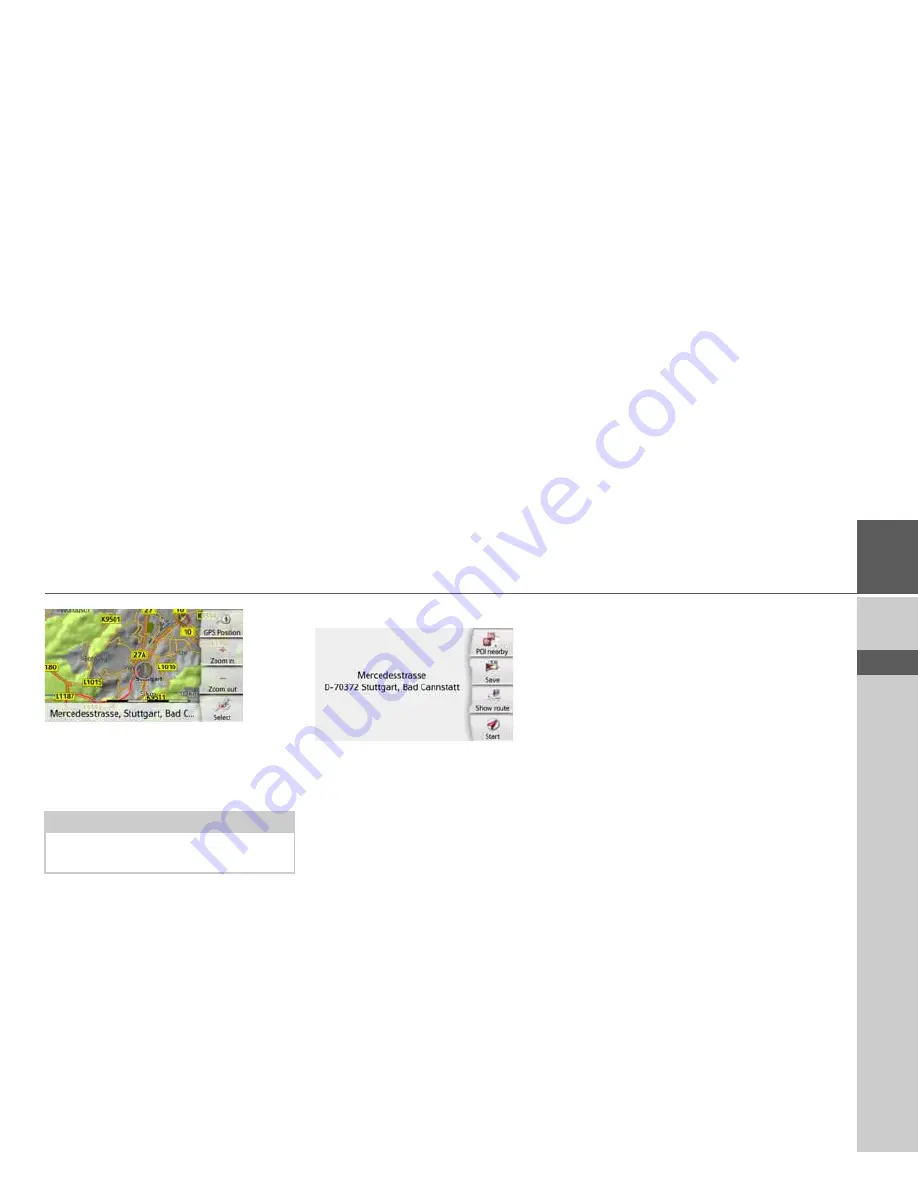
Press the desired point lightly on the
surface of the screen. 

A flashing red cross will be displayed at
this point.

>

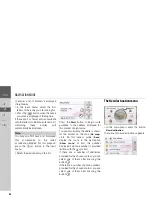
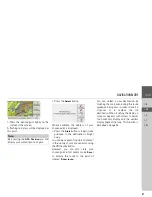
Press the 

Select

 button.

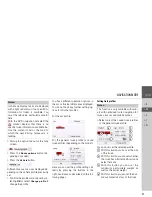
Where available, the address of your
chosen point is displayed.

>

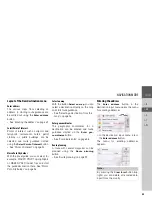
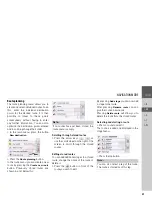
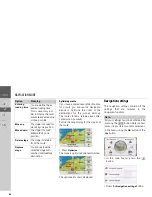
Press the 

Start

 button to begin route

guidance to the destination straight
away.

You can also search for points of interest
in the vicinity of your chosen point using
the POI nearby button.
However, you can also store your
chosen point in fast access mode (

Save

)

or display the route to the point of
interest (

Show route

).

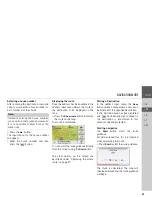
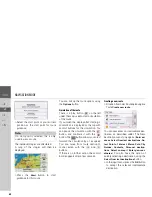
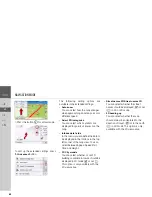
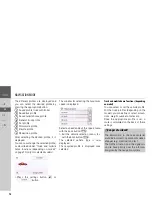
You can select a new destination by
touching the map even during the route
guidance in progress, in order to insert a
stopover or to replace the old
destination. When touching the display, a
compass appears with arrows to adjust
the horizontal display and the vertical
display angle of the map. This function is
described on page 96.

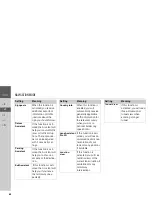
Note:

By pressing the 

GPS Position

 you can

display your current position again.

Summary of Contents for BE D03

Page 1: ...OPERATING GUIDE ...

Page 2: ...onnection to the mains outlet 20 Connecting to power supply 20 TMC antenna depending on the model 20 GPS antenna 20 Unit antenna 20 Cable for vehicle integration depending on model optional 21 Memory card 21 Inserting the memory card 22 Ejecting the memory card 22 Unit bracket 22 Fitting the unit bracket 22 On the windscreen 23 Adjusting the unit holder s position 24 Attaching the Navigation devic...

Page 3: ...tering a point of interest directly 55 Calling special destination phone number depending on the model 55 Additional point of interest information 56 Marco Polo City Guides 56 Selecting a destination from the map 56 Coordinate entry 58 Route planning 59 Simulation of the route 60 Creating a new route 60 Editing a route 61 Optimising a route 62 Navigation settings 62 The Map view button 63 Auto zoo...

Page 4: ...ting a stopover 102 Blocking route temporarily 102 Setting day night display 103 Displaying current position Where am I 103 Entering the destination 105 Skipping a destination 105 Telephone mode 106 Calling up the telephone mode only selected models 106 Telephone menu only selected models 107 Dialing a number 107 Phonebook 108 Text messages SMS only selected models 110 Incoming text message 111 Nu...

Page 5: ...36 Renaming driver profile 136 Deleting driver profile 137 Driver profile Pro model dependent 137 Service information 138 Factory settings 138 Calibration 138 Technical terminology 139 index 141 Model overview and technical specifications 144 NOTICE 145 EU Declaration of Conformity 145 Disposal of the unit 146 Disposal of the battery 147 Duty to supply information according to battery legislation ...

Page 6: ...red by the buyer immediately after defects are discovered and must be accompanied by the initial buyer s purchase contract The warranty expires after 24 months battery 6 months neither warranty claims nor fulfilment shall effect an ex tension of the warranty period Faults resulting from improper handling incorrect installation of the unit improper noise suppression of the vehicle static charge or ...

Page 7: ...w the directions No liability will be assumed for incorrect directions provided by the navigation system Imprecise or incorrect directions may be provided due to changing traffic patterns or deviations in data Therefore you must always observe the actual road signs and traffic regulations In particular the navigation system must not be used as an orientation aid at times of poor visibility The dev...

Page 8: ...difications of the product are permitted any such modification leads to the loss of the operating permission Only use original BECKER accessories This way it is ensured that all relevant provisions will be met and that health risks and damages to the product are avoided Dispose of the used product or the battery according to the legal regulations in effect Improper use excludes all warranties The ...

Page 9: ...hicles Protect the product and the accessories from moisture and dirt Navigation The use of the GPS Global Positioning system eliminates the tedious process of looking in street maps The receiver antenna integrated into the product allows constant access to the navigation services outside buildings Within buildings it is currently not possible to access any navigation functions When using in vehic...

Page 10: ... must be thoroughly checked see also page 14 Unpack the contents carefully and check them thoroughly Note Your Navigation device is delivered in a stable packaging If the packaging or its contents show the signs of serious damages you must not continue to unpack the product In such case please contact your dealer Overview of functions standard not available optional Navigation system Ready 50 LE B...

Page 11: ... original packaging in a dry place at least for the warranty period Description of the device The navigation device consists of the basic unit and the accessories included in the scope of delivery For descriptions of the individual parts see Overview of the scope of Delivery on page 14 1 2 3 4 2 1 2 3 4 Note The disposal must be performed in a professional manner according to the country specific ...

Page 12: ...V socket in a vehicle or via the optional mains power supply unit to the 230 V mains USB connection cable With the USB connection cable provided it is possible to connect the Navigation device to a standard PC with a USB interface The integrated flash memory of the navigation device and a micro SD card that may eventually be inserted can then be addressed by the PC like a removable storage device ...

Page 13: ...signed to provide a brief introduction to operating your Navigation device The most important basic functions of the Navigation device are explained in the Quick Start Guide Operating instructions A comprehensive explanation of the Navigation device functionalities is contained in these operating instructions Registration You can register your product using our software service We will then inform...

Page 14: ...Scope of delivery 1 Basic device PND Personal Navigation Device 2 USB connection cable 3 Unit holder with carrier plate the design depending on the model 4 Cable for power supply via the vehicle cigarette lighter 12 24 Volt with integrated TMC antenna depending on the model 1 2 3 4 3 ...

Page 15: ... unit with controls and displays 1 Back button Press Back function in most applications Press and hold Open the main menu 2 Touch screen showing the main menu selected 3 Touch screen key Press activates the corresponding key command 4 Microphone depending on the model 5 Rear of unit 1 5 2 3 4 ...

Page 16: ...derside of the unit 2 Slot for Micro SD card 3 Mini USB connection connection for power supply 1 2 3 Top of the unit 1 Standby switch sleep mode Underside of the unit 2 Slot for Micro SD card 3 Mini USB connection connection for power supply 4 On Off switch I O 1 2 3 4 model dependent ...

Page 17: ... unit damage the rechargeable batteries and cause certain plastics to warp or melt Do not store your mobile navigation system in cold environments During operation when the unit warms up to operating temperature moisture may form internally causing damage to electronic components Do not drop your mobile navigation systemunit protectitfrom shocksand do not shake it Improper handling can damage comp...

Page 18: ...red dots pixels may be visible on the display Some pixels may also appear brighter or darker However such instances do not represent a product flaw Start up Once the Navigation device has been unpacked and checked for damage the unit can be started up The individual start up steps are connect to power supply switching on the unit ensuring antenna reception if navigation is desired Power supply Not...

Page 19: ...stop or in the case of a device with an active cradle on the underside of the supporting plate Insert the adapter into the cigarette lighter Note Note that if the battery is completely discharged it may take up to a minute before the device can be switched on again Note In the event of a defective battery please contact your authorised dealer Please do not attempt to remove the battery yourself No...

Page 20: ...ered condition If the TMC reception is poor you must remove the cable of the TMC antenna from the cable for the cigarette lighter GPS antenna Unit antenna The GPS antenna is integrated into the housing Danger Make sure that your hands are not wet and that the power supply unit is dry Only connect the power supply unit to a permissible mains power supply Note Remove the power supply unit when not u...

Page 21: ...ded on the underside of the carrier plate Memory card Your Navigation device has a slot for a micro SD memory card As the map data is stored in an internal memory on the Navigation device the slot for a micro SD memory card is used for updates and for viewing images The memory card can also be used for supplementing the map data The card slot is located on the left on the underside of the unit The...

Page 22: ...ory card and place it in the packaging while ensuring not to touch contact bar Unit bracket The Navigation device can be attached directly to the windscreen with the unit holder Fitting the unit bracket Note The Navigation device and unit bracket must not be exposed to long periods of direct sunlight Temperatures inside the vehicle of 70 C and higher may damage parts of the bracket Note Fasten the...

Page 23: ...s of the unit holder Select a suitable spot to attach Loosen the fastening screw slightly Press the base with its suction surface against the windscreen Turn the unit holder such that the carrier plate is positioned roughly in the desired viewing direction Press the lever down The holder has attached itself firmly to the windscreen It can now be adjusted with precision In order to remove it operat...

Page 24: ...the carrier plate This unlocks the Navigation device which can be removed from the carrier plate Switching the Navigation device on off model dependent With the ON OFF switch I O you can switch the Navigation device on or off completely With the button on the upper side of the Navigation device you can switch the device to sleep mode or switch it from sleep mode again For devices without the butto...

Page 25: ... for longer than 3 seconds to finally switch it off Note for models with TTS Voices with a TTS tag support the text to speech function e g announcing roads and reading out text messages Note Use of the Navigation device is only permitted in accordance with the national road traffic regulations applicable at the time Note We recommend that you place the Navigation device in sleep mode in the event ...

Page 26: ...undertaken The calibration function is started from the menu see also page 133 Basic information about the menus During operations you are assisted by various menus and entry windows The main menu The top menu level is the main menu The individual applications are started from the main menu You will find information about the indi vidual applications in the corresponding main chapters In addition ...

Page 27: ...d a button for cancelling route guidance will be displayed between the two rows of buttons Press the button to cancel route guidance to the displayed destination directly in the main menu Entries made with the entry menu Some applications require entries to be made via the entry menu The entry menu is operated in a similar way to a keypad The character entered on the keypad is displayed in the top...

Page 28: ... often then after you enter the letter H the proposal Hamburg is automatically displayed If no preferences are known for the letter entered then cities locations suitable for the entry are displayed as proposals To accept the proposal you may press either the input field or the button Scrolling through the lists If you have already entered some of the letters of the selection you want you can use ...

Page 29: ... location Würzburg then simply press WUERZBURG or WURZBURG Special characters can be useful when naming destinations and routes In order to switch to the special characters keyboard press the button marked with an arrow The special characters keyboard is displayed Enter the desired special character After you enter a character the Naviga tion device automatically switches to the normal input menu ...

Page 30: ... display until the desired method of entry is activated The inscription on the button symbolises the method of entry The button represents automatic mode This means that on entry the first letter is automatically in upper case and subsequently changes automatically to lower case The button represents the entry of upper case letters The button represents the entry of lower case letters Deleting cha...

Page 31: ... the Navigation device Attaching the remote control Take a coin and insert it into the slot in the base plate of the remote control Turn the coin anti clockwise This unlocks the base plate which can now be removed Insert the supplied battery CR2032 DL2032 into the battery compartment with the positive side facing up Press down the battery until it locks into place Select a suitable position to ins...

Page 32: ... the bottom part of the remote control and turn the remote control clockwise until it locks into place Removing the remote control You can remove the remote control again to change the battery for example Hold the bottom part of the remote control and turn the remote control anti clockwise until it becomes detached from the base plate Note If you wish to stick the base plate in place you will firs...

Page 33: ...nnect the remote control to the Navigation device as described above Notice The car adapter cable with radio remote control receiver must be connected to the cigarette lighter and navigation sys tem and be supplied with power The ra dio receiver is in the plastic case on the cable 2 3 1 1 Danger Keep the battery away from children Consult a doctor immediately if a child swallows a battery Batterie...

Page 34: ...with the Map button highlighted Butto n Basic function Opens the map display Opens the options menu for the map display if the map is already active Starts the telephone mode The function is equivalent to pressing the Phone button in the main menu or the button in the options menu of the map display 1 3 2 5 4 6 1 2 Starts up the voice entry The function is equivalent to pressing the button e g in ...

Page 35: ...B interface of the de vice directly to a USB port of the com puter using the USB cable supplied Switch on the navigation device If the application does not start automati cally please start the file CONTENT MANAGER manually in the folder Becker_Content_Manager_Setup Select a language from the list and then click on OK Read the welcome page and click on Next to continue Select the installation fold...

Page 36: ... found the Content Manager gives you the option of installing it We recommend that you always agree to the upgrade if one is available If a new software version is found you have the following options Click on Yes to accept the new software version The new version is downloaded and installed before you can start the Content Manager Click on No to start the Content Manager with the version already ...

Page 37: ... the On Off switch If the messages reappear or the unit doesnot function correctly for any other reason please contact your local dealer You can also try to find a solution to your problem in the FAQ in the Support area on the Becker homepage www mybecker com Note Switch off the navigation device com pletely see Switching the Navigation device on off model dependent on page 24 before connecting th...

Page 38: ...ight above sea level can be calculated if signals are received from four or more satellites The Navigation device determines the direction and distance from the destination using a navigation computer and a digital street map held in its internal memory For safety reasons route guidance is given predominantly in spoken form This is supported by a direction indicator and a map display on the touch ...

Page 39: ...r a destination as described under The New destination menu on page 44 If you have already entered your home address you can start route guidance to your home address in the first line A home address once entered can be modified later In the My destinations menu next to the Home option press the button Press the Change button to enter a new home address The menu for selecting the destination appea...

Page 40: ...called up using the fast access function The destination list The destination list displays line by line all destinations available for fast dialling Each line of the destination list is divided into two fields Each list field is designed as a button The destination is shown on the right hand button and the properties of the destination are displayed using the left icon Note Up to 200 of the most ...

Page 41: ...nation stored in fast access mode can be displayed and edited Press the button to the left of the desired destination A selection menu appears Icon Meaning Thisdestinationisastandard destination with no special features This destination is protected If the destination memory is full this destination will not automatically be deleted This can be performed manually if required In the case of a prote...

Page 42: ...button My destinations Press the Personal destinations button Protect entry The destination is pro tected from automatic deletion This function is only available for unpro tected destinations Remove protection The protection is re moved from the desti nation This function is only available for pro tected destinations Move up The destination is moved forwards by one position If the destina tion is ...

Page 43: ...y your chosen destination on the map On map store it in fast access mode Save display the route to the destination Show route or call the number if a telephone is connected and a phone number is available by pressing the button with the symbol Selecting a destination from Contacts You can call up Microsoft Outlook contacts that have been imported into the Navigation device and start route guidance...

Page 44: ...play the address shown for the contact on the map On map store itin fast access mode Save display the route to the destination Show route or call the number displayed if a phone number is provided button with the symbol If there are a number of addresses provided for the chosen contact you can select one of them after pressing the button If there are a number of phone numbers provided for the chos...

Page 45: ...ation there See Marco Polo City Guides on page 56 Select on map With the button Select on map you can select a destination directly on the map and start route guidance See Selecting a destination from the map on page 56 Enter geo coordinates The geographic coordinates for a destination can be entered and route guidance started via the Enter geo coordinates button See Coordinate entry on page 58 Ro...

Page 46: ...destination address in the address input menu The following settings can be made in the address input menu Town Zip code or postal code Street and house number Junctions as an orientation aid It is also possible to search for a point of interest near to the address entered POI search This can be entered as described under Point of interest near to an address on page 54 save the destination in fast...

Page 47: ...ively When sufficient letters have been entered it will automatically switch to a list from which you can select the town However you can switch to the list before this by pressing the button Using the town list Once a few letters of the desired town have been entered you can display a list of all the towns with the relevant letter combinations or this list will be displayed automatically Press th...

Page 48: ...et list Once a few letters of the desired street have been entered you can display a list of all the streets with the relevant letter combinations or this list will be displayed automatically Press the button on the right of the screen to call up the street list You can scroll through the displayed list using the buttons Press the button for the desired street Selecting the Intersection After ente...

Page 49: ...ing the Start button The other options on this screen are described under Displaying the whole route on page 99 Storing a destination In the address input menu the Save button opens a menu where a name can be entered for the specified destination If the desired name has been entered and has been pressed to accept it the destination is transferred to fast access mode and protected Starting navigati...

Page 50: ...will be asked whether the new destination should replace the old destination or the waypoint Select Replace stopover or Replace old destination Note The symbols above the progress bar refer to restrictions that you may have activated e g unpaved roads toll roads Note If there is no GPS signal when the route is calculated the following will be displayed When a GPS signal is available the route calc...

Page 51: ...e display the route or store the address as described on page 49 Notes Only one address can be entered using the voice entry function Lists for more precise selection cannot be operated using speech The destination country cannot be entered using speech The symbol in the list of countries indicates the countries for which address entry using speech is possible If entry using speech is not possible...

Page 52: ...th the Live POI Search your Becker navigation device establishes a connec tion to our live Server You have access to millions of addresses in Europe You can choose between A Live POI Search in the vicinity A Live POI Search near to an address A Live POI Search near to a destination Subsequent operation is similar to how it is described in the chapter entitled Points of interest on page 52 except t...

Page 53: ...r use the scroll wheel to scroll through the list displayed Select one of the available categories For some categories e g petrol stations a further selection menu is displayed in which you can narrow down the choice further e g by brand If you have selected the category any points of interest belonging to the relevant category and available within the area in question will now be displayed The na...

Page 54: ...red country In the City or Code field enter the town where you wish to search for a point of interest Press the Select category button The available Points of interest categories for the city entered will be displayed Select the desired point of interest as described under Point of interest in the vicinity on page 53 Press the Start button to begin route guidance to the point of interest directly ...

Page 55: ...ton Enter the desired point of interest or part of the name Press the button The Navigation device displays in a list all the points of interest corresponding to the name entered Select the desired destination in the list You will now receive additional informa tion about your chosen destination Press the Start to begin route guidance to the point of interest straight away However you can also dis...

Page 56: ...ide is similar to the function Enter special destination see also page 45 The Marco PoloTravel Guide for Berlin is already preinstalled All travel guides are available in 5 languages D E I S F Other languages are represented in English Additional cities can be purchased from the ContentManager see also page 35 Selecting a destination from the map You may also select a destination directly from the...

Page 57: ...ur chosen point using the POI nearby button However you can also store your chosen point in fast access mode Save or display the route to the point of interest Show route You can select a new destination by touching the map even during the route guidance in progress in order to insert a stopover or to replace the old destination When touching the display a compass appears with arrows to adjust the...

Page 58: ...ntries in the field with the backspace button in order to use the entry field You can enter coordinates in three different ways The following formats can be used Degrees Minutes Seconds Decimal seconds e g 42 52 46 801 Degrees Minutes Decimal minutes e g 48 53 56667 Decimal degrees e g 48 89277778 Press the button Where possible an address matching the coordinates will be displayed You can view th...

Page 59: ...list below this Scrolling through stored routes Press the arrow keys or use the scroll wheel on the right of the screen to scroll through the stored routes Editing stored routes You can add additional stages to a stored route change the name of the route or delete it Press the button in front of the route you wish to edit By pressing Add stage you can now add a stage to the route After pressing Re...

Page 60: ...he button allows you to fast forward the simulation by a 16x speed You can move from route section to route section with the and buttons If there is no further action the control bar disappears after a few seconds Creating a new route Drücken Sie in der Routenplanung die Taste Create new route You can now enter an intermediate des tination as described under The New destination menu on page 44 Ent...

Page 61: ... you wish to edit The edit menu will be displayed The following options are available Notice depending on model Here you can define a loading time This in turn has an impact on the calcu lations of the arrival time for the subse quent destinations of the route Enter the loading time in hours and minutes using the buttons If you do not want to set any loading time press the No loading time button O...

Page 62: ...levant to the navigation functions In the main menu press the button PresstheNavigation settings button Entering loading time You can define the ex pected loading time This is necessary in or der to display the most accurate expected arriv al time possible Move up The stage is moved for wards by one position Move down The stage is moved backwards by one position Delete stage The stage is deleted f...

Page 63: ...he map is to be displayed in 3D or 2D mode in a split screen with 3D or 2D display or in arrow mode You can also select whether or not 3D buildings available in towns should be displayed in 3D mode Further setting options are available to you in the extended settings Press the Map view button in the settings menu The Map view settings window appears Press the button or to select whether to use 2D ...

Page 64: ...enu you can define the data to be displayed in the Info box in the top left corner of the map view You can select between Speed Speed limit Time and Height 3D City models You can select whether or not 3D buildings available in towns should be displayed in 3D mode or not This option is only available with the 3D view active Street names 2D Street names 3D You can select whether the street namesshou...

Page 65: ...ow no POIs displays no points of interest on the map Selecting User defined selection and then pressing the Select POIs button allows you to determine for yourself in the menu which then appears whether each individual points of interest category is displayed or not You can then switch the display of entire categories on or off After pressing the button beside a category you can switch subcategori...

Page 66: ...me and Height Under these options you can select displays for the travel without a selected route Here you can only select between Speed Speed limit Time and Height 3D city view With this option you can select whether or not 3D buildings available in towns should be displayed in 3D mode or not In the Advanced menu press the 3D city view button to turn the function on or off Confirm your setting in...

Page 67: ... announcements Press the Select POI Categories button The Select POI Categories window is opened Three point of interest catego ries can be selected If you touch the preset option of one of the POI Categories POI 1 2 and 3 a selection list with 20 POI types appears The Guidance info button In the Guidance info settings window you can select which additional information you would like displayed dur...

Page 68: ...ted theAssistantwill help you if you leave the motorway unex pectedly Setting Meaning Country info When this function is enabled you will automatically receive generally applicable traffic information for the relevant country when you cross a national border e g speed limits Lane Assistant Pro 3D If this function is acti vated you will see an animated realistic rep resentation of your lane at many...

Page 69: ...the calculation of the estimated journey times In the settings menu press the Route options button The Route options settings window appears Selecting the vehicle profile depending on model This setting influences the calculation of the expected time of arrival and blocks e g motorways for the bicycle setting Select the mode of travel or the required vehicle profile after pressing the Vehicle butt...

Page 70: ...m speed is displayed Select a speed and exit the speed menu with the back button Exit the vehicle selection menu too with the back button The selected vehicle type is now displayed The required profile is displayed once selected Truck and mobile home functions depending on model You can select or set the vehicle profile For the truck profiles depending on the model you can define or select dimen s...

Page 71: ...ck profiles Select one of the saved truck profiles or the general truck profile You can now set the selected profile With this button you can set the size of the truck With this button you can set whether the truck has a trailer and how many axles there are With this button you can set the maximum permissible weight as well as the actual weight With this button you can set the haz ardous materials...

Page 72: ... trailer and axles In the profile settings press the button for the trailer and axle settings Use the button to select whether there is a trailer or not Select the total number of axles Confirm your settings by selecting Setting weight In the profile settings press the button for setting the weight Press the button next to the weight to be entered An entry menu will appear Enter the desired weight...

Page 73: ...e profile Feedback after route calculation When calculating the route the best pos sible route is selected by taking the vehi cle or loading specifications into consid eration if possible The route might vary considerably from the car route as re gards distance journey time or routing If a destination cannot be reached with out taking the predefined restrictions into consideration this will be dis...

Page 74: ...ute Warnings with planned route When the driver warnings function is ac tivated in the navigation settings you will be warned about road sections where there are relevant restrictions If there are road sections on your route that are subject to a restriction your nav igation system will warn you shortly be fore reaching the road sections affected The layout of the message is similar as described i...

Page 75: ...is switched on information statistical information on the possible speed on certain segments at certain times of the day is also taken into account in the route calculation provided this is available This provides a more accurately calculated arrival time and may even result in a different route being selected Option Meaning Fast route With this option the fastest route in terms of travel time is ...

Page 76: ...on An automatic search procedure presets the transmitter with the best reception The currently received TMC transmitter appears on the display The TMC announcements can be spoken by the voice if the navigation settings in the Voice guidance menu the Announce TMC events option is activated Option Meaning Permitted With this option the road type in question is included in calculating the route Prohi...

Page 77: ...ess the Voice guidance button in the settings menu The Voice guidance settings window appears The following setting options are then available Voice You can select the voice that will make the navigation announcements for the language that has been set Notice The data transmission via your mobile phone with Bluetooth may involve addi tional costs depending on the mobile phone contract Please find ...

Page 78: ...val Using the Announce time of arrival button you can switch the automatic announcement of the expected arrival times on or off Setting the Voice In the Voice settings window you can set the voice that will make the navigation announcements for the language that has been set In the Voice guidance settings window press the Voice button The Voice settings window appears Select the desired voice A sh...

Page 79: ... device or which warning sounds are to be output In the settings menu press the Warnings button The Warnings settings window appears The following setting options are then available Driver alerts depending on the model You can have signs displayed for example for dangerous curves or steep gradients provided this information is stored in the map data Speed info You can select whether speed limits a...

Page 80: ...ton The Driver alerts settings window appears The available driver alerts are divided into 4 categories The four categories can be enabled or disabled individually The warning sound can be set individual ly for each of the four categories by pressing the symbol with the bell warning sound switched on The following signs are available in the individual categories Curve warnings This category includ...

Page 81: ...y for journeys with and without ac tive navigation The function can be activated or deactivated respec tively By pressing the symbol with the bell you can set the audible warning sig nal audible warning signal acti vated Confirm your settings by pressing the button Setting Speed info The Speed info settings window allows to select whether speed limits are displayed in parallel to the navigation Yo...

Page 82: ...yed always displayed or only displayed if the limit is exceeded Furthermore you can select whether the sign should blink when exceeding the speed limit by selecting Always or If speed limit is exceeded In city Select the amount over the speed limit at which youwouldliketoreceive an acoustic warning within built up areas Out of city Select the amount over the speed limit at which youwouldliketorece...

Page 83: ...an now set whether or not the road should be blocked for each day of the week Confirm your settings by pressing the back button or Press the button under one of the days and set up to two times when the road should be blocked Using the buttons set the first period when the road is to be blocked on this day Using the buttons set the second period when the road is to be blocked on this day if necess...

Page 84: ...nsumption of the vehicle outside cities This can be entered as described for the In city value Press the Type of engine button to set your engine type The display changes by pressing the button repeatedly You can select Petrol Diesel and Hybrid as the engine type Press on the Fuel economy button to change to the consumption unit Pres sing this button repeatedly will change the display You can choo...

Page 85: ...If the automatic function is switched off you can select the desired time zone by pressing the button below Use auto time zone Pressing the button below Daylight saving time allows you to select whether daylight saving time should be set automatically by the Navigation device or whether you switch daylight saving time on and off yourself The Reset button You can reset the navigation settings to th...

Page 86: ... new route to the destination See The TMC button on page 76 Live Traffic Traffic Announce ments via Data Connection model dependent Your navigation device can receive traffic announcements from a server via a data connection These announcements are more up to date than data received via TMC and are also available more quickly There must also be an appropriate data connection Subsequent use of the ...

Page 87: ...igation device will re ceive up to date traffic announcements It is then possible to calculate dynamic routes traffic jam diversion You can also view traffic announcements directly Settings for TMC can be made as described under The TMC button on page 76 In the main menu press the button The map overview appears Notice The data transmission via your mobile phone with Bluetooth may involve addi tio...

Page 88: ...d by the sign Traffic announcements received via Premium TMC are indicated by the symbol A red twisted arrow next to the traffic report warns for traffic jams that need to be avoided If the arrow is grey and crossed in red colour there is no sensible byroad available to avoid the traffic jam Reading a message Press on the desired message in the list The message display appears on the top of the sc...

Page 89: ...If a traffic announcement affects your route a window with detailed informa tion on the traffic announcement ap pears If after displaying the traffic message the navigation system detects that a sensible alternative route is possible the following display appears The display provides you with an overview of the alternative route calculated The red route or route marked blue for an obstruction show...

Page 90: ...isplay The structure depends on the settings made in Map display options on page 99 or in The Map view button on page 63 and whether route guidance is active or not Map display without route guidance If the navigation is not active almost the whole area of the touch screen will be taken up by the map Speed limit on the road currently being driven on display not available for all roads signs for th...

Page 91: ...isplayed on the map via the position icon The Information box During route guidance you can have information displayed in the Info box If you press the Info box again more or less fields are displayed At least one field and a maximum of three fields can be displayed The information displayed depends on the settings that are selected in the Navigation settings in the map view menu Advanced Info box...

Page 92: ...iver alerts will also be displayed Driver alerts depending on the model Zoom buttons Vehicle position Power level telephone status depending on the model Button for calling up the options Traffic lane recommendation only appears on some multi lane roads green arrows recommended lanes Next driving maneuver Current street or street to which the next driving maneuver leads Distance to the next drivin...

Page 93: ...olume settings Lane Assistant Pro 3D model dependent You can display an animated realistic representation of the lane at many junc tions To do this switch on the function Lane Assistant Pro 3D as described un der The Guidance info button on page 67 At selected complex junctions you will be shown exactly which lane you have to change to You can leave the Lane Assistant Pro 3D again by touching the ...

Page 94: ...ment can be repeated with updated information Press the speaker symbol in the preview area while route guidance is active The last announcement is be repeated with updated information The volume is also displayed If the preview area is reduced and no speaker symbol is displayed the announcement can be spoken again if you press the preview area Note The tunnel view and the intersection view can be ...

Page 95: ...n the speaker symbol in the preview area to mute the voice again The bar display disappears again automatically after a short while if no button is pressed Map zooming The map can be zoomed into in steps by using the zoom buttons Press the button The zoom buttons are displayed Press zoom in to zoom in on the map and therefore to get closer to the details displayed Press zoom out to zoom out from t...

Page 96: ... on the display a little longer Apart from the pulsating point a compass and two arrow buttons pointing to the left and right appear on the top edge of the screen Press the and buttons to rotate the map towards the desired compass direction You can orient the map for example in the direction of travel If you have selected a 3D display for the map view the vertical display angle can be adjusted too...

Page 97: ... are displayed Press one or more buttons to display TMC events or POIs A list of POIs and if applicable TMC events is displayed with the expected arrival time and distance from the current vehicle position Press the desired Point of Interest or TMC event Information such as the address and the telephone number of the POIs or the type of traffic obstruction are displayed From this view all actions ...

Page 98: ...escribed on page 84 The Park Assistant This assistant will be activated when you are near the destination or passed by the destination In the case when the driver is looking for a parking place the symbol is activated as soon as it is possible to park in the given point of interest Up to eight parking possibilities may be displayed where the route to there and the footpath from the parking lot to ...

Page 99: ... Only available when route guidance is active You can have the whole route to the destination displayed on the map Additionally you can have a complete route description displayed As a further option you can display and if needed select the different routes that can be set in the Route options Call up the options menu for the map display Press the Show route button The complete route is displayed ...

Page 100: ...he right hand side of the screen to scroll through the list If you press an entry in the route description it is displayed on the map Blocking route sections roads You can block individual route sections roads The Navigation device then calcu lates a sensible diversion to avoid the blocked section Use the and buttons in the route directions to select the section of the route to be blocked Press th...

Page 101: ...u can select the desired route by pressing the buttons on the right Change route options Only available when route guidance is active You can change the route options route selection etc during route guidance Call up the options menu for the map display Press the Route options button Set the route options as described under The Route options button on page 69 After a modification the route is reca...

Page 102: ...ave entered the desired stopover the route is recalculated The stopover is indicated on the map by a red flag Deleting a stopover Call up the options menu for the map display Press the Delete stopover button Press the Yes button The stopover is deleted Blocking route temporarily Using the Block road ahead option you can block a stretch of road ahead temporarily This determines a certain stretch of...

Page 103: ...d save this position Furthermore you can display information regarding the current GPS reception and the current country Call up the options menu for the map display Press the Where Am button The current position is displayed If possible an address is displayed If no address is available for the current position the geographic coordinates are displayed With the Emergency call button you can make a...

Page 104: ...category Hospital in the current vicinity Also see chapter Points of interest on page 52 With the Petrol Station button you can change directly to the places of interest category Filling station in the current vi cinity Also see chapter Points of inter est on page 52 You can return to the map using the Resume button By pressing Save you can store your current position in the fast access list By pr...

Page 105: ...tions of the map display See Map display options on page 99 After a short time the map is displayed Each route is calculated after each other and displayed on the map The area on the right hand side shows the colour key for the individual routes the mileage for each route and the estimated driving time You can select the desired route by pressing the buttons on the right Skipping a destination If ...

Page 106: ... Navigation device is already connected to a cell phone the telephone menu is displayed If Bluetooth is not activated upon calling up the telephone function the system will prompt you to switch Bluetooth on Press the Yes button to activate Bluetooth Note For some cell phones equipped with Bluetooth wireless technology it is possible that some of the functions described are not available The follow...

Page 107: ... the phonebook Text messages SMS to be displayed edited and read out To call up number lists To search for Buetooth telephones To disconnect the connection to a cell phone If Bluetooth is activated and the Navigation device is already connected to a cell phone the telephone menu is displayed after the telephone function is called up In the upper area of the telephone menu the signal strength of th...

Page 108: ...he Phone book button If there are more than 10 entries in the phonebook an input menu is displayed If there are less than 10 entries a list with the entries will be displayed directly Note Press the button to delete the characters entered Press the Pause button if you wish to pause the dialling process Note Be aware that it may take several minutes to transfer the phonebook If the cell phone whose...

Page 109: ... to establish a connection to the phone number selected You can find out how to continue operation in Telephone calls on page 116 Note For example if you entered the letters M and I the entries are displayed whoselastnames or firstnames start with MI Thatmeans Miller John or Bauer Michael You may enter the first letter of the last name and then enter the first letter of the first name separately u...

Page 110: ... are available Select the desired text message The selected text message is displayed Press the Read out button in order to have the message read out Press the Options button to display the editing options for the text message Call back By pressing the Call back button you can start a call to the sender s number Extract numbers By pressing the Extract numbers button you can display any numbers con...

Page 111: ... telephone menu press the Last calls button Using the buttons Missed Received and Dialled you may retrieve the lists loaded from the cell phone The number list of the numbers or names dialed accepted or not accepted at the Navigation device is shown in the lines below Each line of the number list is divided into two fields Each list field is designed as a button On the right button the number name...

Page 112: ... entry is a standard entry without any special features This entry is protected If the number list is full this entry is not automatically deleted Youhave theoptiontodothis manually For a protected entry you also have the option to set the position in the quick access Selection Meaning Show details The data for the entry is displayed number and name time and date of call if available Protect entry...

Page 113: ...The device list shows line by line all cell phones that were already connected to the Navigation device Each line of the device list is divided into two fields Each list field is designed as a button On the right button the device is named and its features are displayed with the left icon By pressing the icon you can call up a menu where you can protect the device for example Note Press the button...

Page 114: ... displayed and you may cancel the search by pressing the Stop search button After the search or after you press the Stop search a list of the devices found is displayed Selection Meaning Protect entry The device is protected against automatic dele tion only available for unprotected devices Remove protection The protection of the de vice is canceled only available for unprotect ed devices Move up ...

Page 115: ...d that connection is automatically disconnected and the new device is connected Call up the device list Select the cell phone you want in the list The connection is established to the cell phone selected With a successful con nection the telephone menu will be dis played Connecting a mobile phone You can also attempt to establish a connection to the Navigation device from the mobile phone If a req...

Page 116: ...n try from the number list or phonebook The number is dialed If the call is accepted by the party called the display changes and you are con nected to the other party Accepting a call For an incoming call a ringing tone will sound Also the following is displayed If available the phone number and name of the caller are displayed For incoming calls you have several operating options Selection Meanin...

Page 117: ... display the signal strength of the cell phone the charging level of the cell phone the telephone name and the network provider are displayed if availa ble in the upper area Beneath the call time and if available the phone number or name the name of the other party are displayed If route guidance is active then you will receive the navigation instructions with arrows on the call screen Note The ca...

Page 118: ...e function is then ended After the call is ended the connection to the cell phone is automatically re established Press the Private mode button The hands free function is ended Press the Hands free button to make and receive calls again via the Navigation device prior to ending the call DTMF tones You can send DTMF tones during a call e g to check an answering machine Press the DTMF tones button U...

Page 119: ...lephone for data transmission of the Becker GoLive services Selecting both options simultaneously can sometimes cause restrictions in hands free mode or during data trans mission The prerequisite for using Becker Live services is Support of Mobile Tethering via Bluetooth by an Internet capable mobile phone and by the network operator Notice The data transmission via your mo bile phone with Bluetoo...

Page 120: ...call is accepted automatically In the settings menu press the Auto accept call button Select whether incoming calls will be accepted automatically after 3 5 or 10 seconds If you select Off the function is switched off The setting currently selected is indicated with a checkmark Confirm your settings by pressing the back button Telephone volume With this function you can set the volume of the ringt...

Page 121: ...uetooth devices In the settings menu press the Bluetooth name button Enter the desired name Confirm the name entered by pressing the OK button Text message notification depending on the model With this function you can set how the Navigation device should respond when a new text message is received In the settings menu press the SMS signal button Choose the required setting No signal No notificati...

Page 122: ...atically An incoming text message will be read out automatically Confirm your settings by pressing the back button Note The message can only be read out if a voice tagged with the abbreviation TTS has been selected See Setting the Voice on page 78 ...

Page 123: ...tion by pressing one of the buttons Marco Polo City Guides With the travel guide you can select for example MARCO POLO Top Highlights or MARCO POLO Insider Tips and start the guide destination there See Marco Polo City Guides on page 56 Image viewer The Image Viewer can display pictures saved on an inserted micro SD memory card or on the internal memory The jpg and bmp image formats are supported ...

Page 124: ...r containing images Thumbnails of the images in the current folder View the previous page of images folders Go up one level in the directory hierarchy View the next page of images folders Selecting an image In the image viewer menu select the desired folder and then the desired image You can use the and buttons to scroll through the pages of images and folders The selected image is displayed along...

Page 125: ...the image menu Press the Zoom button Move the control on the top of the screen to the desired level of magnifi cation The image can then be moved around Press the centre of the image to cancel the enlargement Rotating the picture Show the image menu Press the Rotate button until the image is in the desired orientation Press the centre of the image to hide the image menu again Displaying image info...

Page 126: ...ose the transition effects for the images In Load pictures in high quality slower you can choose whether images should be loaded at high resolution or not Loading the images at high resolution makes the display slower Confirm your settings by pressing the back button Where am I See Displaying current position Where am I on page 103 Traffic forecast depending on model With the traffic forecast you ...

Page 127: ...display country specific information for numerous countries maximum permit ted speed alcohol limits etc Press the Country information button The list of countries is displayed Press the button for the desired country The country specific information is displayed maximum permitted speed alcohol limits etc Below you will find a description of the symbols used Note Please note that the information ma...

Page 128: ...Define the start and end point of the section to be blocked by touching the map The points will be marked by the letters A and B Define the direction of blockage for the road section from A to B or from B to A Additionally you can display a list of permanent blockages already defined on the map Select the desired blocked road by pressing in order to set the blockage times Symbol Meaning Speed limi...

Page 129: ... 24 h button to set a block for an entire day Press the Use setting for button to also use the block on other days Press again the back button to confirm the settings and to exit the menu Trip computer depending on model The Trip computer provides a data display with average speeds maximum speeds etc and a stopwatch with the option to record laps In the main menu press Extras Press the Trip comput...

Page 130: ... can record up to 300 laps in the same way Press the Stop button to stop the recording The time continues if you press the Start button again after stopping the recording Press the Reset button to delete all recordings and reset all times to zero You can display the individual laps in list form using the List view button Press the Delete list button to delete the recorded laps 6 7 8 9 9 Notes The ...

Page 131: ...ystem settings menu You can select the various settings optionsfrom the system settings menu Operation Selection options Select the desired menu item by press ing the appropriate button The function ality of the buttons varies depending on the selection and is described under The individual menu items on page132 You can go to the next or previous page of the settings by pressing the and buttons Cl...

Page 132: ...atus display and shows the settings menu Automatic on off The Navigation device can switch automatically to sleep mode when the vehicle ignition is switched off Prerequisite for this The Navigation device must be connected to the vehicle cigarette lighter see also page 19 The cigarette lighter is de energized after the ignition is switched off The relevant function can be switched on at the Naviga...

Page 133: ...lly between day and night display de pending on the time the current position and the time of year With the following button you can call up the setting Press the Day Night button Select from Automatic Day and Night The desired function is activated and the system settings are displayed Brightness You can set the brightness of the display separately for day and night display With the following but...

Page 134: ...ay during the day Confirm your selection by pressing the back button Design by night Two schemes with different contrasts are available to select for the map display at night Press the Design by night button Select the option on the bottom to set a lighter night display for the map view Select the option on the top to reset the darker standard preset night display for the map view Confirm your sel...

Page 135: ...Each button is labelled with the language name and the associated national flag Scrolling Using the buttons or the scroll wheel it is possible to scroll through the list in the direction of the relevant arrow Selecting the language Press the button for the required language The selection is confirmed by pressing the back button The selection list for the voice is displayed Using the buttons or the...

Page 136: ...ile 1 Profile 4 button You must then restart the navigation system You restart the system by pressing on the Yes button The driver profiles can now be named in dividually This function can be useful for example if several drivers use the same navigation system Many settings and regular destinations are stored in the driver profiles The following are stored in the driver profiles Home address Last ...

Page 137: ...d the last connected phone is not found your navigation de vice checks whether another telephone is within reach that was selected as a trigger for changing the profile Press the Set Auto connect button A list of possible telephones is displayed that you can use as a trigger for this profile select the corresponding telephone by pressing the appropriate button Notice In order to use a telephone as...

Page 138: ...ettings You can reset your Navigation device to the factory settings The following updated data is deleted saved destinations saved routes the home address telephone data images videos etc saved on the internal memory Press the Factory reset button Press the Yes button The Navigation device is reset to the factory settings Calibration If the touch screen responds incorrectly when buttons are press...

Page 139: ...each satellite from the running time differences and thus evaluates its actual current position in terms of geographical length and width In order to determine the position signals from at least three satellites are required and the fourth one allows the height to be determined JPG JPEG Joint Photographic Experts Group The JPEG is the most common type of storage format for dissipating picture comp...

Page 140: ...screen as softly as possible i e without the danger of scratching the screen The stylus is more accurate than opera tion using the fingers since only the thin tip touches the screen In addition dirty marks on the screen caused by finger prints are avoided TMC Traffic Message Channel Traffic announcements transmitted by most FM stations via RDS Basis for dynamic navigation USB Universal Serial Bus ...

Page 141: ...saving time 85 Destination from map 56 Destination input menu Start 45 Destination list 40 Destination memory changing 41 112 Scroll 41 Destinations Entering 45 Protected 41 113 Standard 41 113 Storing 49 Dial 107 Dialing a number 107 Display position 57 Display street names 64 Displaying information signs 80 Displaying the route 49 99 Driver warnings 80 DTMF tones 118 E Easy route 75 Economical r...

Page 142: ...sts 111 P Phonebook 107 108 Update 121 Photo 123 Point of Interest on the route 55 Points of interest Call 55 entering directly 55 in the vicinity 53 near the destination 55 near to an address 54 Q Quick access Icons 112 R Radio remote control 31 Remote control 31 Restrictions Ferries 76 Motorways 76 Toll roads 76 Route calculator 129 Route description 100 Route guidance starting 49 terminating 27...

Page 143: ...e 24 System settings 131 T Telephone menu 107 Telephone mode 106 Text message 110 The main menu 26 Time of day format 84 Time zone 85 TMC 76 86 Displaying TMC messages on the map 87 Route recalculation 89 TMC antenna 20 Toll roads 76 Traffic information 68 127 Truck profile 71 U Units 84 USB 140 V Vehicle profile selecting 69 70 setting 70 Voice 78 Voice commands 51 W Warnings Speed limit 81 ...

Page 144: ... MB 128 MB 128 MB 128 MB 128 MB Li ion battery 720 mAh 720 mAh 720 mAh 720 mAh 1200 mAh TMC Holder for vehicle integration Bluetooth hands free device Dimensions in mm W x H x D 140 x 90 x 17 140 x 90 x 17 140 x 90 x 17 124 5 x 82 x 16 5 140 x 90 x 17 Screen size 12 8 cm 12 8 cm 12 8 cm 10 9 cm 12 8 cm Display Touch screen with 65000 colours reflection proof display resolution 480 horizontal and 2...

Page 145: ...type approval mark E13 issued by Luxembourg s Road Traffic Registration Authority in accordance with European Directive ECE R10 governing the EMC of motor vehicles in its current version authorises installation and operation of the unit in motor vehicles classes L M N and O EU Declaration of Conformity The United Navigation GmbH hereby declares that the navigation device described here isin compli...

Page 146: ...ervice life Please bring this product to the appropriate collection sites for processing and recycling The units will be accepted there free of charge The proper disposal of this product serves the purpose of environmental protection and prevents the harmful effects to persons and the environment that may be caused by improper disposal For further information on the nearest collection points pleas...

Page 147: ...ally equipped for this purpose statutory obligation to return It is the duty of the retail and of manufacturers to take back these batteries free of charge and to correctly recycle them or to dispose of them as hazardous waste statutory obligation to take back The lithium ion battery in the Navigation device is marked with the adjacent symbol consisting of a crossed out waste bin and the type of b...

Page 148: ... remove the housing screws model dependent using a small TX5 screwdriver Lever off the rear of the housing using a flat blade screwdriver placed at the slits on the sides of the housing Pull out the connector of the battery connecting cable Remove the battery Note Do not reconnect a unit that you have opened to the power supply 4 1 2 3 2 4 3 1 1 2 3 4 ...

Page 149: ...3LGRCBÍ TGE RGMLÍ K J ͱ ͱEͱ LJ Á Á KL E JG Germany UUU KW CAICP AMK ...

Reviews: