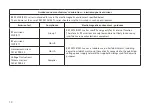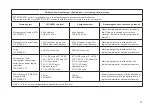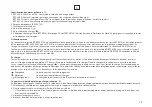
3
en
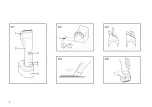
Parts Identification (diagram #1):
1� REF 4406, 4403A or 4412A: Disposable blade, single use only
REF 4406: General purpose surgical blade designed for all types of hair (light blue)
REF 4403A: SensiClip™ surgical blade designed for clipping areas of loose or sensitive skin (light pink)
REF 4412A: Neuro surgical blade designed for head hair and/or thick body hair (blue)
2� Clipper handle (REF 5513E)
3� On/Off switch
4� Recharge (
) LED
5� Charge status ( ) LED
6� Charging adapter (REF 5514 series): CE marked except REF 5514A� (North America version) Be aware of appropriate plug configuration for
your region�
Intended Use
The BD Surgical Clipper REF 5513E is a rechargeable clipper used with charging adapter (REF 5514 series) and BD disposable blades only (REF
4406, 4403A or 4412A)� It is intended to remove head and body hair prior to any medical procedure requiring hair removal� The hair is
removed by each blade oscillated by an electric motor� The BD 5513E Clipper will easily and effectively remove body hair and even the thickest
hair from the chest with BD disposable blade REF 4406 BD, scalp and other thick coarse hair with BD disposable blade REF 4412A, and other
difficult-to-clip areas of the body with BD disposable blade REF 4403A� The Clipper effectively removes wet or dry hair�
Charging
All Clippers arrive discharged� Before patient use, it is recommended to charge the Clipper a minimum of overnight (Maximum fully charge
17 hours)� Switch Clipper off to charge� Place charger upright on a flat surface or wall mount� The charge status ( ) LED glows to indicate it is
receiving a charge� Except when charging, it is recommended to unplug the charging adapter from the electrical outlet� This will reduce overall
energy consumption and is compliant with best practices� Below are the LED indicators on the Clipper:
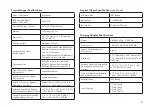
Orange Solid � � � � � � � � � � Battery is charging
Off � � � � � � � � � � � � � � � � � � � Battery is fully charged
Blue Flashing � � � � � � � � � Battery charge low (5 minutes of runtime remaining)
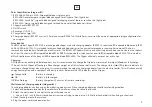
Wall mount of charging adapter (diagram #2):
The charging adapter can be hung on the wall using wood screws� Place charging adapter per healthcare facility guidelines�
1� Select an appropriate location on the wall where the wall mount can be securely attached�
2� Attach the wall mount to the wall as shown with wood screws�
• Use no� 6 by 1 inch (25�4mm) round head screws when fixing to wood; or no� 4-6 Molly or Anchor bolts when fixing to sheet rock�
3� Hook the charger onto these screws�
4� Plug the power cord into a power outlet�
Summary of Contents for 5513E
Page 2: ...2 1 2 3 4 5...
Page 136: ...136 BD 3 1 3 40 4 5 30 PHMB BD 4406 4403A 4412A BD 5513E BD...
Page 138: ...138 2002 96 2006 66 10 C 60 C 10 100 106 kPa 50 kPa B II...
Page 139: ...139 5513E 5514 4406 4403A 4412A 5513E BD 1 m 3 3 30 1 60 C 1 6 6 BD bd com...
Page 140: ...140 6 A 1 800 8 BATTERY BD 5513E 5514 2 BD BD BD BD 4406 4403A 4412A BD BD 6...


