


20
DOS Installation
This section describes how to install the FastLink II Client on your PC in DOS.
To install the FastLink II Client, start from the DOS prompt and:
1
Insert the FastLink II Client diskette in drive A or B, then make that drive current by typing either
A:
or
B:
, then pressing
↵
↵
.
2
Enter the following command:
FINSTALL
↵
↵
Follow the directions on the screen. The FINSTALL program copies the FastLink II Client software
into the directory of your choice.
3
Select the PPP or SLIP version of the FastLink II Client.
PPP - Choose this if you are running Remote Annex Software
Release 10.1 or higher. This selection enables IPX and IP remote access over PPP.
SLIP - Choose this if you are running a Remote Annex Software Release that is earlier than Release
10.1. This selection enables IPX remote access over SLIP.
3
Make the FLINK directory current and type:
FLINK
↵
↵
The FastLink II main menu will appear.
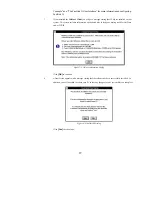
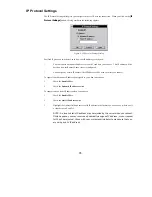
4
Select
Setup
. The Setup dialog will appear.
You can now enter configuration information required by FastLink II to operate your system:
Serial Port — Set the Serial Port to the port to which your modem is connected. Normally, this will
be either COM1 or COM2.
Modem
—
Select a Modem from the list of preconfigured modems. Select Default if your modem
does not appear on the list.
Baud Rate — Select the baud rate at which your serial port and modem will communicate.
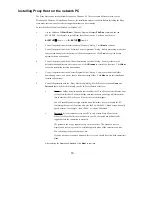
When you are done entering settings, press
[Save]
. Then press
[Done]
to return to the main menu,
then select
Exit
to return to DOS.
NOTE: Any settings you enter here can always be changed by invoking this same
dialog again.
5
Edit your AUTOEXEC.BAT file and add a command to run DPMS.EXE, preferably as the first line
of the file:
C:\FLINK\DPMS.EXE