background image

Operation


When you have changed the heating 
duration press the confirm button 
("OK").  

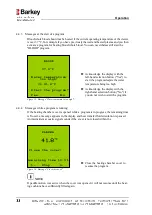
Pressing the confirm button ("OK") will 
enter the currently set heating duration for 
the selected program ("PLASMA" in this 
example). The required option can now be 
selected again with the left or right-hand 
selection button ("▼" or "▲"). 

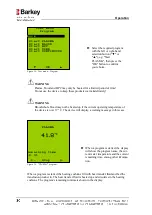
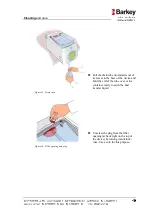
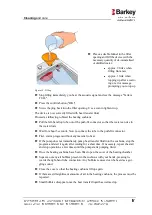
Figure 25: Changed heating duration   
for the "PLASMA" program 


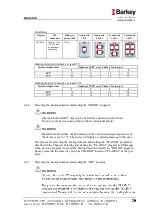
In the heating duration menu, select 
"Back" to return to the user menu. 

Figure 26: User menu 

 
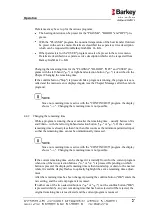
The heating duration has been successfully changed. To change the heating durations for 
"BLOOD", "HPC" and "USER", please proceed as described above. 


          U se r   m en u 

      H e a ti n g   du r a t i on 


B a c k 


P L A S M A  d u r a t.


  2 5 :0 0 

B L O O D   du r a t .      1 5 :0 0  

H P C   d u ra t .            5 :0 0  

U S E R   d ur a t .        2 0 :0 0 


      -          O K            + 


        U s er   m e nu 


B a c k                           


  P r o g r am 

  H e a t i ng   d u ra t i o n 


  F u n c t io n   b ut t o n s 

  F i l l   le v e l 


      ▼          O K          ▲ 


Summary of Contents for plasmatherm

Page 1: ...Instructions for use Barkey plasmatherm Version 1 EN Issued 2009 12 22 for SN 1107500 onwards Manufactured by Barkey GmbH Co KG Gewerbestrasse 8 33818 Leopoldshoehe Germany ...

Page 2: ......

Page 3: ...fety distance 4 Operation 4 1 Putting into service 4 1 1 Siting the device 4 1 2 Connecting the power cord printer and barcode scanner 4 1 3 Switching on 4 1 4 Switching on if the fill level is too low 4 1 5 Filling 4 2 Opening the heating chamber 4 3 Loading 4 4 Selecting and starting a program with the menu system 4 4 1 Selecting and starting the PLASMA program 4 4 2 Changing the remaining time ...

Page 4: ...ter 6 Maintenance 6 1 Technical safety inspection TSI 6 2 Replacing the battery 7 Error messages 7 1 Moisture sensors 7 2 Overtemperature 7 3 Paddle blocked 7 4 Tank is empty 7 5 Device errors 7 6 Error numbers 8 Warranty and disclaimer 9 Customer service 10 Factory settings of the programs 11 Specifications Declaration of Conformity ISO Certificate Barkey plasmatherm device master data sheet ...

Page 5: ...bout the functions op eration and use of the Barkey plasmatherm 1 1 Pictograms words and symbols These instructions use the following pictograms symbols and words to highlight warn ings and special advice WARNING If disregarded danger to persons CAUTION If disregarded danger to property the device or basic device functions NOTE Additional useful advice and information the i stands for information ...

Page 6: ... user Please ensure that any supplementary instructions which may be issued are kept to gether with the original instructions Carefully read through these instructions before using the device Please follow the advice about the intended use of the device in the Chapter In tended purpose and the safety information provided in the Chapter Safety advice For a better understanding of these chapters you...

Page 7: ...isation of Barkey GmbH Co KG Any further usage which goes beyond the use of the contents described in connection with the product purchased is not permitted Third party products protected trademarks etc are always stated without reference to the registration or copyright status Existing industrial property rights and registered trade marks are explicitly acknowledged We reserve the right to make t...

Page 8: ...while heating or thawing is in progress 2 Filler opening The filler opening is used to fill the device with heat transfer fluid 3 Paddle Gently agitates FFP s during the heating process 4 Heating cushion Heat transfer fluid flows through the heating cushions The cushions heat the materials placed in the device and keep them warm 5 Cover locking release button The locking release button is used to ...

Page 9: ...ons Dif ferent functions of the device act on the preparation depending on the program selected A number of preferences can also be set The following table provides an overview of these Program name User preselectable Acting special func tions Undulation BLOOD Heating time no PLASMA Heating time yes HPC Heating time yes USER various parameters can be set as required adjustable or select able CONTI...

Page 10: ... 2 lamps LEDs The display displays the menu system for the operation of the device displays information about the currently running program and its status and outputs warning and error messages An audible signal draws your attention to the fact that a program has finished warns of operator error or indicates that an error has occurred A message is additionally shown in the display in the event of ...

Page 11: ...button or selection button for menu navigation The button s particular function is indicated in the display Confirm button for menu navigation This button is used to acknowledge confirm the function which cur rently appears in the display The green light LED shows that the device has been switched on The yellow light LED indicates a device malfunction ...

Page 12: ...tes the appointed body TÜV SUEDProduct Service GmbH which supervises the manufacturer s quality assurance system This symbol indicates the month and year in which the next safety in spection is due This symbol advises you that you must read the instruction manual sup plied thoroughly This hazard symbol advises you that failure to follow the instructions contained in the instruction manual can resu...

Page 13: ... of the device in individual cases 2 5 Contraindication The device must not be used to heat or keep warm animals or to thaw heat or keep warm objects or fluids of any kind except those as described under Intended purpose There are no known contraindications when thawing and or heating blood and blood products 2 6 Overtemperature protection Independent overtemperature protection systems monitor the...

Page 14: ...in the heating chamber The device uses a dry heating process that prevents the contents of damaged con serves hairline cracks being contaminated by the heat transfer fluid The heating procedure can be monitored Fluid leakage is easy to detect through the use of transparent heating cushions the light colours used in the heating chamber and white dry paper filter paper on the heating chamber floor P...

Page 15: ...ted and or thawed with the programs specifically intended for them If infusion solutions or medications are heated in the Barkey plasmatherm you must ensure that their efficacy is maintained during heating and that the timed heating is approved by the manufacturer of the medication If preparations leak this is due to previously damaged con serve bags e g hairline cracks damage in transit The senso...

Page 16: ...ut repairs from the manufacturer if necessary Repairs and modifications to the device may only be carried out by Barkey GmbH Co KG or authorised per sonnel The heating cushions of the device must not be allowed to come into contact with sharp edged objects The heating chamber and the heating cushions must be cleaned and disinfected at least once per week The filter paper must be replaced after eac...

Page 17: ...utside the limit values set by EN 60601 1 2 Portable and mobile HF communication equipment such as mobile phones can affect the device Do not use the device in the immediate vicinity of flammable materials e g gases liquids flammable mixtures of anaesthetic substances with air flammable mixtures of anaesthetic substances with oxygen or nitrous oxide whose flashpoint is below 50 C It is imperative ...

Page 18: ...ines HF outputs in accordance with CISPR 11 Group 1 The Barkey plasmathermuses high frequency energy for inter nal functions only This means that HF emission is very low and neighbouring electronic devices are unlikely to be affected HF outputs in accordance with CISPR 11 Class B The Barkey plasmatherm is suit able for use in buildings other than residential and those which are directly connected ...

Page 19: ...vi ronment Surges according to IEC 61000 4 5 1kV voltage phase to phase 2kV voltage phase to earth 1kV voltage phase to phase 2kV voltage phase to earth The quality of the supply volt age should comply with a typi cal business or hospital envi ronment Voltage dips short time inter ruptions and fluc tuations in supply voltage according to IEC 61000 4 11 5 UT 95 drop of UT for 1 2 period 5 UT 95 dro...

Page 20: ...s m The field strength of stationary transmitters should always be less than the compliance level b at all frequencies in accordance with an on site investigationa Interference is possible near devices that display the following symbol NOTE 1 At 80 MHz and 800 MHz the higher frequency range applies NOTE 2 These guidelines may not apply in all cases The propagation of electromagnetic variables is a...

Page 21: ...ansmitter power W Safety distance depending on transmitter frequency m 150 kHz to 80 MHz P d 17 1 80 MHz to 800 MHz P d 17 1 800 MHz to 2 5 GHz P d 33 2 0 01 0 12 0 12 0 23 0 1 0 37 0 37 0 74 1 1 17 1 17 2 33 10 3 69 3 69 7 38 100 11 67 11 67 23 33 For transmitters whose maximum nominal output is not given in the above table the recom mended safety distance d in metres m can be determined using th...

Page 22: ...smatherm must be set up on a stable hard and level surface Unobstructed access to the device from above and in front must be guaranteed CAUTION The device must be lifted by a minimum of 2 people When carrying grip the de vice by the bottom edge only Recesses are provided in the base for safe carrying CAUTION The device is ventilated from below It should therefore not be placed on a soft sur face i...

Page 23: ...r the first time the appropriate signal connection for the peripheral device must be activated before it can be used Details are described in a separate service description which can be requested from Barkey GmbH Co KG The device s termination panel is located on the underside front left The panel provides a mains power socket 230 115 VAC 50 60 Hz for non heating appli ances a socket X2 for option...

Page 24: ...its two captive screws CAUTION Only use the cable supplied to connect the printer Connect the other end to the printer Using a suitable screwdriver secure the plug in position with its two captive screws Connect the barcode scanner cord to socket X1 This plug does not fit socket X2 Using a suitable screwdriver secure the plug in position with its two captive screws Connect the printer to the mains...

Page 25: ...n correctly filled with heat transfer fluid the following information appears in the display for a maximum of 5 seconds the Barkey logo the device name the software version Vx x current version the abbreviation for the language variant in the example shown DE for German the serial number SN Figure 4 Login screen You will now see the main screen in the display at top left is the current date and at...

Page 26: ...rkey plasmatherm is too low when it is switched on the menu for filling the tanks is shown first after the initial screen The prompt Fill Tank is addition ally highlighted by flashing NOTE You cannot quit this menu until a certain level is reached in the tank or the device is switched off again When the tank is filled and the required level has been reached the FILL Tank prompt is replaced by the ...

Page 27: ...micropur tablets in the filler opening CAUTION Always add two micropur tablets to the distilled or de mineralised water For devices supplied new or exchange devices or following maintenance and re pairs the two micropur tablets are always already inside the tank for the heat trans fer fluid Place a suitable funnel in the filler opening and fill up the device with the necessary quantity of de miner...

Page 28: ...er waiting for a short time If necessary repeat the start and stop operations a few times until the pump starts pumping fluid Once the heating cushions have been filled open the cover of the heating chamber Squeeze out any air bubbles present in the cushions with your hands pressing to wards the right hand tube connection Any bubbles removed can be heard as a gur gling sound Close the cover so tha...

Page 29: ...tically so should be guided with one hand to its end stop as shown Figure 8 Cover locking release button To close the heating chamber press the cover down until you hear the button en gaging in the hole in the cover Figure 9 Cover open WARNING Keep your fingers away from the edge of the cover There is a danger of crushing CAUTION Programs will only run when the heating chamber cover is closed Othe...

Page 30: ...ies and involves a longer warm up phase because the product on the bottom of the heating chamber is not heated from both sides Lift up the heating cushions by the grip and place the product to be heated or thawed in the required position WARNING Do not place conserves beneath the paddle The paddle is marked red to aid identi fication Place the heating cushions back over the conserves without any f...

Page 31: ...Operation Figure 10 Optional loading positions for conserves ...

Page 32: ...nction buttons which are pre assigned programs and can be used as selection shortcuts Assigning the shortcut programs is described in the following chapters The left and right hand function buttons can be used to select and start the defined pro grams BLOOD and PLASMA in this example The confirm button Menu takes the user to the main menu of the user menu The route that uses the main menu is descr...

Page 33: ...You will now see the Program submenu the user has a choice of 5 programs PLASMA for thawing FFP s BLOOD for heating blood or EC s HPC for thawing stem cells USER a user configurable program for clinic specific standards CONTINUOUS for heating and keeping warm non denaturable infusion solutions The selection of the PLASMA program is described here by way of example to select the BLOOD HPC USER and ...

Page 34: ...ice is over 37 C The device will display a warning message in this case When a program is started the display will show the program name the cur rent water temperature and the current remaining time among other informa tion Figure 14 PLASMA program When a program is started the heating cushions fill with heat transfer fluid and bed the transfusion product in The heat transfer fluid is heated up an...

Page 35: ...is not possible 4 4 2 Changing the remaining time While a program is running the user can alter the remaining time usually between 30s and 99min with the left or right hand selection button or If the current remaining time is already less than 30s then this counts as the minimum permitted input so that the remaining time cannot be unintentionally increased NOTE Since no remaining time is active wi...

Page 36: ... you do not wish to start the program Figure 15 Message Water temperature too high 4 4 4 Messages while a program is running If the heating chamber cover is opened while a program is in progress the remaining time is frozen a message appears in the display and heat transfer fluid circulation is paused An intermittent acoustic signal sounds if the cover is not closed within 16s Close the heating ch...

Page 37: ...inter during the ongoing program When a program has been started the connection to an IT network is also verified if this has been configured in the service menu If the Barkey plasmatherm is not connected to the network or if the network connection is faulty or the remote terminal is not ready or has a fault the user is made aware of this by a flashing icon in the top left corner of the screen If ...

Page 38: ...nal sounds This indicates that the program has finished and pre vents inadvertent further heating Open the heating chamber cover or Acknowledge the end of the program with the confirm button OK Figure 20 Program complete If a lack of water was previously detected while the program was running then another message is displayed when the Program complete message is acknowledged As well as an appropri...

Page 39: ...ext time low water is detected see the Chap ter Messages while a program is running 4 4 6 Presetting the heating duration of the PLASMA program This chapter describes how to preset the heating duration taking the PLASMA program as an example to preset the heating duration of the BLOOD HPC and USER pro grams please proceed as described for the PLASMA program WARNING Plasma blood and HPC may only be...

Page 40: ...Heating duration menu You will now see this display for setting the heating duration for the PLASMA program Press the confirm button OK The flashing heating duration can now be set individually for the selected program by using the left or right hand selection button or Figure 24 Setting the heating duration for the PLASMA program User menu Back Program Heating duration Function buttons Fill level...

Page 41: ... selection button or Figure 25 Changed heating duration for the PLASMA program In the heating duration menu select Back to return to the user menu Figure 26 User menu The heating duration has been successfully changed To change the heating durations for BLOOD HPC and USER please proceed as described above User menu Heating duration Back PLASMA durat 25 00 BLOOD durat 15 00 HPC durat 5 00 USER dura...

Page 42: ...f the heat transfer fluid the fill volume of the FFP s the number of FFP s choice of program etc The guideline values listed in Table 2 guideline heating duration in minutes to reach at least 5 C in each FFP and Table 3 guideline heating duration in minutes to reach 33 C apply under the conditions indicated in Table 1 NOTE Different conditions such as the starting temperature of the FFP s the temp...

Page 43: ...arting the BLOOD program WARNING Plasma blood and HPC may only be heated for a limited period of time Do not use the device to keep these products warm indefinitely WARNING Blood whole blood may not be heated up if the current operating temperature of the device is over 37 C The device will display a warning message in this case The process for presetting the heating duration and starting the PLAS...

Page 44: ...cts that are being heated might be impaired or destroyed due to incorrect parameter settings you should always observe the following safety information WARNING The undulation function should not be used while heating up blood conserves or erythrocyte concentrates so as to avoid mechanical stress on the cellular material or prevent agglutination WARNING Setting up the USER program should only be ca...

Page 45: ... right selection button or in the user menu select Function Buttons then press the OK button to confirm your choice Figure 27 User menu A screen is displayed showing both cur rently set shortcut programs e g BLOOD and PLASMA as shown in the adjacent figure Press the top left hand function button repeatedly until the desired program is displayed on the left Similarly assign a program to the top rig...

Page 46: ... the OK button to confirm your choice Figure 29 User menu The filling status will be displayed as shown in the adjacent figure Depending on the level the message FILL Tank i e water is low or Tank is FULL there is sufficient heat transfer fluid is displayed Figure 30 Fill level menu FILL Tank message CAUTION If FILL Tank is displayed as shown in the example you must top the device up with distille...

Page 47: ...then Tank is FULL is displayed as the status The display s background light ing flashes and an intermittent acoustic signal sounds Press the confirm button Back to return to the user menu Figure 31 Fill level menu Tank is FULL message Fill level Tank is FULL Back ...

Page 48: ...on for the first sample ID 1 If a user ID is not required you can scan in a dummy code or move to the position of the first sample ID by pressing the left hand selection button You can now scan in the corresponding sample ID The cursor moves automatically to the next position after each scan Figure 33 Scanned user ID and sample ID It is not necessary to scan in all 8 sample ID s A program can be s...

Page 49: ... position ID then the user ID is deleted Here again the insertion point then moves to position 1 Correcting or deleting a sample ID is done in the same way The barcodes for the user ID and for the 8 sample ID s are automatically deleted when a program has properly completed If a program is cancelled either manually or because an error occurs the data are initially retained They can be deleted manu...

Page 50: ...r ther mochemical cleaning solutions You should use standard commercial preparations based on alcohol without oxygen releasing components with sodium hypochlorite with 1 4 bleach solution or aldehyde content 0 2 as a disinfectant If possible clean the device with a solution of soap and water Dry the surfaces and use a surface disinfectant Follow the application time stated by the disinfectant manu...

Page 51: ...amination within the device itself enabling early recognition If the filter paper becomes moist the two sensors metal contacts on the heating chamber floor are short circuited triggering an audible signal and a flashing warning message in the display Replace the dry paper after carrying out a full cleaning routine NOTE Dry paper can be ordered from Barkey GmbH Co KG Article No 212 10005 pack of 60...

Page 52: ...s can be ordered from Barkey GmbH Co KG if required Please proceed as follows to replace the water 5 3 1 Draining off the water Switch off the device with the On Off button WARNING Do not pull the device further forward than indicated in the following step Pull the device forward over the front edge of the surface on which it is standing so that its front projects by approx 15 cm Two extra feet un...

Page 53: ...vice and hold the end of the tube over or in a container ready to catch the heat transfer liquid Figure 35 Drain tube Unscrew the plug from the filler opening at back right on the top of the device by turning it anticlock wise Use a coin for this purpose Figure 36 Filler opening with plug ...

Page 54: ...lling with water If you are not filling the device from empty but just topping it up Unscrew the plug from the filler opening as described in the Chapter Draining off the water When filling the device from empty switch the device on with the On Off button It will now display a message asking you to fill with water To fill with water select the fill level display described in the Chapter Fill level...

Page 55: ...an rise in the water ducts Wait for about 5 seconds Now re connect the tube to the push fit connector First start a program without any material to heat If the pump does not immediately pump heat transfer fluid into the cushions stop the program and start it again after waiting for a short time If necessary repeat the start and stop operations a few times until the pump starts pumping fluid Once t...

Page 56: ...ipment 6 1 Technical safety inspection TSI As with all electronic devices the Barkey plasmatherm s temperature setting is dependent on normal ageing and on the tolerances of the electronic components To ensure that the temperature settings on the Barkey plasmatherm are always within the stated tolerances a technical safety inspection TSI must be carried out each year by qualified service personnel...

Page 57: ...1225 3 V must be replaced every 3 years CAUTION Only qualified service personnel and employees of Barkey GmbH Co KG may replace the battery Please dispose of any batteries properly in accordance with regulations The device clock will need to be reset after replacing the battery ...

Page 58: ...quiring the device to be switched off proceed as fol lows Note the error message Make a note of the error number and serial number Switch off the device Contact your medical technical service or the service department of Barkey GmbH Co KG NOTE In certain circumstances the serial number of the device may not be shown when an error message occurs NOTE The device s rating plate will be found at the f...

Page 59: ...e error message Make a note of the error number xxx and serial number SN Switch off the device and allow it to cool down Figure 40 Overtemperature error message An overtemperature condition can occur for a variety of reasons Further diagnosis is pos sible by reference to the error number see also the Chapter Error numbers In order to be certain that there is an error in the device you must switch ...

Page 60: ...d error message 7 4 Tank is empty If the tank is empty or if the level in the tank has fallen below a critical level for the heat ing the following error message is displayed Note the error message Switch off the device Top up with water as described in the Chapter Filling with water Figure 42 Tank is empty error message Error Paddle blocked Error number 098 SN 1234567 Switch off the device Error ...

Page 61: ... Make a note of the error number xxx and serial number SN Switch off the device Figure 43 Device error error message 7 6 Error numbers The numbers of the errors which require the device to be switched off are listed in the ta ble below Errors which require the system to be restarted with action on the part of the user are greyed Error Device error Error number xxx SN 1234567 Switch off the device ...

Page 62: ...n set time and date 60 The watchdog timer has detected an error 70 to 73 Error with temperature measurement temperature sensors Possible cause sensor open circuit short circuit 80 to 81 Overtemperature soft ware during temperature measurement Restart system allow device to cool down 90 Pump and heater supply voltage not available Possible cause overtemperature 91 Faulty program function 92 Overtem...

Page 63: ...nstructions for use for the use of non original components or for any use installation which does not conform to the instructions for use accompanying such components The use of components and accessories other than those referred to in the instructions for use shall result in a reduction of the manufac turer s warranty for the device Barkey GmbH Co KG only holds itself responsible for effects on ...

Page 64: ...s before dispatching the device Return the device for recycling repair only to Barkey GmbH Co KG or its author ised distributor The device must be cleaned and if necessary disinfected before it is dispatched The returned device must not pose any kind of health risk e g as a result of toxic carcinogenic biohazardous or radioactive substances The sender shall be held liable for any losses caused by ...

Page 65: ...barkey de WARNING Barkey GmbH Co KG accepts no liability for modifications or repairs to the de vices carried out by the user or by unauthorised third parties without first consult ing the supplier Our conditions for repair and assembly and our warranty conditions apply Our products are supplied according to the General Conditions for the Supply of Products and Ser vices of the Electrical and Elec...

Page 66: ...Paddle time 0 min Paddle active 0 min Paddle inactive 0 min HPC program Nominal temperature 37 C Heating duration 5 min Paddle delay 0 5 min Paddle time 4 5 min Paddle active 4 5 min Paddle inactive 0 min USER program Nominal temperature 37 C Heating duration 20 min Paddle delay 2 min Paddle time 18 min Paddle active 18 min Paddle inactive 0 min CONTINUOUS program Nominal temperature 37 C Heating ...

Page 67: ...Program PLASMA 45 C 1600 Watt max Sound pressure level 45 dB A Current consumption 7 A at 230 VAC max 14 A at 115 VAC max Fusing 8 A slow at 230 VAC 15 A slow at 115 VAC Battery type Lithium CR 1225 3 V Interfaces devices optional Barcode scanner Log printer Overtemperature protection software controlled setpoint 1 0 C electronic 48 1 0 C Temperature setting Variable from 37 to 45 C Default settin...

Page 68: ...ver closed 340 x 600 x 320 mm Cover open 340 x 600 x 720 mm Weight empty 18 kg Fill quantity approx 9 litres Refill quantity approx 1 litre device warning Protection rating I MDD classification II a Enclosure class IP21 Identification CE 0123 ...

Page 69: ...________________ Inventory number __________________________________________ Device location __________________________________________ Commissioned on __________________________________________ Identification 0123 Manufacturer Barkey GmbH Co KG Gewerbestrasse 8 33818 Leopoldshoehe Phone 49 5202 98010 Fax 49 5202 980199 email info barkey de ...

Page 70: ......

Page 71: ......

Page 72: ......

Reviews: