


4. Connections
4.3.1
RS232/RS422 Connections
What is possible with the RS232/RS422 Connections?
1.
Remote control :
- easy adjustment of projector when connected to an IBM PC (or compatible) or Apple computer.
- allow storage of multiple projector configurations and set ups.
- wide range of control possibilities.
- address range from 0 to 255.
2.
Data communications: sending data to the projector or copying the data from the projector to a memory device (hard disc,
floppy, etc.).
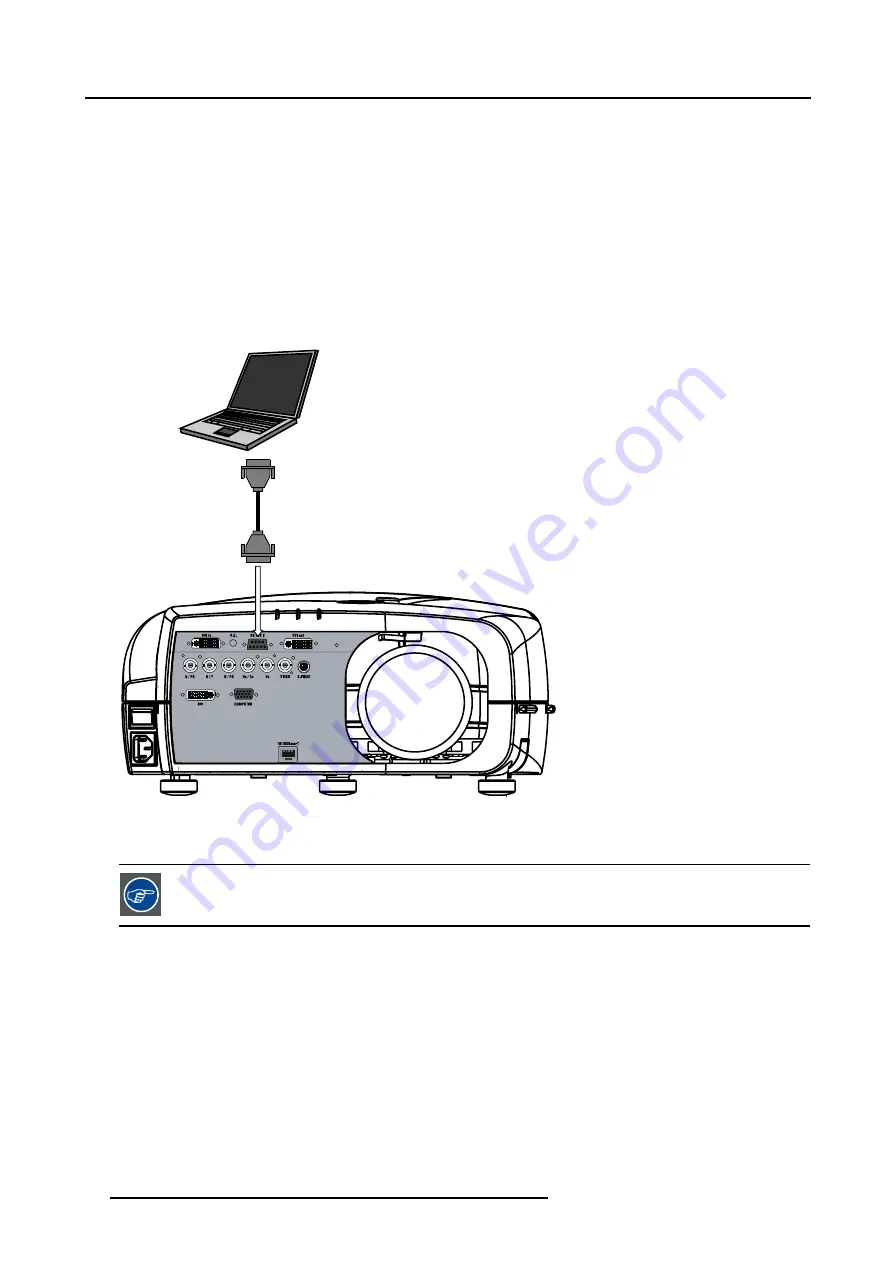
How to connect the RS232/RS422 ports?
1. Connect the D9 connector from the RS232/RS422 cable to the RS Input on the projector.
PC Serial Port
Image 4-13
RS232 connection
2. When applicable connect the RS232/RS422 Output to the next projector in the daisy chain setup.
See the
Setup
section for the baudrate and address setting
4.3.2
Ethernet Connections
What is possible with the Ethernet Connections?
The Ethernet Connections can be used to:
•
Upload or download projector software.
•
Set up RS232 communication (TCP-packets) with the projector.
How to connect the Ethernet ports?
1. Plug one end of the TCP/IP cable into the PC or the network socket.
22
R59770079 BARCO ID H250/500 23/07/2007
Summary of Contents for iD H250
Page 1: ...Barco iD H250 500 Owners manual R9010520 R9010570 R59770079 01 23 07 2007...
Page 28: ...4 Connections 24 R59770079 BARCO ID H250 500 23 07 2007...
Page 41: ...5 Setup Image 5 18 7 Press ENTER R59770079 BARCO ID H250 500 23 07 2007 37...
Page 42: ...5 Setup 38 R59770079 BARCO ID H250 500 23 07 2007...
Page 44: ...6 Getting started 40 R59770079 BARCO ID H250 500 23 07 2007...
Page 88: ...7 Advanced Image 7 84 84 R59770079 BARCO ID H250 500 23 07 2007...
Page 96: ...7 Advanced 92 R59770079 BARCO ID H250 500 23 07 2007...
Page 98: ...8 Maintenance 94 R59770079 BARCO ID H250 500 23 07 2007...


