14. Service
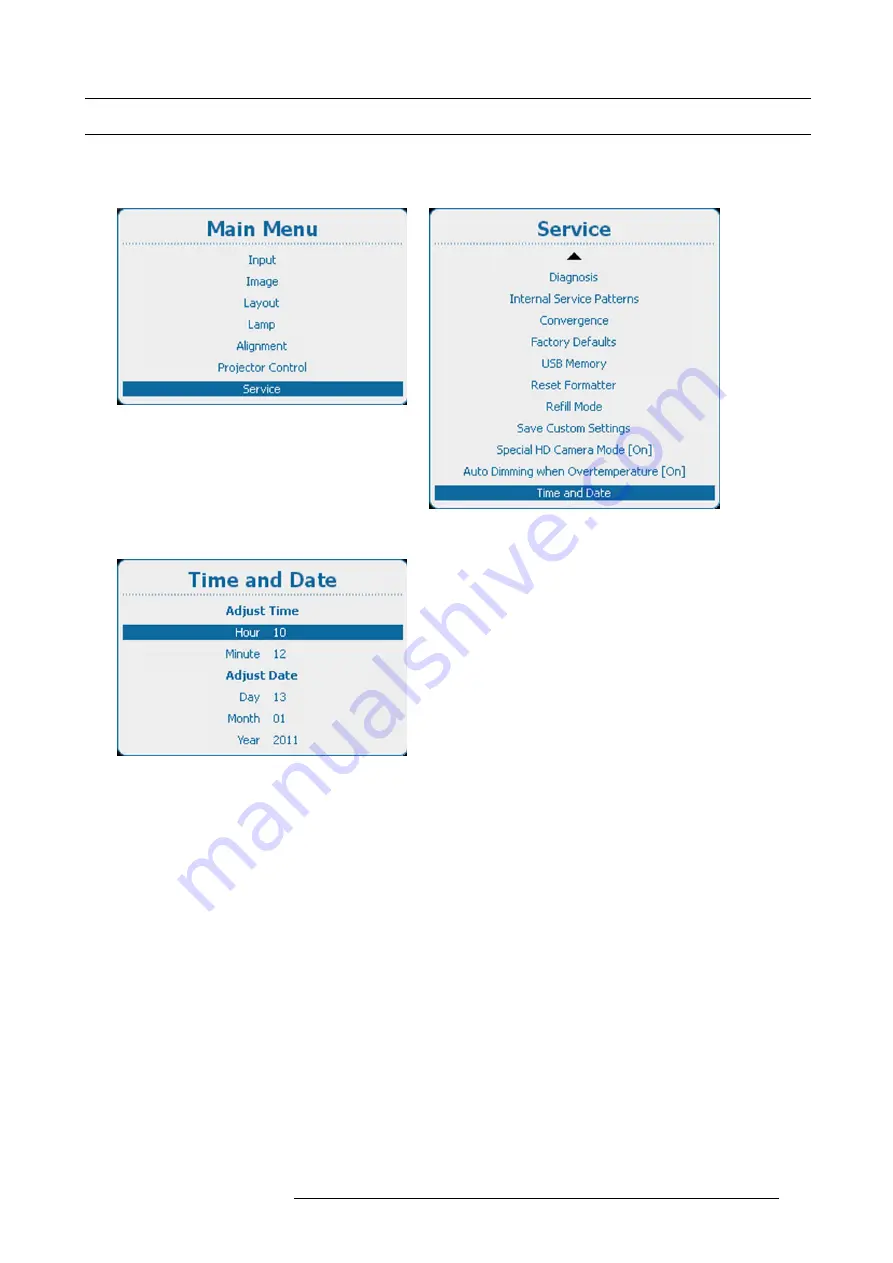
14.13 Time and Date
How to set
1. Press
Menu
to activate the menus and select
Service
→
Time and Date
.
Image 14-76
Main menu, service
Image 14-77
Service, time and date
Image 14-78
Date and time set up
2. Use the
▲
or
▼
key to select
Hour
,
Minute
,
Day
,
Month
or
Year
and press
ENTER
to select.
3. Use the
▲
or
▼
key to change the selected character.
Use the
◄
or
►
key to select another character.
Note:
Digits can be entered with the digit keys on the remote control or the local keypad. When a digit is entered in that way,
the next character will be selected automatically.
4. Press
ENTER
to accept the changes.
Repeat for other values in the same way.
R5905032 HDX SERIES 20/11/2014
289
Summary of Contents for HDX series
Page 10: ...Table of contents 6 R5905032 HDX SERIES 20 11 2014...
Page 16: ...1 Safety 12 R5905032 HDX SERIES 20 11 2014...
Page 26: ...2 General 22 R5905032 HDX SERIES 20 11 2014...
Page 50: ...3 Physical installation 46 R5905032 HDX SERIES 20 11 2014...
Page 58: ...4 Input Communication 54 R5905032 HDX SERIES 20 11 2014...
Page 108: ...8 Input 104 R5905032 HDX SERIES 20 11 2014...
Page 138: ...9 Image 134 R5905032 HDX SERIES 20 11 2014...
Page 156: ...10 Layout 152 R5905032 HDX SERIES 20 11 2014...
Page 168: ...11 Lamp 164 R5905032 HDX SERIES 20 11 2014...
Page 294: ...14 Service 290 R5905032 HDX SERIES 20 11 2014...
Page 296: ...15 Maintenance 292 R5905032 HDX SERIES 20 11 2014...
Page 308: ...16 Servicing 304 R5905032 HDX SERIES 20 11 2014...
Page 310: ...A Dimensions 306 R5905032 HDX SERIES 20 11 2014...
Page 316: ...B Specifications 312 R5905032 HDX SERIES 20 11 2014...
Page 320: ...C Standard source files 316 R5905032 HDX SERIES 20 11 2014...
Page 324: ...D DMX chart 320 R5905032 HDX SERIES 20 11 2014...
Page 334: ...F Environmental information 330 R5905032 HDX SERIES 20 11 2014...


