3. Physical installation
3.9
Aligning the projected image on the screen
About aligning
Use the Communicator software to align the projector. For more detailed information, consult the Communicator software user guide.
Alignment steps
1. Project an internal hatch pattern with the projector. In the navigation pane, click on
Control
→
Test Patterns
.
Use one of the short cuts to display a test pattern.
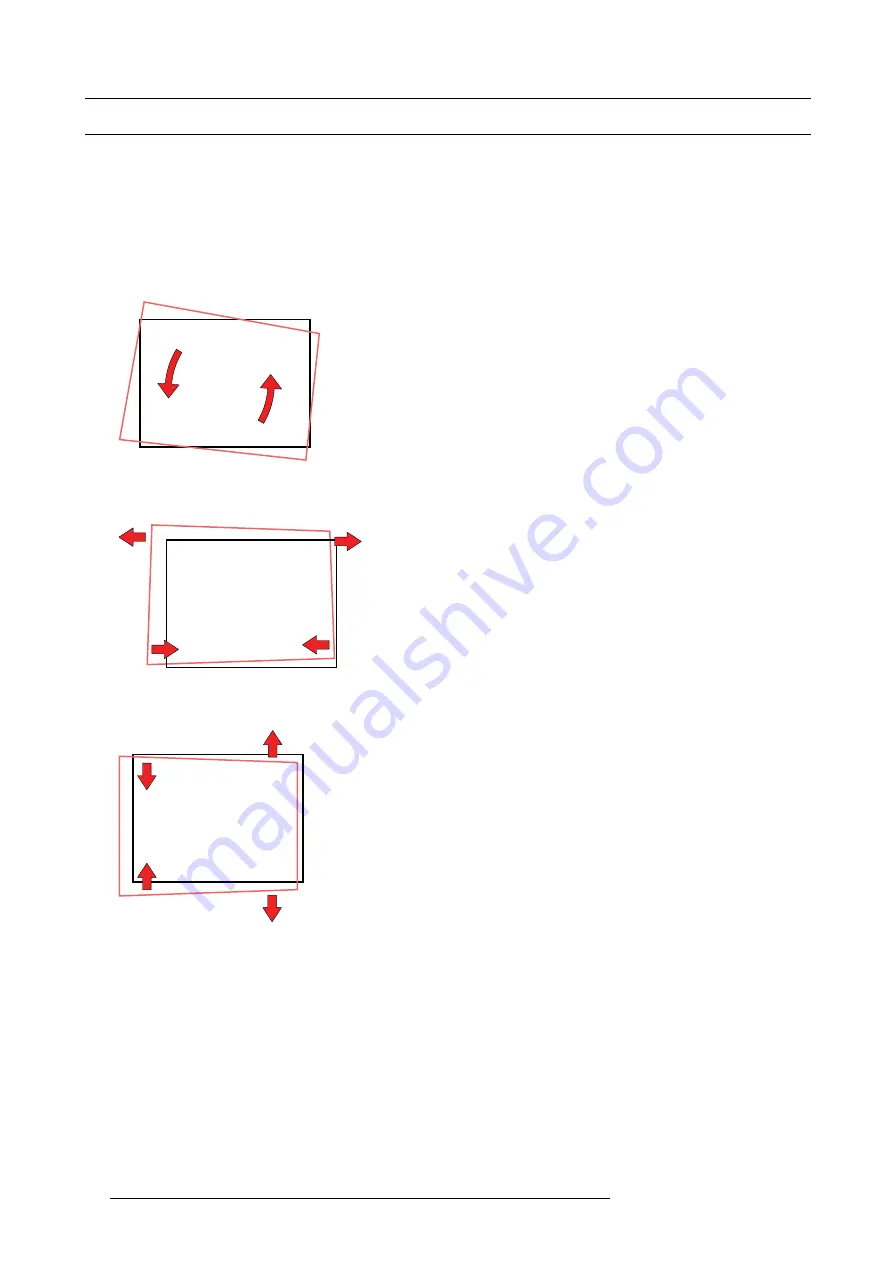
2. Adjust the rotation of the projector.
Adjust until the outline of the hatch pattern is most symmetric with the projection screen.
Rotation
Image 3-19
3. Adjust the inclination of the projector.
Adjust until the outline of the hatch pattern is most symmetric with the projection screen.
Inclination
Image 3-20
4. Adjust the skew of the projector.
Adjust until the outline of the hatch pattern is most symmetric with the projection screen.
Skew
Image 3-21
5. Shift the hatch pattern horizontally and vertically until the outline of the hatch pattern is most symmetrically placed with respect
to projection screen.
Use Communicator software to shift. In the navigation pane, click on
Con
fi
guration
→
Lens
. The
Lens settings
menu opens.
Use the
Lens shift
buttons to shift the image.
Or, use the shift buttons on the local keypad.
32
R5905823 HDQ 4K35 30/11/2015
Summary of Contents for HDQ 4K35
Page 1: ...HDQ 4K35 User and Installation manual R5905823 04 30 11 2015 ...
Page 4: ......
Page 58: ...4 Lenses Lens Holder 54 R5905823 HDQ 4K35 30 11 2015 ...
Page 69: ...6 Starting up 6 STARTING UP R5905823 HDQ 4K35 30 11 2015 65 ...
Page 70: ...6 Starting up 66 R5905823 HDQ 4K35 30 11 2015 ...
Page 84: ...7 Maintenance 80 R5905823 HDQ 4K35 30 11 2015 ...
Page 96: ...8 Removal and installation of the projector covers 92 R5905823 HDQ 4K35 30 11 2015 ...
Page 98: ...A Dimensions and specifications 94 R5905823 HDQ 4K35 30 11 2015 ...
Page 108: ...B Environmental information 104 R5905823 HDQ 4K35 30 11 2015 ...


