F70-series
Quick Start Guide
AC
110-240V
Connect power
Press Power On Button
Installation Conditions
Installation Conditions
Ventilation Requirements
Ventilation Requirements
General
1
2
3
Content is distorted or color is not correct
Content is distorted or color is not correct
1
2
Power up procedure
3
Review source information in the Status menu (LCD
screen or OSD) and verify that the source signal is
compatible.
Check length of source cables; try shorter cables.
Use test images to verify that the correct aspect ratio is
selected.
Reset color and display settings to factory settings.
Restart the projector. Let the unit cool down for at least
1 minute prior to restarting.
4
5
Power down procedure
Ambient operating conditions:
Altitude 0 - 500 m:
Temperature: 10 - 45°C
Humidity: 10-80% RH
Altitude 500 - 1500 m:
Temperature: 10 - 40°C
Humidity: 10-80% RH
Power requirements:
100 - 240 V, 50 - 60 Hz
Dimensions excl. lens:
475 x 593 x 272 mm (WxLxH)
Weight excl. lens:
37 kg
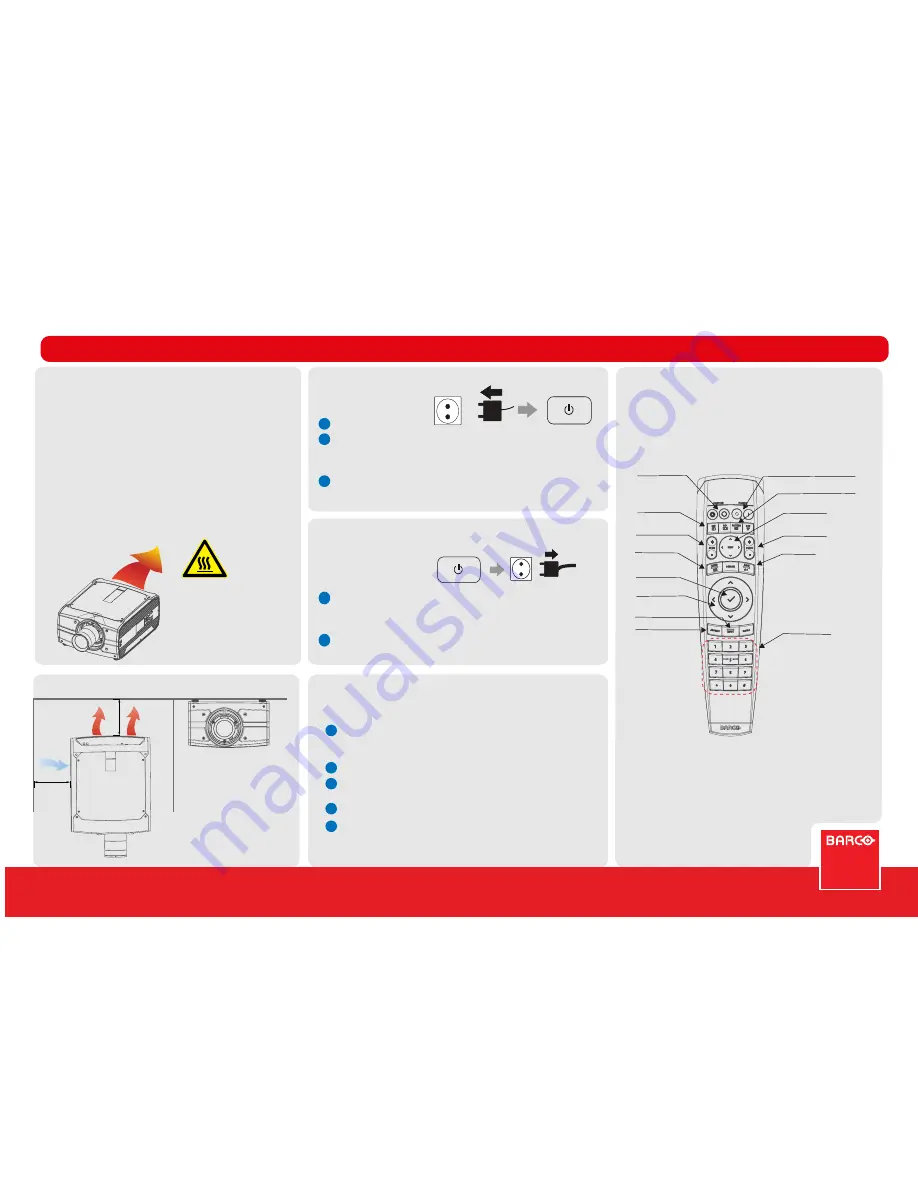
Warm exhaust!
Do not place
heat-sensitive
objects in this area.
CAUTION!
Plug in mains power cord.
Press the power button.
The projectore are running a start up procedure. When completed, the standby
button illuminates white. (Standby mode).
Press power button again to bring the projector in On mode. When the power
button backlight is steady blue, the projector are ready for use.
Press Power Button for 3 seconds.
The power button will illuminate white, and the projector enters
the cooling down process.
Wait until the cooling down process are completed before
removing the main power cord from the projector.
1
2
Failure Indications - what to do
AC
110-240V
Pull out Connector
Press Power Button for 3 sec
Remote Control
3
Shutter OP + CL
D Enable Shutter
OSD On/Off
Lens Shift
Move picture
Zoom
Zoom In/Out
Focus
Manually Focus
Numeric Keys
Direct entry
Navigation Pad
Zoom In/Out
Confirm Key
Zoom In/Out
Power on / Standby
Menu Entry
Home Menu
Back Key
Jump backwards in Menu
Test Patterns
Enables the different test patterns.
Input Selection
Adress Button
Altitude 1500 - 3000 m:
Temperature: 10 - 35°C
Humidity: 10-80% RH
1000 mm
500 mm