


F70-series
Quick Start Guide
Maintenance
2
1
3
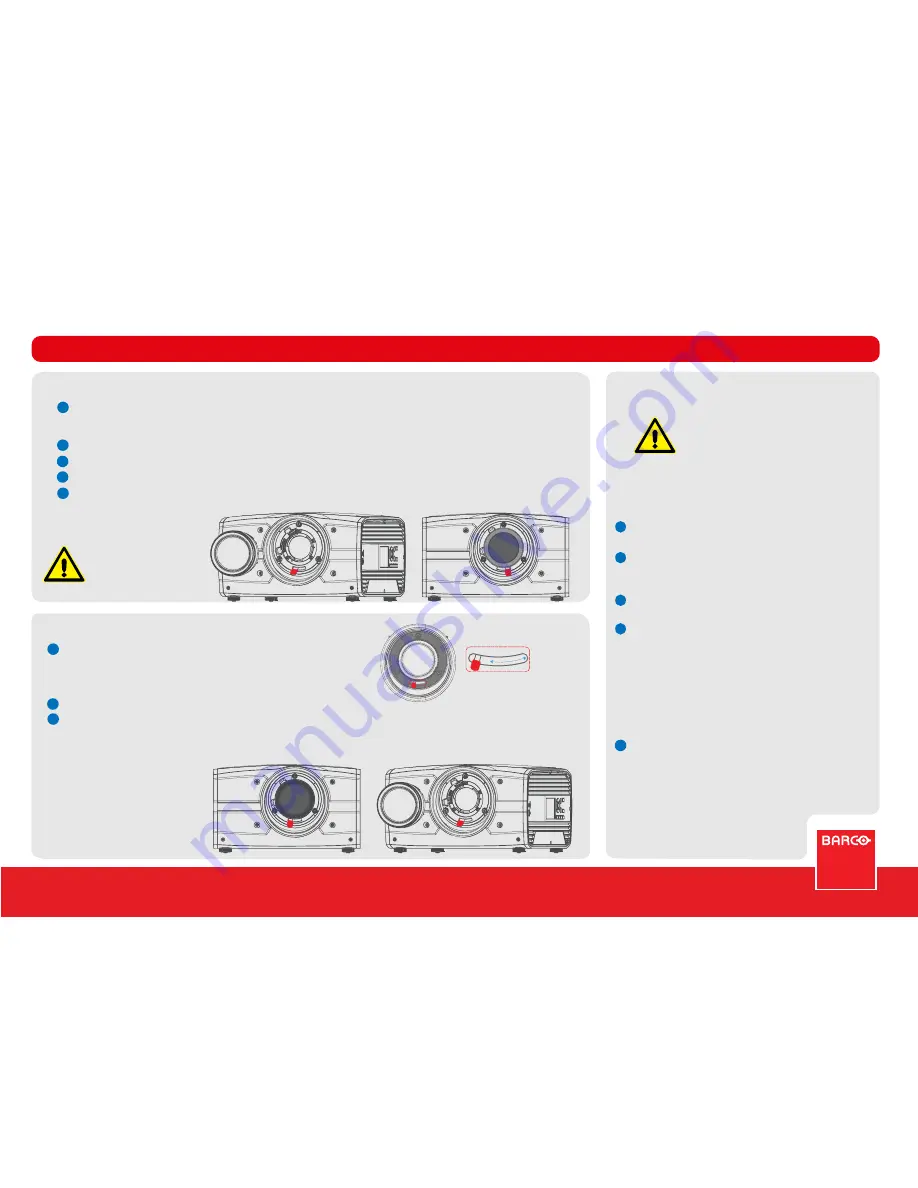
Move the lever to the far left position
Pull the lens straight out of the lens mount.
NOTE!! To prevent damage to the lens, and dust contamination in the projector light processor, always replace the lens bayonet cap, lens front cap
and projector lens cap immediately after removing the lens.
Lens Removal
When removing the lens, always close the shutter, see keypad explanation. Press Shutter
keypad, and verify that the shutter keypad turn in to red illumintation. This indicate that
the shutter is closed. When new lens is installed, open shutter by pressing the shutter key.
Shutter open state is verified when the shutter key illuminates white.
4
Software upgrade
Software upgrade
1
2
3
4
Go to www.barco.com and select your product. All available firmware
downloads are filed under the Technical Downloads tab.
Download the firmware. Extract and save the file to a USB Stick with FAT
file system. Use the eject function on your PC to safely remove the
device from your computer.
Place the projector in Standby mode (status indicator is steady white).
Insert the USB stick into one of the projector’s rear USB ports.
After a few seconds, the status indicator will flash. (Rate: 3 Hz/180
FPM). This signals that the upgrade is in progress. If the upgrade file is
corrupt or invalid, the status indicator will turn red and the upgrade
process will stop.
Note!
The upgrade will not be installed in this
instance, and the upgrade process must be restarted with a full and
correct file.
The projector may restart several times during the upgrade process
The LCD display will show the progress of the update procedure, and
also when the USB stick must be removed. The projector will return to
standby mode (status indicator is steady) once the upgrade is
completed successfully.
The projector is now ready for normal operation.
CAUTION !
Do NOT turn off, power down, or remove mains
power supply to the projector when an upgrade
is in progress.
NOTE !
Once initiated, the upgrade procedure can take up to 20 minutes
to complete.
5
Installing lens
1
2
3
4
5
When handling lens in or out, always close shutter, see keypad explanation. Press Shutter keypad, and verify that the shutter keypad turn in to red
illumination. This indicate that the shutter is closed. When the lens is installed, open shutter by pressing the shutter key. Shutter open state is
verified when the shutter key illuminates white.
Verify that the lens release lever is in it’s default position, at the far left of the slide, as illustrated
Remove the protective cap at the lens bayonet end
Align the lens so that the red marking on the bayonet end is facing upwards.
Install the lens bayonet into the lens mount, and then move the lever to the right. Check that the lever is firmly at the far right end, and that the
lens is firmly in place before removing your hand from the lens..
WARNING!
Always keep shutter closed
when lens is removed


