3. Installation Guidelines
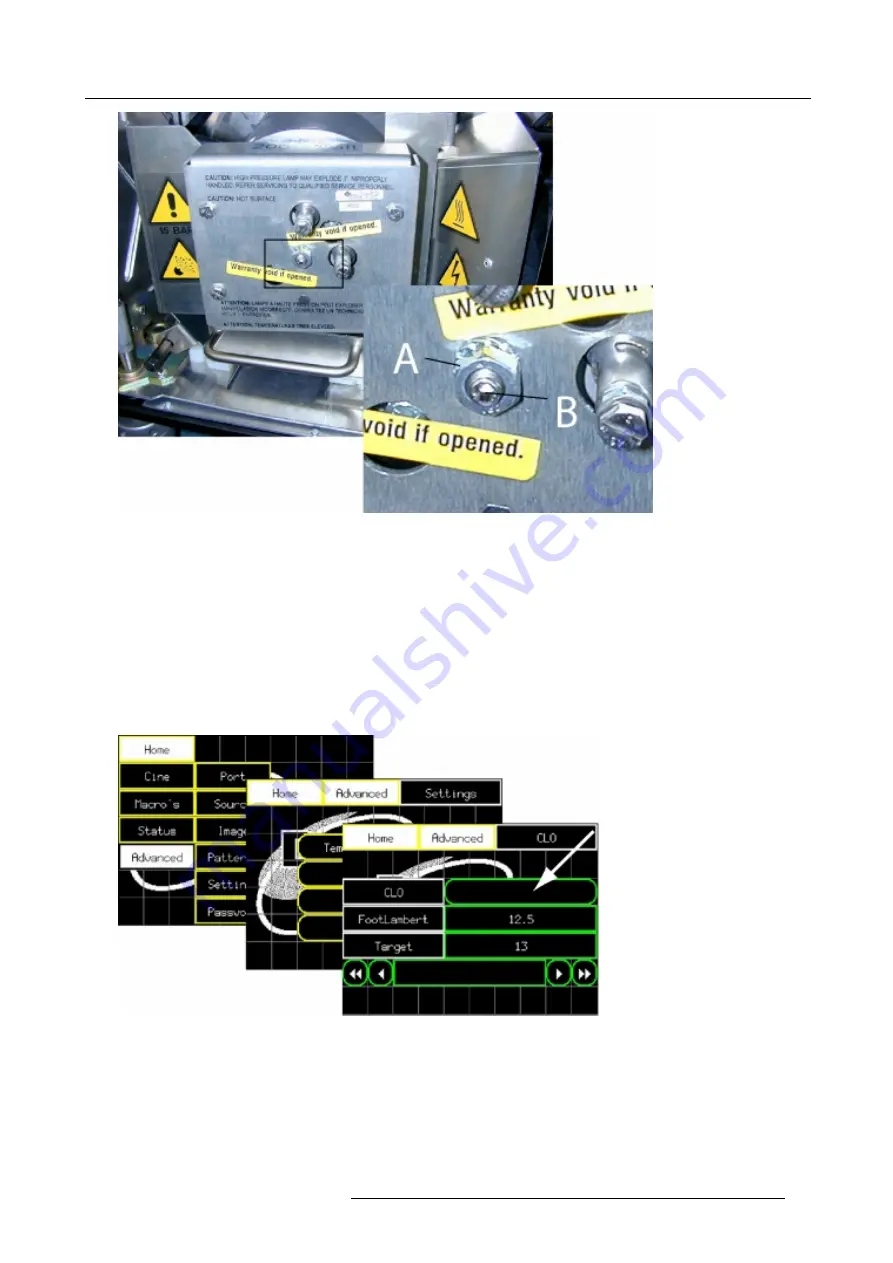
Image 3-32
Adjusting the Z-axis
Adjusting via the CLO meting
Only possible when the CLO function is active in projector and a touch panel is mounted
1. Push
Home
–>
Advanced
–>
Settings
–>
CLO
on the touch panel control. (image 3-33)
2. Project a full white pattern.
3. Loosen the lock nut (A), securing the adjustable screw (B) for the z-axis adjustment.
4. Carefully adjust the adjustable screw (B), using an Allen key of 3mm, for maximum value of the CLO. (image 3-32).
5. Lock the adjustable screw by fastening the lock nut (A).
6. Reinstall the side cover.
Image 3-33
Lamp adjustment via CLO sensor
Adjusting the cold mirror
This procedure is only necessary when installing a new lamp.
1. Put a lightmeter in the center of the screen.
2. Project a full white pattern.
3. Remove the opposite side panel of the power connection.
R5976572 DCINE PREMIERE DP30 17032003
29
Summary of Contents for DCINE PREMIERE DP30
Page 1: ...DIGITAL CINEMA DCINE PREMIERE DP30 R9006100 INSTALLATION GUIDELINES 17032003 R5976572 00...
Page 4: ......
Page 6: ...Table of contents 2 R5976572 DCINE PREMIERE DP30 17032003...
Page 15: ...2 Packaging and Dimensions Image 2 9 Front view R5976572 DCINE PREMIERE DP30 17032003 11...
Page 16: ...2 Packaging and Dimensions 12 R5976572 DCINE PREMIERE DP30 17032003...
Page 36: ...4 AC Power Requirements 32 R5976572 DCINE PREMIERE DP30 17032003...
Page 38: ...5 Maintenance of the Projector 34 R5976572 DCINE PREMIERE DP30 17032003...
Page 44: ...A Key Panel Automation Interface 40 R5976572 DCINE PREMIERE DP30 17032003...
Page 46: ...Index 42 R5976572 DCINE PREMIERE DP30 17032003...


