Connecting the signal cables
42
6.
After routing the cables, re-attach the display stand cover.
7.
Startup the display.
Note:
When after startup you wish to change the screen
resolution, try to do so in the display control panel on the
computer. If you cannot select the desired resolution in the
control panel, you need to select the desired resolution in the
display OSD by means of the
Preferred Input
function in the
Settings menu. After changing this setting, you must reboot the
PC so that the graphic board adapts to the new setting. This
works only with plug-and-play graphic boards.
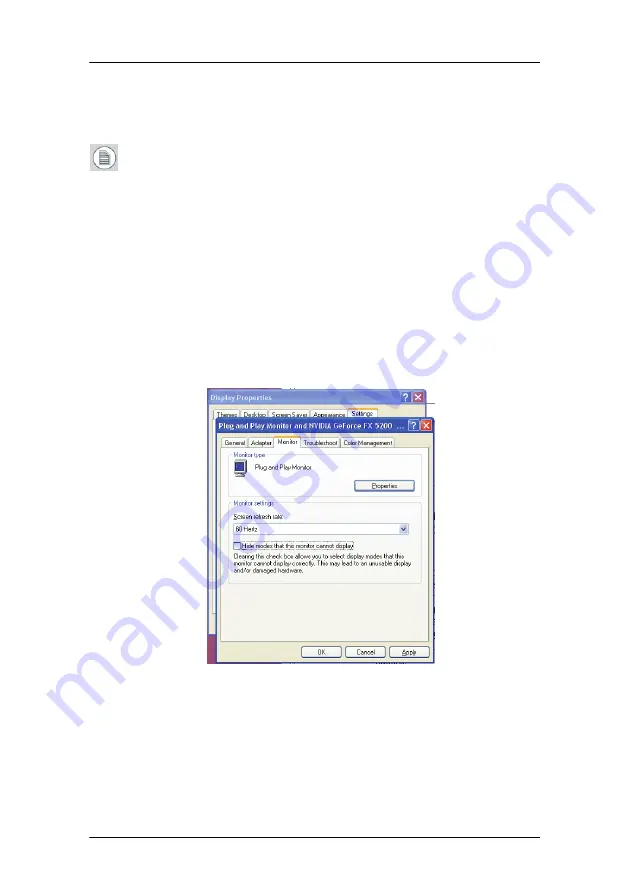
If you still cannot select the desired resolution, make sure the
Hide modes that this monitor cannot display
option in the
control panel, Advanced Settings, Monitor tab is not checked
(see image below).
Figure 8: Control panel
Summary of Contents for Coronis Fusion 6MP
Page 1: ...Getting Started Guide Coronis Fusion 6MP ...
Page 2: ... This page intentionally left blank 2 This page intentionally left blank ...
Page 7: ...Preface 7 Preface ...
Page 20: ...Recommendations for using your display system This page intentionally left blank 20 ...
Page 21: ...Display controller installation 21 Display controller installation ...
Page 30: ...Display Controller Installation This page intentionally left blank 30 ...
Page 31: ...Display installation 31 Display installation ...
Page 49: ...Software installation 49 Software installation ...
Page 56: ...Driver and Software Installation This page intentionally left blank 56 ...
Page 57: ...Where to get more information 57 Where to get more information ...
Page 59: ...Where to get more information 59 ...
Page 60: ...Where to get more information This page intentionally left blank 60 ...
Page 61: ...Troubleshooting 61 Troubleshooting ...
Page 65: ...Technical specifications 65 Technical specifications ...
Page 69: ...Technical specifications 69 Units per pallet NA Pallet dimensions W x H NA Item Specification ...
Page 70: ...Technical specifications This page intentionally left blank 70 ...
Page 71: ...Warranty Statement 71 Warranty Statement ...
Page 77: ...Warranty Statement 77 ...
Page 78: ...Warranty Statement 78 ...
Page 79: ...Warranty Statement 79 ...


