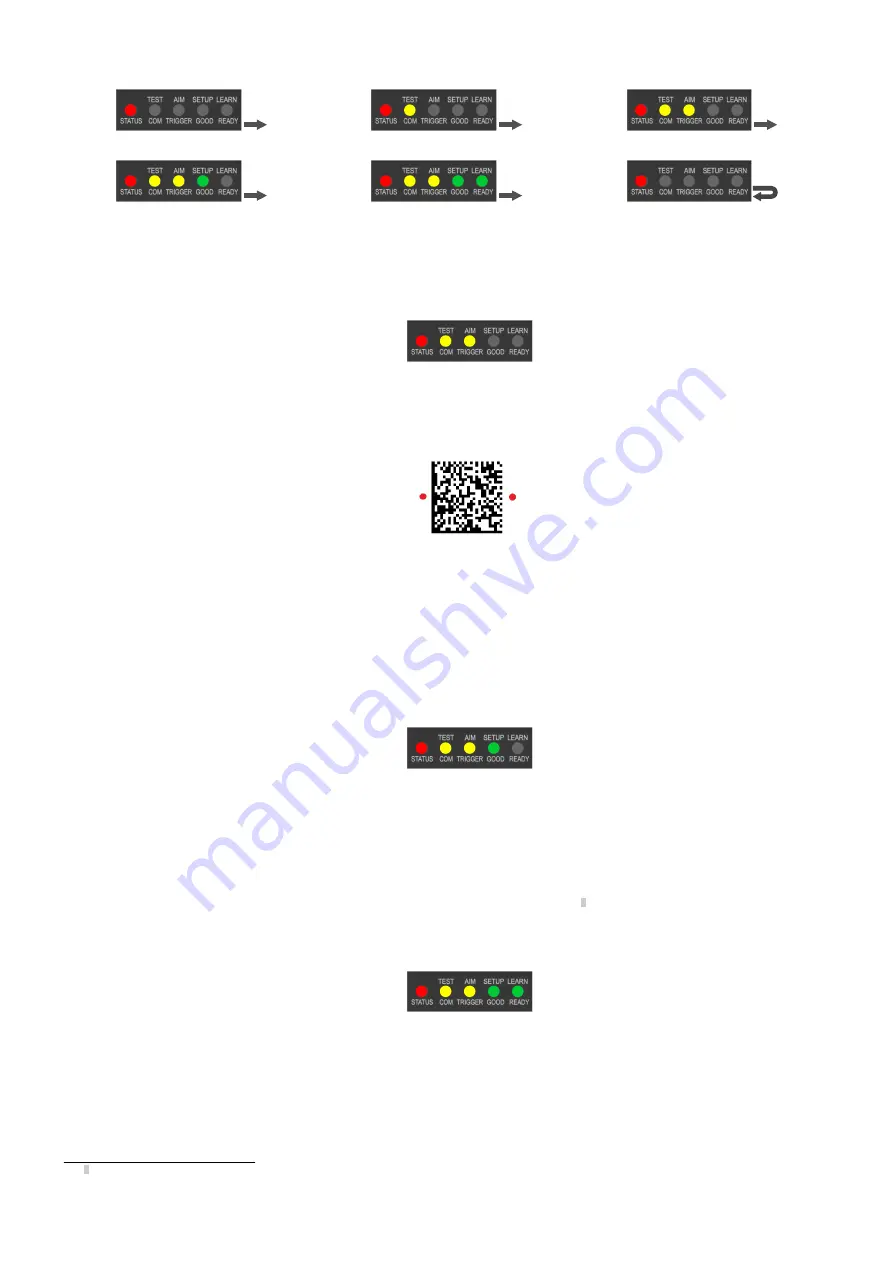
Release button to exit
Release button to enter Test mode
Release button to enter Aim/Autofocus mode
Release button to enter Setup mode
Release button to enter Learn mode
Release button to exit (cycle)
Aim and Focus
After the ABR is focused at the correct reading distance, you must configure it for optimal code reading relative to your application.
1. Enter Aim mode by pressing and holding the Smart Teach button until the Aim LED is on.
Figure 5. Smart Teach Interface: Aim Mode
2. Release the button to enter Aim mode.
The laser pointers turn on.
3. Select a single code from your application.
4. Position the code at the center of the Field of View (equidistant from the laser pointers).
Figure 6. Code Position
For liquid lens autofocus models, the reader starts taking images and performs the autofocus distance calibration. Any enabled image
lighting will flash until the autofocus is complete. Aim mode ends automatically. The focus distance is the only setting that can be
changed during the Aim procedure.
5. Exit Aim mode by pressing the Smart Teach button once.
After a short delay, Aim mode is cancelled and the laser pointers turn off.
Setup
Once entered, the imager automatically performs the Image Acquisition parameter calibration for the specific code presented to it.
1. Enter Setup mode by pressing and holding the Smart Teach button until the Setup LED is on.
Figure 7. Smart Teach Interface: Setup Mode
2. Release the button to enter Setup mode.
The Setup LED blinks until the procedure is completed. The Setup procedure ends when the Image Acquisition parameters are suc-
cessfully saved in the reader memory, the Setup LED stops blinking, and the ABR emits three high pitched beeps.
3. If the calibration cannot be reached after a timeout of about 5 (five) seconds, ABR exits without saving the parameters to memory, the
Setup LED stops blinking, and the ABR emits a long low pitched beep.
Learn
Once entered, the imager starts a procedure to automatically detect and recognize a single code
6
which is presented to it. Successive Learns
will substitute the current code. To configure multiple codes, use the Barcode Manager Auto-learn procedure.
Exit Learn mode at any time by pressing the Smart Teach button once. After a short delay the Learn procedure is cancelled.
1. Enter Learn mode by pressing and holding the Smart Teach button until the Learn LED is on.
Figure 8. Smart Teach Interface: Learn Mode
2. Release the button to enter Learn mode.
The Learn LED blinks until the procedure is complete. The Learn procedure ends when the Image Processing and Decoding parame-
ters for a single code are successfully saved in the reader memory, the Green Spot is activated, the Learn LED stops blinking, and the
ABR emits 3 high pitched beeps.
6 The Learn procedure does not recognize the following symbologies: Postal Codes, Pharmacode, MSI, Standard 2 of 5, or Matrix 2 of 5.
ABR 7000
4
www.bannerengineering.com - Tel: +1-763-544-3164
P/N 207633 Rev. A


