background image

13

Before you can play N.MUSIC 

N.MUSIC is the Bang & Olufsen 

term for music stored on a PC, 

music obtained, for example, from 

the Internet or from audio CD’s. 

This chapter describes what you 

need to do, before you can play 

N.MUSIC. 

Once you have performed a scan 

as shown on this page, simply 

refer to ‘Daily use’ for further 

information, as well as to the On-

screen Guide for in-depth 

instructions. 

Scan your PC for tracks 

When you select the source N.MUSIC for 

the first time, you are prompted to search 

your computer for playable tracks*. A scan 

must be performed the first time you 

want to play N.MUSIC, as well as the first 

time a particular drive is used for track 

storage. 

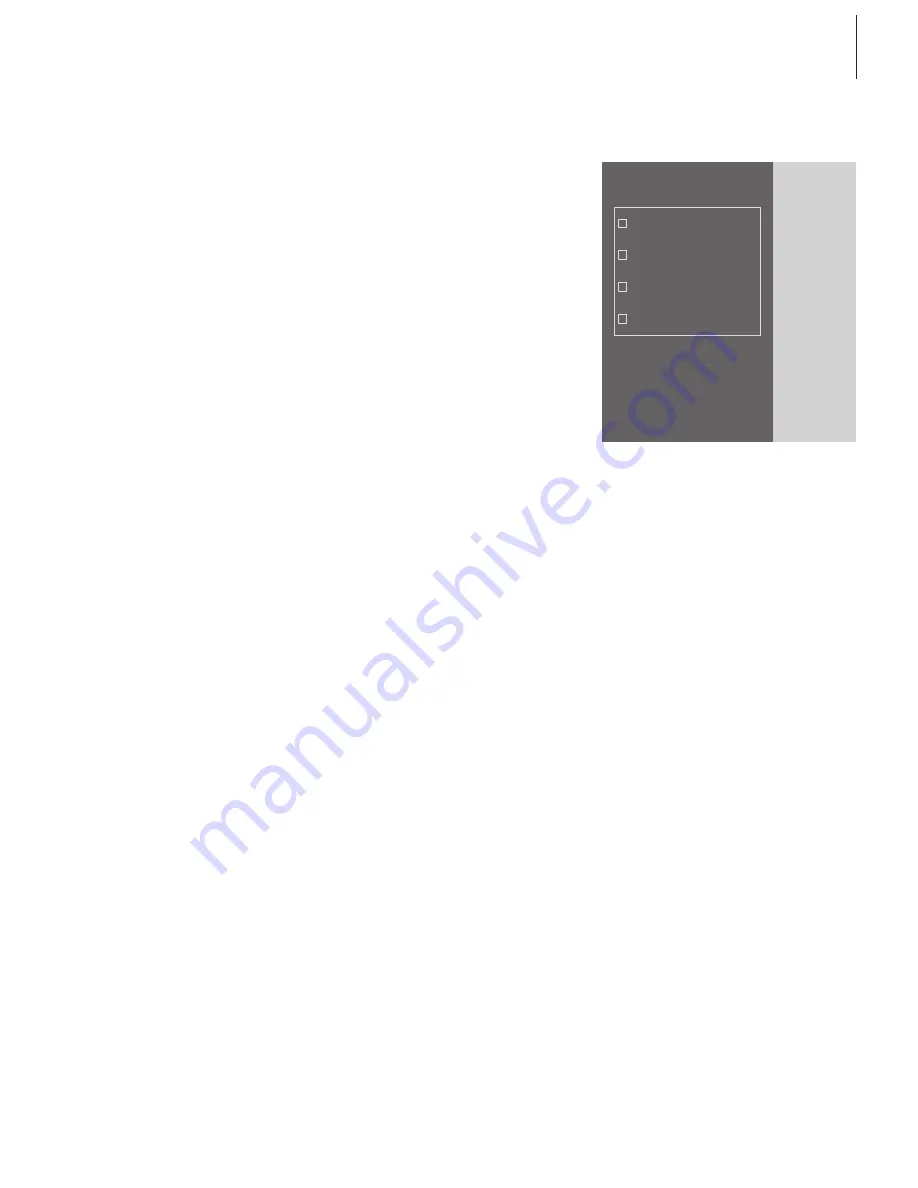
The SCAN OPTIONS menu appears on the 

screen… 

> Move the cursor to the input box by a 

relevant drive. 

> Click once to set a check mark by the drive, 

and twice to remove a check mark. 

> Click 

START

 to begin a scan. Progress is 

shown in red below the drive selection box. 

> Click 

STOP 

to cancel a scan in progress. 

> Click 

HIDE SCAN

 to conceal the SCAN OPTIONS 

menu. Scans in progress will continue until 

they are complete. 

When scanning is complete… 

> Click

 N.MUSIC

 on the control bar to begin 

playback of the first track. 

If your existing tracks contain ‘tagging’ information, 

such as artist names, track and album names, 

or genres, this information is stored during a 

scan. 

*NOTE: Once you have accessed N.MUSIC for 

the first time, a hidden update of your avail able 

music on the drives you initially stored on will be 

made every time you access N.MUSIC. Therefore, 

it is only necessary for you to scan your hard 

drive again, if you choose to store music on 

another drive. 

START  STOP 

HIDE  SCAN

SCAN OPTIONS

Games (C:)

System (D:)

Compact disc (E:)

Work (G:)

Summary of Contents for BeoPort

Page 1: ...BeoPort Guide...

Page 2: ...rical Code Section 54 of Canadian Electrical Code Part 1 which provides guidelines for proper grounding and in particular specifies that the cable ground shall be connected to the grounding system of...

Page 3: ...our BeoPort installation Configure BeoPort 10 11 Find out how to make the configuration settings you need This chapter shows you some basic settings and explains registration of BeoPort Daily use 12 S...

Page 4: ...4...

Page 5: ...olution of 800 600 and 16 bit colour depth One available USB socket Operating system requirements Windows 2000 or XP DirectX 8 0a or newer Media Player 9 0 or newer Browser requirements Internet Explo...

Page 6: ...to the documentation enclosed with these products BeoPort in a Bang Olufsen system setup The setup shown above is a typical example of a system setup In this example the BeoPort box must be set to Opt...

Page 7: ...e specifically prompted to do so on the screen You do not have to turn off the PC to connect this cable IR receiver connection The IR socket is used for connecting an optional IR receiver to your PC T...

Page 8: ...llGuide exe in the command line substituting the X with the driveletter of your CD rom drive Select BeoPort installation from the menu Follow the instructions on the screen carefully When prompted to...

Page 9: ...guide exe in the command line substituting the X with the drive letter of your CD rom drive In the Installation menu select Repair upgrade your installation If the program registers that you already h...

Page 10: ...correct broadcast system is displayed under Video System that you have indicated whether your connection is via cable or antenna and that the correct country is displayed Remember that to receive a t...

Page 11: ...rovided during registration with utmost confidentiality If you have not registered A registration form automatically appears on screen Click New User and fill out the form If you have already register...

Page 12: ...pause playback of a source Click to adjust volume up or down click MUTE between r and u to mute the sound and click a volume button to restore the sound Click or to reveal MUTE HP and click this butt...

Page 13: ...box by a relevant drive Click once to set a check mark by the drive and twice to remove a check mark Click START to begin a scan Progress is shown in red below the drive selection box Click STOP to ca...

Page 14: ...pair or upgrade installation 9 TV tuner card installation 8 N MUSIC What is N MUSIC 13 Scan your PC for tracks 13 On Screen Guide Call up the Guide on the control bar 12 Option What is Option setting...

Page 15: ...ose of the Directive is the prevention of waste of electrical and electronic equipment and to promote the reuse and recycling and other forms of recovery of such waste As such the Directive concerns p...

Page 16: ...www bang olufsen com...

Reviews: