background image

FLOOR MODEL GAS DECK OVEN OPERATION MANUAL

4

INSTALLATION INSTRUCTIONS

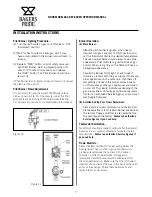
Installation With Casters (Optional):

Four Casters (two with wheel brakes) and the mounting 
hardware is packed and included in the shipment if 
ordered. Install casters with wheel brakes on the front of 
the unit.

Installation should be made with a connector that 
complies with the latest edition of the Standard 
for Connectors for Movable Gas Appliances ANSI 
Z21.69 in the USA (CAN CGA-6.16 in Canada) 
and a quick disconnect device that complies 
with the latest edition of the Standard for Quick 
Disconnect Devices for use with gas fuel ANSI 
Z21.41 in the USA (CAN CGA 1-6.9 in Canada) 
and adequate means must be provided to limit 
the movement of the appliance without depending 
on the connector and any quick disconnect device 
or its associated piping. 

NOTICE

The restraint should be attached to the rear legs of the 
oven on which casters are mounted. lf disconnection of 
the restraint is necessary to move the oven for servicing 
needs, the restraint should be reconnected after the 
appliance has been returned to its originally installed 
position.

Pizza Deck:

(a) Remove all packing material, samples, shims, etc. 

from the baking chamber leaving the two metal 
hearth liner sheets on the baking chamber floor. 
Make sure that the two metal hearth liner sheets 
cover the entire bottom of the chamber.

(b) Depending on the model, three or five slabs of 

the Pizza Deck are provided with the oven. This 
material is heavy, and fragile, and should be 
handled carefully.

A. Three Deck Installation:

(a)  Slide one deck into the baking chamber and 

push it as far as possible to one side.

(b)  Slide the second deck into the baking chamber 

on the side opposite to the first deck.

(c)  Slide the third deck into the center section.

(d)  Use metal shims to level the decks.

(e)  Use wedges in the back and on the sides of the 

deck if the decks are loose. The three decks 
should be tight against each other with no gap 
between them (See Fig. 7).

(f)  Put the hearth trim in place between the deck 

and the door.

DO NOT install the baking stones until you have 
read the pre-drying instructions. Failure to pre-dry 
the stones can result in severe damage to your 
oven and void the manufacturer’s warranty. 

WARNING

Figure 7

B. Five Deck Installation:

(a)  Slide one deck into the baking chamber and 

push it as far as possible to one side.

(b)  Slide the second deck into the baking 

chamber on the side opposite to the first deck.

(c)  Slide the third and the fourth decks in the 

same as the first two decks.

(d)  Slide the fifth deck into the center section.

Summary of Contents for SUPER DECK Y-600

Page 1: ...BUILT BY CRAFTSMEN TESTED BY TIME SERIES Y600 Y800 OPERATION MANUAL SUPERDECK SERIES GAS DECK OVENS ...

Page 2: ...lling or servicing this equipment CAUTION Instructions to be followed in the event the user smells gas must be posted in a prominent location in the kitchen area This information shall be obtained from the local gas supplier NOTICE BAKERS PRIDE OVEN COMPANY LLC 1307 N Watters Rd Suite 180 Allen TX 75013 Phone 800 527 2100 Fax 914 576 0605 www bakerspride com P N U4282A 06 17 IMPORTANT INSTRUCTIONS...

Page 3: ...GHTING PROCEDURE 8 BREAKING IN 8 BAKING 8 RECOMMENDED OPERATING PROCEDURE 8 HELPFUL HINTS 9 CLEANING AND MAINTENANCE 9 OVEN EXTERIOR 9 CONTROL PANEL 9 FLUE VENT 10 OVEN INTERIOR 10 A BAKING CHAMBER 10 B BAKING DECKS 10 C BURNER COMPARTMENT 10 TROUBLESHOOTING CHART 11 EXPLODED VIEWS PARTS LISTS 12 WIRING DIAGRAMS 16 WARRANTY 17 EN 437 Gas Cat Gas and Supply Pressures Designated European Market u A ...

Page 4: ...6891 WARNING Clearances Combustible Construction Non Combustible Construction Minimum Clearance from Left Side 3 75mm 0 Minimum Clearance from Right Side 1 25mm 2 Minimum Clearance from Rear 3 75mm 2 51mm Set Up The oven must be installed in a well ventilated area Your oven is packed standing on its back Leave it on its back while unpacking The skid may be left under the oven for convenience in fu...

Page 5: ...g 4 b Bolt side braces and rear brace to legs using supplied 3 8 16 x 3 4 bolts lock washer and flat washer See Fig 5 c Using proper lifting equipment lower the oven from its back to its bottom Lift the unit and set on stand See Fig 6 d Move the oven to its final location keeping the minimum clearances from the back of the oven to the wall This clearance is necessary for safe operation and to prov...

Page 6: ...from the baking chamber leaving the two metal hearth liner sheets on the baking chamber floor Make sure that the two metal hearth liner sheets cover the entire bottom of the chamber b Depending on the model three or five slabs of the Pizza Deck are provided with the oven This material is heavy and fragile and should be handled carefully A Three Deck Installation a Slide one deck into the baking ch...

Page 7: ...st be electrically grounded in accordance with local codes and or the latest edition of the National Electric Code ANSI NFPA 70 in USA Canadian Electric Code CSAC22 2 in Canada b In Europe appliance must be connected by an earthing cable to all other units in the complete installation and thence to an independent earth connection in compliance with EN 60335 1 and or local codes c The ovens should ...

Page 8: ...f the safety valve The safety pilot valve is in effect a two stage control After initial lighting the pilot burner stays on without the gas cock dial being held pressed in After 1 2 minutes the valve opens fully to let the gas flow past the safety pilot valve into the burner system After the Gas Supply has been connected it is extremely important to check all the piping for leaks Use a soap and wa...

Page 9: ...w appearance Should the Burner fail to light check to see if there is a problem with the gas supply lf there are other appliances on the same line shut them off temporarily and see if the burner comes back on or it fluctuates as other gas appliances are turned on and off That would indicate overloading of the gas supply lines or a faulty gas pressure regulator Contact an authorized Service Agency ...

Page 10: ...edients and temperature that gives the right bake for your crust sauce and cheese combination and your customer s taste mark and keep it Deck baking refers to baking Pizza directly on the deck Generally it is a thin product that requires temperature of at least 550 F 290 C Screen baking refers to baking Pizza on a screen The screen lifts the Pizza off the deck The screen may be removed near the en...

Page 11: ...When choosing pans be sure to pick a pan which is closest in height of your product Dark color pans and screens transfer heat better than light colored aluminum pans or screens They must be seasoned before use CLEANING AND MAINTENANCE This appliance must be serviced by an Authorized Service Technician only Disconnect the power supply before cleaning or servicing the oven Regular and thorough clean...

Page 12: ... least 1 2 hour This will burn off the food spilled onto the baking decks during day s production and turn it into ash This ash can be brushed off the next day before turning the oven on The baking decks should be scraped and brushed during the day also to help keep them clean To remove excessive crumbs or carbon the baking decks and the oven cavity may vacuumed when the oven is cold Do not use wa...

Page 13: ...cro slides are open too much Close micro slides pull out until desired combination is reached This will help decrease top heat Bottom of pies burn before toppings are cooked Deck temperature too hot especially during slow periods Reduce thermostat setting by 50 75 below normal bake temperature When decks cool begin cooking and immediately increase the thermostat setting by 50 75 Micro slides are c...

Page 14: ...FLOOR MODEL GAS DECK OVEN OPERATION MANUAL 12 EXPLODED VIEWS PARTS LISTS Exploded View Y600 Y800 ...

Page 15: ...FLOOR MODEL GAS DECK OVEN OPERATION MANUAL 13 EXPLODED VIEWS PARTS LISTS Exploded View Y600 Y800 Controls Burners ...

Page 16: ... LEFT ACCESS DOOR 36 S1004Y 1 LEG 30 SET OF 4 37 S1120Y 1 LEG CASTER 30 SET OF 4 38 S1003Y 1 LEG 16 SET OF 4 39 S1119Y 1 LEG CASTER 16 SET OF 4 40 M1242P 1 CONTROL ASSY Y600 41 N5014A 1 NIPPLE 1 2 X 5 BLK PIPE 42 N3021A 2 REDUCING ELBOW 3 4 X 1 2 90 BLKSTL ITEM PART QTY DESCRIPTION 43 N5232A 1 NIPPLE 3 4 X 6 3 4 BLK PIPE 3 4 OFFSET 44 N3002A 1 TEE 3 4 X 3 4 X 1 BLK PIPE REDUCING 45 K1332B 2 BACK C...

Page 17: ...T LEFT ACCESS DOOR 36 S1004Y 1 LEG 30 SET OF 4 37 S1120Y 1 LEG CASTER 30 SET OF 4 38 S1003Y 1 LEG 16 SET OF 4 39 S1119Y 1 LEG CASTER 16 SET OF 4 40 M1242P 1 CONTROL ASSY Y600 41 N5014A 1 NIPPLE 1 2 X 5 BLK PIPE 42 N3021A 2 REDUCING ELBOW 3 4 X 1 2 90 BLKSTL ITEM PART QTY DESCRIPTION 43 N5232A 1 NIPPLE 3 4 X 6 3 4 BLK PIPE 3 4 OFFSET 44 N3002A 1 TEE 3 4 X 3 4 X 1 BLK PIPE REDUCING 45 K1332B 2 BACK ...

Page 18: ...FLOOR MODEL GAS DECK OVEN OPERATION MANUAL 16 WIRING DIAGRAM Wiring Diagram Gas Oven Series 120V 208 OR 230V 1PH Auto Starter Option ...

Page 19: ... Stones and Valves are covered for a period of SIX MONTHS All Ceramic Baking Decks are covered for a period of THREE MONTHS The installation of these replacement decks is the responsibility of the purchaser The extended Cyclone door warranty years 3 through 5 is a parts only warranty and does not include labor travel mileage or any other charges EXCLUSIONS Negligence or acts of God Failures caused...

Page 20: ...TANT FOR FUTURE REFERENCE Please complete this information and retain this manual for the life of the equipment For Warranty Service and or Parts this information is required Model Number Serial Number Date Purchased ...

Page 21: ...19 NOTES ...

Page 22: ...t offering a wealth of refrigeration and cooking expertise Products include walk in coolers and freezers hot and cold display cabinets cases and storage systems commercial ovens rotisseries and cooking equipment and rotary vane pumps Ask your sales representative about how the power of all Standex brands can work for you www standex com segments food service Food Service Equipment Group ...

Reviews: