6 | Baker Hughes
Copyright 2021 Baker Hughes Company. All rights reserved.
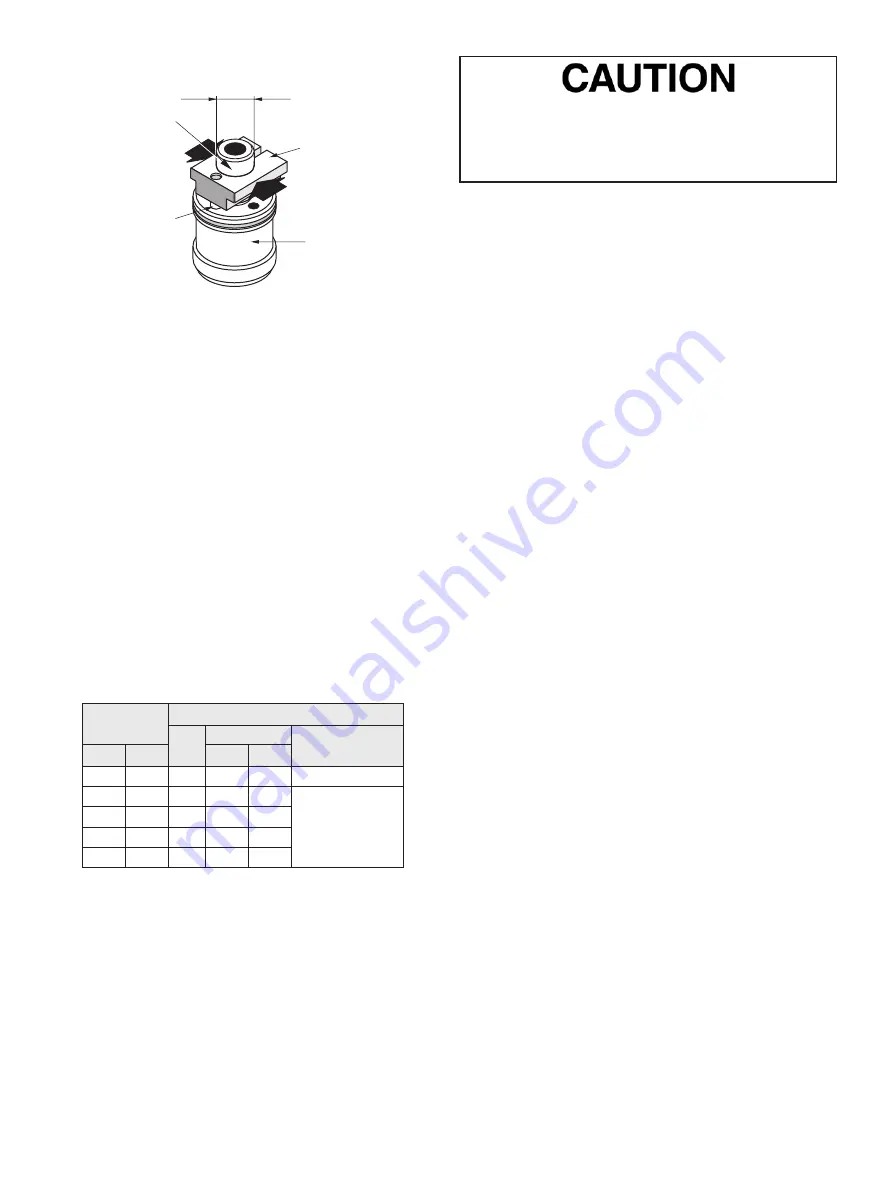
Tight only
on this
non-guiding
surface
Do not
tighten
on the
plug skirt
Soft metal
vise jaw
Cylindrical machining
diameter of the jaw =
plug shank diameter:
Dia. A
Stop pin
integrated in
vise jaw and
inserted into a
plug hole
Figure 4 - Valve Plug Stem S/A Disassembly
Auxiliary Pilot Plug Disassembly
(Model 724XX)
For size 3" or 4" (80 or 100 mm) valves:
Exert a sufficient force on the auxiliary pilot plug (21) to
compress the pilot springs (22). The retaining ring (23) can then
be removed, allowing for disassembly of the auxiliary pilot plug
and springs.
Some auxiliary pilot plug designs may incorporate a threaded
and welded retaining ring. For disassembly machine removal of
the weld is required. After removal of the weld, compress the
pilot assembly to unthread the retainer.
For size 6" to 16" (150 to 400 mm) plug sizes:
To carry out this operation safely, screws with diameters and
lengths indicated in Table 1 must be used. Thread the socket
head cap screws through the holes in the auxiliary pilot plug
(21). Tighten until the retaining ring (23) can be removed.
Loosen the screws gradually, then remove the auxiliary pilot
plug and the spring (22).
Maintenance and Repair
The purpose of this section is to provide recommended
maintenance and repair procedures. These procedures assume
the availability of standard shop tools and equipment.
Packing Box
Tight sealing within the packing box is obtained by compression
of the packing (19). Compression must be achieved by evenly
tightening the packing flange nuts (16) on the packing flange
(17). Periodic re-tightening of the packing flange nuts may be
required to maintain proper sealing.
Be careful not to over tighten the packing as this
could prevent proper operation of the valve. If leakage
persists after maximum packing compression, then
the packing needs to be changed.
Table 1
Valve Size.
Pilot Dismounting Screw Sizes
Qty
Length
Diameter
in.
mm
in.
mm
6
150
2
2.25
57.0
1/4"- 20 UNC 2A
8
20
2
2.5
63.5
3/8"- 16 UNC 2A
10
250
2
2.75
70.0
12
300
3
4.00
101.5
16
400
3
4.00
101.5
PTFE Packing and
PTFE V-Ring Packing
Kevlar
®
/PTFE, carbon/PTFE and pure PTFE packing rings are
cut in such a way that they can be replaced without having to
separate the valve plug stem from the actuator stem.
Note: V-Ring packing requires smooth, 32 µ inch RMS or
finer, finish. Inspect stem and packing box bore to ensure
the surfaces have not been damaged. If damage has
occurred, the surfaces must be repaired to ensure proper
sealing.
1. Unscrew and remove the packing flange nuts (16).
2. Lift the packing flange (17) and packing follower (18) up
along the valve stem (7).
3. By means of a puller, remove the packing (19) being careful
not to damage the sealing surface of the packing box or the
valve plug stem.
4. Replace the packing rings, placing the cut in each ring
about 120° apart from the adjacent ring. Press rings in one
at a time.
5. Reassemble the packing follower (18) and the packing
flange (17).
6. Tighten the packing flange nuts (16) without over
compressing the packing rings.
Note: In case of V-ring packing, compress packing flange
nuts to finger tight, plus one half additional turn.
7. Put the valve back into service and check for leakage. If
packing leaks, tighten packing flange nuts (16) in half turn
increments as required.
Valve with Graphite Packing
To replace graphite packing, it is necessary to separate the
valve plug stem from the actuator stem.
1. Remove the packing flange nuts (16) from the packing
flange studs (15).
2. Lift the packing flange (17) and packing follower (18) up
along the valve stem (7).
3. By means of a puller, remove the packing (19) being careful
not to damage the sealing surface of the packing box or the
valve plug stem.
4. Replace the packing (19). Press a back-up ring (car-bon/
graphite/Inconel braided ring) into the bonnet (2). Next
press the expanded graphite rings into the packing area
one at a time. Press an additional back-up ring into packing
area.
5. Reassemble the packing follower (18) and the packing
flange (17).
6. Tighten the packing flange nuts (16) without over-
compressing the packing rings.


