Installation Sequence
WBPEEUI220771A0
3 - 7
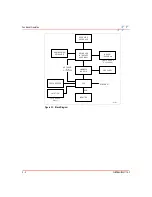
Installation Sequence
begins the installation sequence for the auxiliary
terminal. Depending on the model, Figure
points to either
.
Each block of the flow represents a single task that must be
completed before continuing with the sequence. In some cases,
more than one path can be taken during installation. For paths
that are in parallel, either complete all of the tasks in all of the
paths before continuing or complete all of the tasks in only
those paths that apply before continuing. At least one path
must be completed.
Some blocks contain alphanumeric codes. These codes identify
the procedure that describes the steps to complete an indi-
cated task. Complete all of the steps given in a procedure
before continuing to the next procedure.
The procedures have check boxes in the margin by each proce-
dural step. When performing a procedure, check each box as
each step is completed.
By treating each task as a separate entity, the procedures pro-
vide an easy method for finding the information needed to per-
form each task in the installation sequence.
Figure 3-1. Installation Sequence Flowchart
TR1421A
START
WHICH
TYPE OF
C-I-CV42C?
C-I-CV42C-1
C-I-CV42C-2
C-I-CV42C-3
C-I-CV42C-4
Summary of Contents for C-I-CV42C
Page 1: ...Bailey Hartmann Braun TM Instruction Conductor Conductor VMS Series 42 Auxiliary Terminal ...
Page 15: ...WBPEEUI220771A0 ...
Page 43: ...WBPEEUI220771A0 ...
Page 53: ...WBPEEUI220771A0 ...
Page 67: ...WBPEEUI220771A0 ...
Page 77: ...WBPEEUI220771A0 ...
Page 93: ...PR1 2 WBPEEUI220771A0 Procedure 3 Turn each end latch turn 4 Open the door ...
Page 97: ...WBPEEUI220771A0 ...
Page 107: ...WBPEEUI220771A0 ...
Page 113: ...WBPEEUI220771A0 ...
Page 123: ...WBPEEUI220771A0 ...
Page 125: ...WBPEEUI220771A0 ...
Page 133: ...WBPEEUI220771A0 ...
Page 137: ...WBPEEUI220771A0 ...
Page 141: ...WBPEEUI220771A0 ...
Page 143: ...WBPEEUI220771A0 ...
Page 145: ...WBPEEUI220771A0 ...
Page 147: ...WBPEEUI220771A0 ...
Page 151: ...WBPEEUI220771A0 ...
Page 177: ...PR27 6 WBPEEUI220771A0 Procedure 7 Install all cables onto the CPU ...
Page 181: ...WBPEEUI220771A0 ...
Page 185: ...WBPEEUI220771A0 ...
Page 195: ...WBPEEUI220771A0 ...
Page 197: ...WBPEEUI220771A0 ...
Page 213: ...WBPEEUI220771A0 ...


