background image


Password:


This option is used to lock the display device and prevent unauthorized access. If activated, a 
4-digit input password will be required to enter the normal user interface when the device is 
turned on.

i.  Setting Password


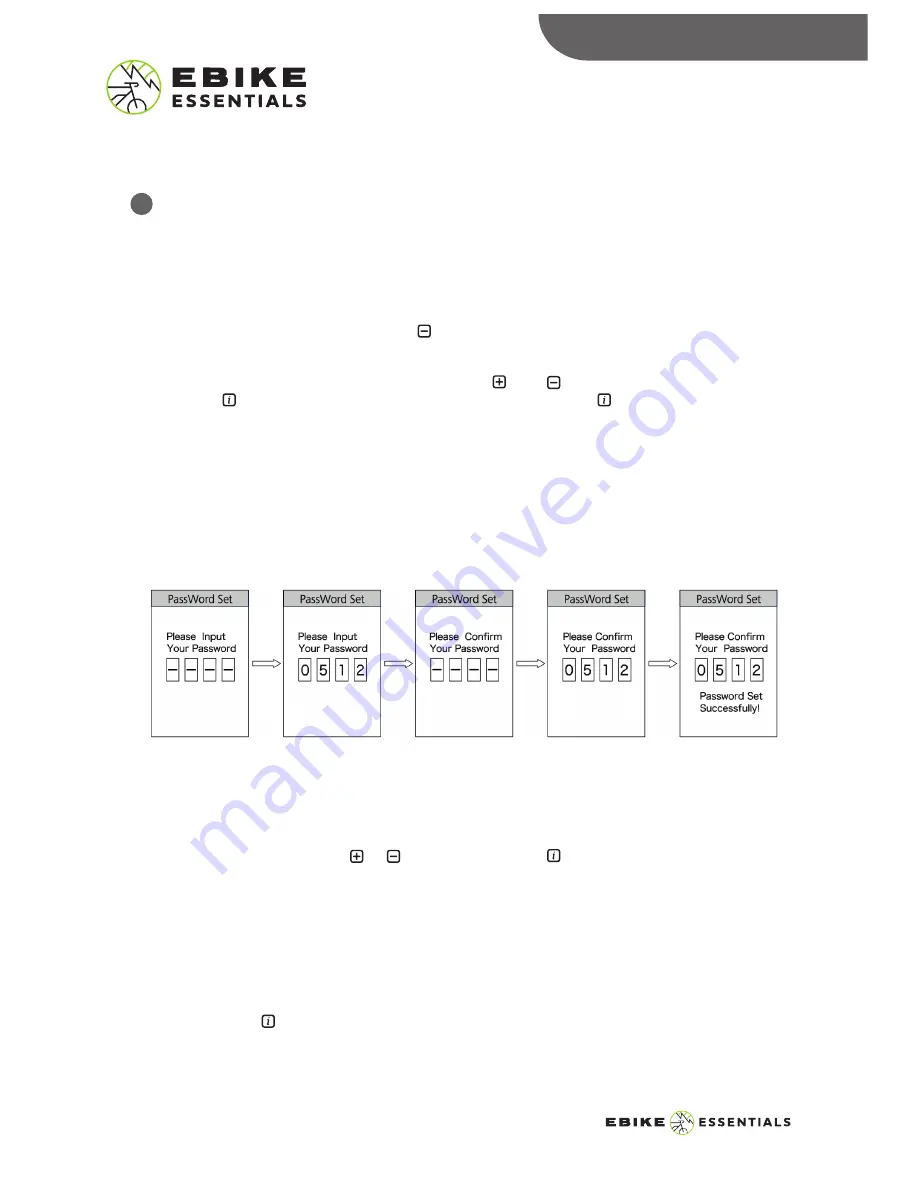
Cycle to this password option using the      button and select “ON”. The display will show an 
interface to input your preferred password.


Scroll and Select between numbers “0–9” using the       and       buttons for each entry slot. 
Press the      button to confirm your selection for each slot. Press the      button again to 
confirm the inputted password.


After the input, it will display the input password interface again, repeat the above step and 
input the same password. If the password is the same as the previous entry, the system will 
display a prompt showing that you have successfully set your password. With an incorrect 
entry, you will need to repeat the first step and input the password and reconfirm.


After correctly inputting the password, the interface will automatically exit to the password 
menu.

ii.  Change Password


After setting the password, the option “Reset Password” will appear in the password menu. To 
reset the password:


Scroll to the option using the      or      button and press the       button to select “Reset 
Password”. The interface will display a prompt to input the current password to gain access to 
this option. Please input the correct current password.


Inputting the wrong password 10 times will cause the display system to switch off automatically.


If the password is correct, the interface will display a prompt to input the new password. Repeat 
the process of “Setting Password” reconfirming the password as described above. The interface 
will automatically return to the password menu at the end of this action.


Select the back      button to exit this menu.


DISPLAY SETTINGS

10


DPC18

 MANUAL

© Copyright Ebike Essentials. All Rights Reserved.

www.Bafangusadirect.com

11

Summary of Contents for Ebike Essentials DPC18

Page 1: ...ng Hardware 3 Specifications 4 Interface 5 Functional Overview 7 Display Settings 8 Information Setting 12 Error codes 12 DPC18 MANUAL CONTENT CONTENT 1 DPC18 MANUAL Copyright Ebike Essentials All Rig...

Page 2: ...Amps Battery Gauge Voltage or Percentage Note Voltage is recommended for a more accurate battery capacity estimation USB charging port 5V at 0 5A for small electronics not enough for a light Storage...

Page 3: ...3 The DPC 18 Display comes with all of the necessary hardware to mount on your handlebars You simply decide where you would like to install it on your handlebars and use the appropri ate hardware to...

Page 4: ...level IP65 Storage humidity 30 70 SPECIFICATIONS CAUTION Bolts provided with display are 3 M3 0 5 x 12mm Control pad hardware and Mount bracket hardware During installation do not overtighten the bolt...

Page 5: ...Go to the Set Clock option in the display setting to set or change the time USB Display The device will display the USB connector symbol on the screen when an external device is connected to the displ...

Page 6: ...displays the current power output of the motor You can set the output unit for this display in the Power Unit option of the display setting menu Pedal Assist Level Display Walk Assist This displays t...

Page 7: ...yed on the bottom of the screen and includes the single trip distance TRIP total distance ODO maximum speed MAX average speed AVG and riding time TIME Backlight Display Press and hold the light button...

Page 8: ...ighly recommend setting your display to 9 Pedal Assist Levels to have access to more incremental and available power levels Power View This allows you to select your viewing preference for the power o...

Page 9: ...ity of your device Press the button to enter this option and adjust the setting to your preference by using the and buttons Use the button to increase the value to the highest Level 5 and press the bu...

Page 10: ...u will need to repeat the first step and input the password and reconfirm After correctly inputting the password the interface will automatically exit to the password menu ii Change Password After set...

Page 11: ...ery time you remove the battery of the device To set the clock press the button on the option and use the and buttons to adjust each value The cursor will appear on the first input digit of the hour s...

Page 12: ...s information is currently unavailable on the Mid drive models 2 Error Code Information This information provides a list of previous error codes to assist with diagnostics Note These are not current e...

Reviews: