background image

The following information is from the United States 
Consumer Product Safety Commission’s Information 
Sheet  for  playground  surfacing  material;  also  see 
the  following  website  for  additional  information: 
www.cpsc.gov   

X3.  SECTION  4  OF  THE  CONSUMER  PRODUCT  SAFETY 
COMMISSION’S  OUTDOOR  HOME  PLAYGROUND  SAFETY 
HANDBOOK

9

X3.1  Select  Protective  Surfacing—One  of  the  most 

important things you can do to reduce the likelihood of serious 
head  injuries  is  to  install  shock-absorbing  protective  surfacing 
under and around your play equipment. The protective surfacing 
should be applied to a depth that is suitable for the equipment 
height in accordance with ASTM Specifi cation F 1292. There are 
diff erent  types  of  surfacing  to  choose  from;  whichever  product 
you select, follow these guidelines: 

X3.1.1 Loose-Fill Materials: 
X3.1.1.1 Maintain a minimum depth of 9 inches of loose-

fi ll materials such as wood mulch/chips, engineered wood fi ber
(EWF), or shredded/recycled rubber mulch for equipment up to
8 feet high; and 9 inches of sand or pea gravel for equipment up
to 5 feet high. NOTE: An initial fi ll level of 12 inches will compress
to about a 9-inch depth of surfacing overtime. The surfacing will
also  compact,  displace,  and  settle,  and  should  be  periodically
refi lled to maintain at least a 9-inch depth.

 X3.1.2 Use a minimum of 6 inches of protective surfacing 

for  play  equipment  less  than  4  feet  in  height.  If  maintained 
properly, this should be adequate. (At depths less than 6 inches, 
the protective material is too easily displaced or compacted.)

  NOTE:  Do  not  install  home  playground  equipment  over 
concrete,  asphalt,  or  any  other  hard  surface.  A  fall  onto  a  hard 
surface can result in serious injury to the equipment user. Grass 
and  dirt  are  not  considered  protective  surfacing  because  wear 
and  environmental  factors  can  reduce  their  shock  absorbing 
eff ectiveness. Carpeting and thin mats are generally not adequate 
protective surfacing. Ground level equipment such as a sandbox, 
activity wall, playhouse or other equipment that has no elevated 
play surface – does not need any protective surfacing. 

X3.1.3 Use containment, such as digging out around the 

perimeter  and/or  lining  the  perimeter  with  landscape  edging. 
Don’t forget to account for water drainage. 

X3.1.3.1  Check  and  maintain  the  depth  of  the  loose-

fi ll surfacing material. To maintain the right amount of loose-fi ll
materials,  mark  the  correct  level  on  play  equipment  support
posts.  That  way  you  can  easily  see  when  to  replenish  and/or
redistribute the surfacing.

X3.1.3.2  Do  not  install  loose-fi ll  surfacing  over  hard 

surfaces such as concrete or asphalt. 

X3.1.4  Poured-In-Place  Surfaces  or  Pre-Manufactured 

Rubber Tiles  — You  may  be  interested  in  using  surfacing  other 
than  loose-fi ll  materials  –  like  rubber  tiles  or  poured-in-place 
surfaces. 

X3.1.4.1 Installations of these surfaces generally require 

a professional and are not “do-it-yourself” projects. 

X3.1.4.2 Review surface specifi cation before purchasing 

this type of surfacing. Ask the installer/manufacturer for a report 
showing  that  the  product  has  been  tested  to  the  following 
safety standard: ASTM F 1292 Standard Specifi cation for Impact 
Attenuation  of  Surfacing  Materials  within  the  Use  Zone  of 
Playground  Equipment.  This  report  should  show  the  specifi c 
height for which the surface is intended to protect against serious 
head  injury. This  height  should  be  equal  to  or  greater  than  the 
fall height – vertical distance between a designated play surface 
(elevated  surface  for  standing,  sitting,  or  climbing)  and  the 
protective surfacing below – of your play equipment

X3.1.4.3  Check  the  protective  surfacing  frequently  for 

wear.  

X3.1.5 Placement — Proper placement and maintenance 

of protective surfacing is essential. Be sure to:  

X3.1.5.1  Extend  surfacing  at  least  6  feet  from  the 

equipment in all directions.  

X3.1.5.2 For to-fro swings, extend protective surfacing in 

front  of  and  behind  the  swing  to  a  distance  equal  to  twice  the 
height of the top bar from which the swing is suspended.

9

This  information  has  been  extracted  from  the  CPSC 

publications “Playground Surfacing — Technical Information Guide” and 
“Handbook  for  Public  Playground  Safety.”  Copies  of  these  reports  can 
be  obtained  by  sending  a  postcard  to  the:  Offi

  ce  of  Public  Aff airs,  U.S. 

Consumer  Product  Safety  Commission, Washington,  D.C.,  20207  or  call 
the toll-free hotline: 1-800-638-2772.

The  American  Society  for  Testing  and  Materials  takes  no  position 
respecting  the  validity  of  any  parent  right  asserted  in  connection 
with  any  item  mentioned  in  this  standard.    Users  of  this  standard  are 
expressly advised that determination of the validity of any such parent 
rights, and the risk of infringement of such rights, are entirely their own 
responsibility. 

The  standard  is  subject  to  revision  at  any  time  by  the  responsible 
technical  committee  and  must  be  reviewed  every  fi ve  years  and  if  not 
revised, either approved or withdrawn.  Your comments are invited either 
for  revision  of  this  standard  or  for  additional  standards  and  should  be 
addressed  to  ASTM  Headquarters.   Your  comments  will  receive  careful 
consideration at a meeting of the responsible technical committee, which 
you may attend.  If you feel that your comments have not received a fair 
hearing you should make your views known to the ASTM Committee on 
Standards.  100 Barr Harbor Drive, West Conshohocken, PA 19428.

APPENDIX A 

Please Read This Before Starting Assembly

Owner’s Manual

7

Summary of Contents for BIG BRUTUS SWINGSET 1952050

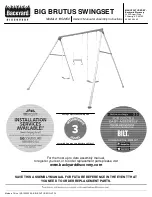
Page 1: ...ww backyarddiscovery com SAVE THIS ASSEMBLY MANUAL FOR FUTURE REFERENCE IN THE EVENT THAT YOU NEED TO ORDER REPLACEMENT PARTS Model 1952050 BIG BRUTUS SWINGSET Owner s Manual Assembly Instructions MANUFACTURED BY Backyard Discovery 3305 Airport Drive Pittsburg KS 66762 800 856 4445 average 2 person assembly time assembly time may vary based on skill level ...

Page 2: ...m for more info Installation services are only available to U S customers With Go Configure we bring you 18 years of experience right to your doorstep We service a wide array of indoor and outdoor recreation products that most consumers don t have the time or ability to deliver install themselves We do the heavy lifting so you don t have to Installation services are only available to U S customers...

Page 3: ...r box 1 800 856 4445 Read entire assembly manual paying special attention to the important tips and safety information To ensure there are no missing pieces do a complete inventory by first separating and identifying all parts Make sure to check packing material for small parts that may have fallen out during shipment Structures are not intended for public use The Company does not warranty any of ...

Page 4: ...llation Labor for any inspection Labor for replacement of any defective item s Incidental or consequential damages Cosmetic defects which do not affect performance or integrity of a part or the entire product Vandalism improper use failure due to loading or use beyond the capacities stated in the applicable Assembly Manual Acts of nature including but not limited to wind storms hail floods excessi...

Page 5: ...the chain or rope DO NOT let children push empty seats The seat could hit them and cause serious injury Instruct and teach children to sit in the center of the swings with their full weight on the seats DO NOT allow children to use the equipment in a manner other than intended Instruct children NOT to get off equipment while it is in motion Instruct children to ALWAYS go down slides feet first Nev...

Page 6: ...dded as shock absorbing materials after assembly If used properly these materials can absorb some of the impact of a child s fall All surface material should extend a minimum of 6ft 1 8m feet in all directions around the play area Do not apply playground surfacing until after the unit is completely constructed Playset should not be built on top of surfacing Use containment such as digging out arou...

Page 7: ...phalt X3 1 4 Poured In Place Surfaces or Pre Manufactured Rubber Tiles You may be interested in using surfacing other than loose fill materials like rubber tiles or poured in place surfaces X3 1 4 1 Installations of these surfaces generally require a professional and are not do it yourself projects X3 1 4 2 Review surface specification before purchasing this type of surfacing Ask the installer man...

Page 8: ...ry Additional Maintenance Check the swing beam and hardware every two weeks due to wood expansion and contraction It is particularly important that this procedure be followed at the beginning of each season Inspect wood parts monthly The grain of the wood sometimes will lift in the dry season causing splinters to appear Light sand may be necessary to maintain a safe playing environment Treat your ...

Page 9: ...nless as possible Sorting Parts Sorting Hardware When removing the wood from the boxes we recommend arranging them by part number before you begin assembly This will allow for faster assembly and easily identify any parts that may be missing or damaged To help with assembly we recommend sorting your hardware bags with the seven digit alpha numeric number printed on the bags or by hardware type i e...

Page 10: ...r assembly you will need to ensure that your structure is level before proceeding to the next step When you see this icon you will need a socket wrench The icons below show the size of attachments needed for assembly This icon will show you what drill attachments are needed For this example you will need a Phillips head attachment 1 4 driver and 1 8 drill bit This icon warns you to not over tighte...

Page 11: ...rea refers to a zone extending 6 ft 7 in beyond the play product including the space above the play product Ground Dimension 13 1 1 2 4 0m x 9 5 2 9m x 9 5 3 4 2 9m Safe Play Area 26 3 1 2 8 0m x 22 7 6 9m Fall Height 9 2 1 2 2 8m General Information Your set has been designed and engineered for children only and for residential use only A maximum of 150 lbs per child is recommended for all play a...

Page 12: ...H100278 BOLT CARRIAGE WZ 5 16x2 1 2 x22 H100591 BOLT HEX WZ M12x 45mm x7 H100818 NUT BARREL WH WZ 5 16x7 8 x34 H100499 LOCK NUT WZ M12 x7 H100819 TORX WRENCH T 40 x2 A100041 TORX BIT T 40 x2 A100042 BOLT WH WZ 5 16x4 x4 H100366 BOLT CARRIAGE WZ 5 16x2 3 4 x9 H100811 ...

Page 13: ... A4M01014 TOP LEG x4 A4M01015 MIDDLE TOP BEAM x1 A4M01016 SIDE BAR x2 A4M01018 METAL BRACKET GREY x16 A4M01019 LEG CONNECTING TUBE x8 A4M01020 METAL BRACKET GREEN x4 A4M01024 SIDE TOP BEAM x2 A4M01021 TOP BEAM CONNECTING TUBE x2 A4M01022 BOTTOM LEG x4 A4M01013 ...

Page 14: ...ARABINER SD x6 A4M01044 METAL GROUND STAKE BROWN x4 A100178 A4M00508 x1 6 TRAPEZE ASSEMBLY CHAIN GREEN 7mm x 2028 mm x4 A4M01041 QUICK LINK SD x4 A4M00927 26 HD BELT SWING x2 A6P00373 SWING SET FOOT x4 A6P00366 WARNING LABEL STICKER x1 A6P00374 BYD TAG STICKER SMALL x1 A6P00375 ...

Page 15: ...E BOLT BEFORE NUT BARREL METAL BRACKET GREY x16 A4M01019 013 x1 BOTTOM LEG BOTTOM LEG x4 A4M01013 BOLT CARRIAGE WZ 5 16x2 1 2 x12 H100591 NUT BARREL WH WZ 5 16x7 8 x16 H100499 BOLT CARRIAGE WZ 5 16x2 3 4 x4 H100811 NOTE TWO VERTICAL HOLES TOWARD TOP NOTE TWO HORIZONTAL HOLES ON BOTTOM 591 x1 BOLT 2 1 2 591 x2 BOLT 2 1 2 811 x1 BOLT 2 3 4 499 x4 NUT BARREL 7 8 DO NOT FULLY TIGHTEN BOLT AS IT WILL B...

Page 16: ...ARABINER SD x6 A4M01044 DUCTILE HANGER WZ x6 A4M01040 BOLT HEX WZ M12x 45mm x6 H100818 LOCK NUT WZ M12 x6 H100819 NUT BARREL WH WZ 5 16x7 8 x4 H100499 BOLT CARRIAGE WZ 5 16x2 3 4 x4 H100811 819 x6 LOCK NUT M12 818 x6 BOLT 45mm 044 x6 CARABINER SD 040 x6 DUCTILE HANGER WZ 811 x4 BOLT 2 3 4 499 x4 NUT BARREL 7 8 PLACE BYD TAG STICKER CENTERED ON BEAM AS SHOWN APPROXIMATE LOCATION BYD TAG STICKER SMA...

Page 17: ...018 x2 SIDE BAR SIDE BAR x2 A4M01018 STEP 1 Phase 2 TOP BAR ASSEMBLY 591 x8 BOLT 2 1 2 499 x4 NUT BARREL 7 8 BOLT CARRIAGE WZ 5 16x2 1 2 x8 H100591 NUT BARREL WH WZ 5 16x7 8 x8 H100499 PLACE WARNING TAG STICKER CENTERED ON LEG AS SHOWN APPROXIMATE LOCATION WARNING LABEL STICKER x1 A6P00374 018 x1 WARNING LABEL STICKER ...

Page 18: ...mm x 2028 mm 927 x4 QUICK LINK SD 373 x2 26 HD BELT SWING Phase 2 STEP 2 QUICK LINK SD x4 A4M00927 CHAIN GREEN 7mm x 2028 mm x4 A4M01041 6 TRAPEZE ASSEMBLY A4M00508 x1 508 x1 6 TRAPEZE ASSEMBLY 26 HD BELT SWING x2 A6P00373 ...

Page 19: ...D STAKE BROWN Phase 2 STEP 3 METAL GROUND STAKE BROWN x4 A100178 BOLT WH WZ 5 16x4 x4 H100366 NUT BARREL WH WZ 5 16x7 8 x4 H100499 278 x4 WASHER FLAT 5 16 NOTE HOLE ORIENTATION SWING SET FOOT x4 A6P00366 WASHER FLAT WZ 5 16 x4 H100278 366 x4 SWING SET FOOT ...

Reviews: