27
26
5.0
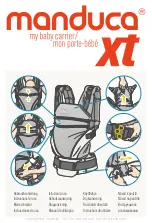
FEATURES
5.0
FEATURES
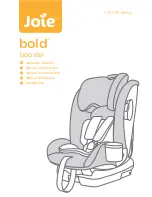
Seat Angle Indicator
CORRECT
WRONG
20 poun
ds
(9 kg) an
d
under
20 t
o 30
poun
ds
(9 to 13.6
kg)
Locking Clip
Seat Angle Adjuster
5.7 Operation of the Carry Handle
The Carry Handle has four positions: the carry position, a mid-
storage position, a storage position and the non-rocking position.
To adjust handle position
• Depress the two buttons located on the
handle just above the connection to the Car
Seat shell to release the handle.
• Slowly rotate the handle to the desired
position. The buttons should pop out and
the handle should automatically lock into the
new position. (Fig. 27-1)
• Before lifting the Car Seat, push on the handle to check that both
sides of the handle have locked into the Carry position.
Crotch Strap
The crotch strap is adjustable in length to ensure a safe and
comfortable fit for harness.
Seat Angle Indicator
The Seat Angle Indicator
is used to ensure that the
seat is installed at the
proper degree of recline to
adequately protect your child
in a crash.
Locking Clip
The Locking Clip is stored under the
pad on the right side of the Safety Seat
and is used to securely install the Safety
Seat with certain types of vehicle lap/
shoulder combination belts.
Seat Angle Adjuster
The Seat Angle Adjuster raises and
lowers the rear of the Base in order to
obtain the proper angle of recline for
proper installation of the Safety Seat
when using the Base.
Fig. 27-1
Carry
Mid-Storage
Storage
Non-Rocking
Toys or other objects attached to carry handle can cause
injury in a crash. Never attach toys or other objects to
handle when in vehicle.
WARNING