


SEWING THE STITCHES
136
c
Press the seam allowance open and attach
the zipper with a basting stitch in the
middle of each side of the zipper tape.
a
Basting stitches
b
Zipper
c
Wrong side
d
Remove presser foot “J”. Align the right
side of the pin in zipper foot “I” with the
presser foot holder, and attach the zipper
foot.
a
Right
b
Left
c
Needle drop position
e
Topstitch 7 to 10 mm (approx. 1/4 to
3/8 inch) from the seamed edge of the
fabric, then remove the basting.
■
Inserting a Side Zipper
Use for side zippers in skirts or dresses.
a
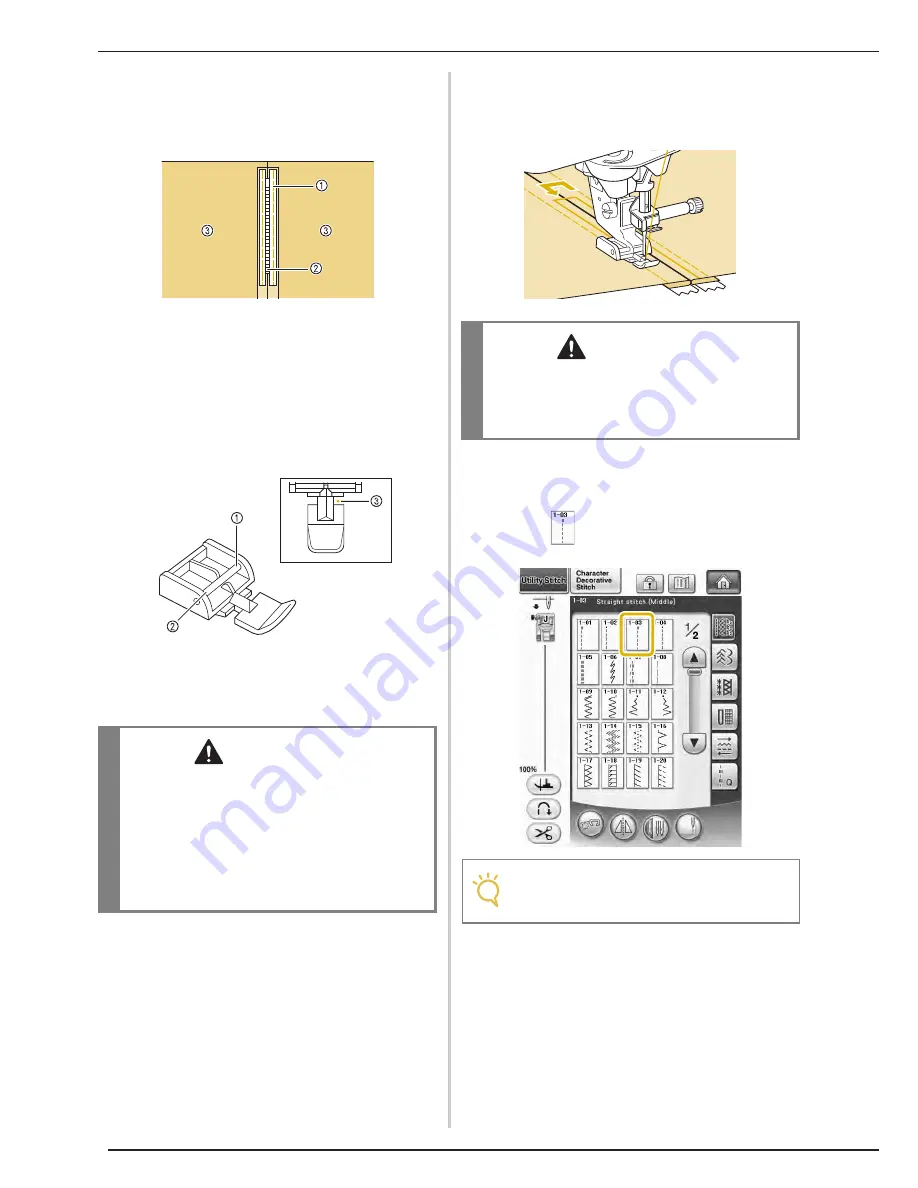
Select .
CAUTION
• When using zipper foot “I”, make sure the
straight stitch, middle needle position is
selected. Rotate the handwheel toward you
(counterclockwise) to make sure the needle
does not strike the presser foot. If another
stitch is selected, the needle will strike the
presser foot, causing the needle to break and
possibly causing injury.
CAUTION
• Make sure the needle does not strike the
zipper during sewing. If the needle strikes the
zipper, the needle may break, leading to
injury.
Note
• Make sure you sew using the middle needle
position.
Summary of Contents for Ellisimo BLSO
Page 1: ......
Page 7: ...IMPORTANT SAFETY INSTRUCTIONS v...
Page 14: ...CONTENTS xii...
Page 35: ...LCD SCREEN Getting Ready 21 1...
Page 90: ...USEFUL FUNCTIONS 76...
Page 194: ...USING THE MEMORY FUNCTION 180...
Page 267: ...USING THE MEMORY FUNCTION Embroidery 253 5 f Press o The sewing screen is displayed...
Page 300: ...EDITING PATTERNS 286...
Page 324: ...PRINT AND STITCH COMBINING EMBROIDERY PATTERNS AND PRINTED DESIGNS 310...
Page 348: ...UPGRADING YOUR MACHINE S SOFTWARE 334...
Page 361: ......
Page 362: ......
Page 363: ......
Page 364: ...X1_TaconeyE_OM_cover C M Y K...


